


Several Practical Articles On Fishkeeping That Can Be Used As Reference Material
An Informative Article On Using UV Sterilizers In Freshwater & Saltwater Aquariums
An Introduction To Aquarium Plants - Good Article On Growing Plants In The Aquarium
Excellent Article On Setting Up A DIY CO2 Fermentation System
An Informative Article On Setting Up A Pressurized CO2 System For Your Aquarium
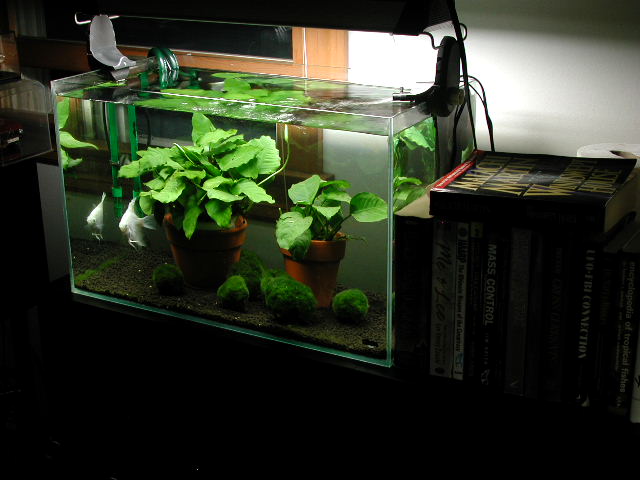
UPDATE:BENEFITS OF LONG TERM USE OF MARIMO MOSS IN SEVERAL FRESH WATER AQUARIUMS
After years of frustration attempting to successfully grow different types of aquatic plants, I finally decided to use Marimo Moss balls in some of my fresh water aquariums.
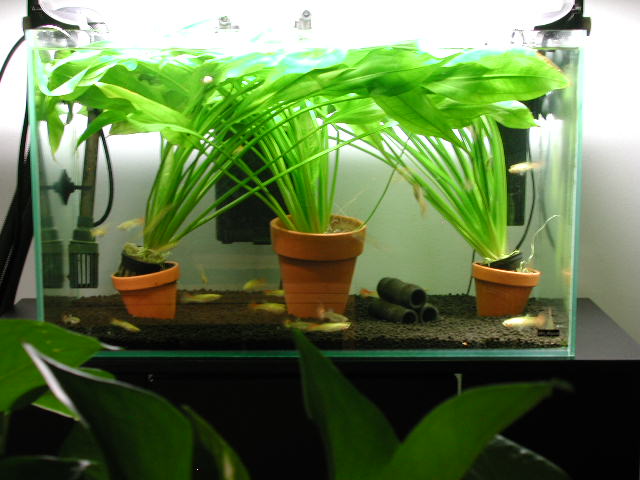
Earlier, I'd had quite a bit of success in growing the carpeting plant dwarf hair grass. However, DH needs injected CO2 to both carpet properly as well as achieve the type of lush growth that one often sees in plants featured in aquarium catalogs.
This fish-keeper has found that the only way to grow DH to its full potential (without promoting the overgrowth of opportunistic forms of algae such as black and blue green algae - cyanobacteria), is to use both a pressurized CO2 system as well as a PH monitor; the latter of which is used to stabilize the PH levels in the water column in an aquarium.
Using an electronic PH monitor in conjunction with a pressurized CO2 system, greatly reduces the PH swings that always occur in aquariums which utilize some form of injected CO2.
The main problem in using a DIY (do it yourself) injected CO2 system (as opposed to a more costly pressurized CO2 system) is that because the CO2 is manufactured through the process of fermentation, it is very difficult to obtain an accurate measure of the amount of CO2 being added to the water column in an aquarium.
Moreover, it is also virtually impossible to control the PH swings with a DIY CO2 system.
And such PH swings will eventually lead to an unstable PH level in an aquarium, which will in turn lead to the type of increased algal growth that can completely overrun a beautifully planted aquarium.
So if a fish-keeper decides to invest in a pressurized CO2 system for his/her planted aquarium, it may be more expensive initially. However, it will certainly be less expensive in the long run to invest in a top notch pressurized CO2 system; along with a CO2 monitoring system that will allow one to minimize the PH swings in their planted aquarium.
Furthermore, if as a fish-keeper, you decide that you want to have a lush green aquarium without the hassle or expense of using pressurized CO2, this author recommends that you consider using Marimo Moss balls.
I say this because these wonderful little algae specimens are a lush green color when healthy, and maintain all of the basic benefits of keeping plants in an aquarium; specifically, their ability to photosynthesize light in order to produce oxygen, as well as their use in converting harmful chemicals such as ammonia and nitrite into less harmful nitrate - which they then use to fuel their growth.
The Marimo Moss don't need strong light - nor do they need much attention.
Instead, every few weeks they must be removed from the aquarium and soaked in some tap water along with a capful of good quality liquid fertilizer. The benefit here is that no liquid fertilizer (which could cause an algae bloom in one's aquarium) is added to the aquarium water column itself.
Periodically, the Marimo Moss balls will split and need to be trimmed into a smaller ball so that they can grow larger. This will take a bit of work, however, it is enjoyable as a fish-keeper to take part in the horticultural process, while also nurturing these cute little algae.
Earlier...
UPDATE: ADDING A MARINELAND MAGNUM Pi INTERNAL POLISHING CANISTER FILTER TO MY COLLECTION OF AQUARIUM FILTERS
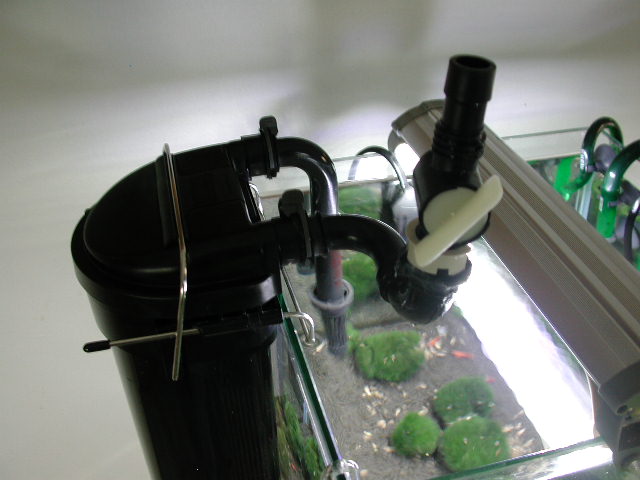
I recently grafted a ball valve onto the output tube of a newly acquired *Magnum Pi internal polishing filter, in order to reduce its impressive 290 GPH flow of water. This **modification has worked out very well, giving the Pi far more flexibility than it had stock.
* The Magnum Pi replaces the Marineland HOT 250 (external canister filter) which after a few decades the company decided to finally discontinue.
**I added a Little Fishes 1/2" ball valve to the extension piece of the Magnum Pi (so that the modification is not made directly to the filter itself), and as previously stated, it works well.
However, because this filter is so powerful for its respective, diminutive size, if you close the ball valve by more than about one third of the way, the Pi's electric motor will get noisy as it is held back. So if you decide to install a ball valve on the Magnum Pi in order to use it in smaller aquariums, you should not close the ball valve more than one third of the way, so that you don't damage the Pi's electric motor.
The ball valve is a nice idea, and I've previously installed them on a pair of Magnum HOT 250s.
This has given these filters tremendously flexibility, because they can be used in much smaller aquariums by reducing the HOT 250s' 250 GPH rating down to a trickle flow if necessary.
The reader will note that the Magnum HOT 250's electric motor does not strain to the same degree as the PI's does when a ball valve is used (perhaps because the intake and output tubes on the HOT 250 are larger in diameter than the Magnum Pi's output tube is).
Earlier...
Those who say that the Magnum Pi is a large filter probably haven't used a Marineland HOT 250 - its predecessor. I say this because the Magnum Pi is quite a bit smaller than the HOT 250.
And unlike the HOT 250, the Pi hangs inside as opposed to outside the aquarium.
The Magnum Pi is nicely built and like its predecessor, cleverly designed. The Pi also uses the same Marineland micron cartridge that the HOT 250 uses for water polishing.
There is also regular pleated filter cartridge included with the Pi for full time use.
For a compact filter the Pi is powerful, with a water flow rate of 290 gallons per hour.
If you plan on using this filter just for general tank maintenance, you can probably use it in a larger nano aquarium no smaller than 17 - 20 gallons.
. That is provided that you don't let it run for more than five to ten minutes at a time. And that is about all it will take to polish the water in your aquarium without exhausting your fishes.
In reality, this filter was built for medium to large sized aquariums. That is to say that it produces a very strong current and in any aquarium smaller than 60 or so gallons it will have your fishes getting blown all over your tank.
* You can reduce the water flow of the Magnum Pi by adding a ball valve. I did this with my Marineland HOT 250s and it has given them much greater flexibility since the water flow can now be increased or decreased as the ball valve is opened or closed. Line up a 16mm (1/2") ball valve (I use "Two Little Fishes" brand) with the end of the extension tube for the Magnum Pi, then glue the two ends together using a brand of super glue.
After the glue has dried, use marine silicone to ensure that the area where the ball valve and extension tube are joined is properly sealed. You should now be able use the Pi in much smaller tanks given that you can control the amount of water flowing through its output tube. Since you are only modifying the extension tube, the Magnum Pi filter itself remains stock.
So in spite of its diminutive size, it is thus not surprising that the Magnum Pi is rated for up to a 97 gallon aquarium.
The installation instructions are very simple. Once you have installed the filter cartridge you want to use just submerge the Pi in your aquarium and let it fill with water. Contrary to Marineland's instructions, you are better off installing the suction cup frame to the back of the Pi before you place it in the water.
This way you can avoid the difficulty of attempting to fit the Pi to the frame once it's in your tank.
Once you have ensured that the Pi's motor is fully immersed in water you can then plug it in and allow it to filter your aquarium.
It would not surprise this fish keeper if the Pi is purchased by many aquarists as a dedicated maintenance filter, which will be used for tank clean ups, such as the mess one makes with the substrate after planting new flora.
Or using the Magnum Pi with its micron cartridge in order to polish their aquariums' water columns a few times per month.
In spite of the comments regarding how large this filter is, it is actually very compact and easy to use.
A power head attached to a canister chassis that moves quite a bit of water for very little money; while being both well designed and constructed.
Highly recommended!
Earlier...
UPDATE: Eheim Reintroduces Its Original Professional Series As The Experience Series, In Europe
In late 2015, this fishkeeper purchased an Eheim 2224 Professional filter. I was able to find a NOS stock one which cost me about $5 less than a comparable Eheim Experience 250 (the same filter now rebadged). These filters are almost impossible to find as NOS in the United States, so I seized on the opportunity to purchase the one I found on Amazon.
As stated, this was the first generation of Eheim Professional filters, which the company began offering in the 1990s. It was offered as an option for those who liked the Eheim Classic series of canister filters, however, wanted a more user friendly aquarium filter with Eheim's quality construction.
The Eheim Professional I series has always been my favorite Eheim filter aesthetically, and I much prefer it to the later Professional 2, 3 and 4 series filters that Eheim presently offers.
So I was pleased to recently learn that Eheim now offers the old Professional I series under the Experience name.
The Experience series filters are available through the Internet and include the Experience 150 ($135 & Rated Up To 40 Gallons), the Experience 250 ($162 & Rated Up To 80 Gallons), and the Experience 350 ($198 & Rated Up To 120 Gallons).
The Experience 250 also comes in a version which includes an internal heater (The 250T, $380).
With regard to the 250T, the Eheim thermofilters have always been a clever design.
However, in the past they've also been known to fail after a year or two. And replacement Eheim thermofilter heaters are very expensive, when you can actually locate them.
This is why many Eheim thermofilter owners purchase separate heaters for their aquariums when these thermofilter heaters fail. They are especially prone to fail in salt water aquariums, where the internal parts for the heater eventually corrode.
Moreover, it appears that the Experience series may only be available in 220V, so if you live in the States and want to purchase one, you'll also need to use a step down transformer, to lower the Experience's 220 volt power supply to 110 volts.
So caveat emptor.
UPDATE: Cleaning Marimo Moss Balls To Keep Them Healthy
Like all plants that live in an aquatic environment, they do soak up quite a bit of detritus after awhile.
And the situation is no different for Marimo moss balls, where detritus and other types of algae tend to grow on them, which can eventually inhibit the Marimo's ability to grow properly.
For this reason it is not only important to clean Marimo at least once a week by removing them from your aquarium and soaking them in cool chlorinated water, but also rotating them weekly so that each side of the Marimo obtains enough light to grow properly.
In addition to this maintenance, over time the Marimo will start to lose their green color as well as their round shape and become scraggly looking.
This is the time to trim the Marimo back into its round shape.
To do so, take a pair of scissors and place the Marimo over a garbage can fitted with a Hefty or some other type of collection bag.
Then trim the Marimo moss ball as evenly all around its surface as you can.
Once you have done so rinse the ball in some fresh water (if you have filtered water) and place it back into your aquarium. Repeat this process with each Marimo moss ball that you have.
You will find that the dull look of your Marimo is now gone, and has been replaced with the rich emerald green natural color of the Marimo. The Marimo will now grow better with all of the surface dirt and foreign algae removed.
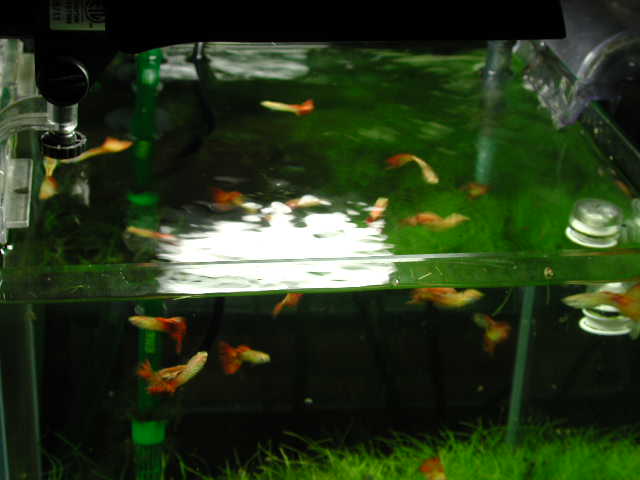
UPDATE: RED CHERRY SHRIMP PROPAGATING NICELY
Update: It's been the better part of a month since I posted below, and the RCS continue to propagate nicely. I have raised the temperature to about 80 degrees, which has led to more spawning.
A Helpful Article On Raising Red Cherry Shrimp
The RCS fry are so tiny when they are hatched that they are barely visible. This is why it is best to raise your RCS in a dedicated tank, so that RCS fry don't become a meal for your fish.
Once they reach full size they can be transferred to a community tank. However, they should be transferred several at a time so that they form their own community. Marimo Moss makes for an excellent addition to any RCS or planted tank, since they provide a safe haven for RCS as well as a source of food.
I can now understand why some RCS keepers were describing how their RCS were reproducing so quickly that they were either selling or giving many of them away. In the right aquatic environment, RCS propagate like guppies, and can quickly overrun a small aquarium.
Earlier...
I have read in the past of some RCS keepers claiming that their RCS never reproduced and gradually died off, while other RCS keepers have described their RCS reproducing like guppies.
I have not been raising RCS for long and don't have much time or money invested in them. My first attempt with 5 RCS resulted in some RCS reproduction, however, virtually all of the RCS were dead within a year. This second attempt (I purchased 24) nearly ended the same way with all but a few surviving.
However, I decided to raise the water temperature to about 78 degrees from the low 70s, and it has made a significant difference. The RCS are now propagating nicely, and I have about 24 (mostly fry) presently inhabiting this RCS dedicated tank.
I don't do water changes because I use a rimless tank without a top, which results in plenty of water evaporation. So I need to add some fresh water every day.
I allow the filtered tap water to stand over night in order to reach room temperature before I add the water to my RCS tank. This has resulted in much healthier RCS.
Moreover, if you want to increase the survival rate of the RCS you purchase, don't bother transferring them to your tank directly.
Instead, follow the drip method, which results in a much higher survival rate.
Don't over feed your RCS either so that you don't pollute your tank water.
I have found that Marimo Moss balls work quite well in *providing both food as well as a safe haven for your RCS, so you might want to consider purchasing Marimo Moss if you are planning to keep RCS.
*Marimo Moss is an algae, and it also traps detritus, which the RCS also feed on. Just remember to rinse the Marimo under tap water once a week, and then rinse it under filtered water to wash all of the chlorine off their surface, so that the chlorine does not kill your shrimp or fish.
UPDATE: Marimo Moss Balls - An Algae That Can Outcompete The Dreaded Black Brush Algae In Your Aquarium - DIY CO2 Injection Is The Primary Cause Of Black Brush Algae
BBA is known to the fishkeeper as perhaps the most dangerous scourge to the planted aquarium. BBA spreads quickly, and its microscopic spores can pass through most types of filtration including all but the smallest of micron filters.
Short of completely breaking down your aquarium and starting from scratch, a diatom earth filter is the only way to gradually eradicate BBA from an aquarium.
After years of using DIY CO2 in my planted aquaria, this fishkeeper has arrived at the conclusion that DIY CO2 is the primary cause of black brush algae. I say this because DIY CO2 leads to significant fluctuations in the PH (potential for hydrogen) in an aquarium, thus allowing for the rapid growth of BBA.
Moreover, BBA spores pass through most types of filtration media, and right back into one's aquarium, while then attaching themselves to every surface they can access.
If you are using DIY CO2, you really must recharge the CO2 bottles once a week in order to maintain high enough levels of CO2 in your tank. Use a CO2 drop checker to monitor CO2 levels in your aquarium.
Also get in the habit of using a *diatom filter on your aquarium at least once a month in order to remove many of the microorganisms which develop in its water column over time. This way you keep the ecosystem in your aquarium healthy.
*If you own a Marineland Magnum 350 or HOT 250, you can add diatom powder to these canister filters, however, their motors quickly bog down due to the heavy consistency of the diatom powder, and will take much longer to diatom your tank than a dedicated diatom filter such as the Vortex XL or D-1.
If you want to make a substantial investment in a pressurized CO2 system for your aquarium you will likely be able to avoid a BBA outbreak, however, these systems are expensive.
This is especially true if you have several planted aquaria, in which case they can become prohibitively expensive to use over time.
So if a DIY CO2 system is your only logical choice, be aware that sooner or later BBA will show up in your aquarium. At least you now know how you can get it under control without adding any chemicals to your aquarium.
Moreover, if you like Marimo Moss balls, they readily compete with BBA and other forms of algae for the nutrients in an aquarium's water column, which makes them a very nice addition to your aquarium. They also don't require injected CO2 or much lighting, although they do grow better in a CO2 injected aquarium.
Keep in mind that Marimo Moss are on the expensive side, and that there is something addictive about raising them in an aquarium.
UPDATE: The Vortex Diatom Filter Remains The Most Effective Way Of Removing Black Brush Algae From Your Aquarium - Why The Vortex XL Design Is Better Than The D-1 Or Freedom Filters
One of the problems with using a Do It Yourself (DIY) injected CO2 system to enhance plant growth in a freshwater tropical aquarium is that the amount of CO2 being injected into your aquarium is erratic.
This is due to the inconsistent nature of a DIY CO2 system, and the many different permutations for DIY CO2 setups. Specifically, attempting to determine the ideal balance of refined sugar, water and baking soda, in order to make this concoction last as long as possible.
Given the erratic nature of DIY CO2, the PH (Potential For Hydrogen) in an aquarium will fluctuate to a greater degree than a non injected aquarium, or a pressurized CO2 injected aquarium (which is more accurate, yet much more expensive).
This greater fluctuation in PH will lead to increased algal growth. And while certain types of algae are easy to remove from an aquarium, others are not.
One of the most aggressive forms of algae is known as Black Brush Algae.
This type of algae is so aggressive, that it is often referred to as the scourge of the aquarium hobby, given that it is nearly impossible to get rid of once it invades your aquarium, unless you aggressively treat your tank.
Some fish keepers use liquid carbon to dose their aquariums with in order to kill off BBA, however, this can often backfire by killing their fishes as well .
BBA also grows in small tufts that attach to the glass panes of aquariums as well as to plant leaves, filter tubes, substrate, and ornaments that are placed in the aquarium.
So once BBA infiltrates the water column in your aquarium, it will quickly overrun your tank unless you can find a way to eradicate it.
What's the best answer?
A combination of UV sterilization and diatom filtration.
The reader will note that this fish keeper did not include micron filtration here, only because in my experience, while micron cartridges work very well for polishing a water column and removing many smaller particulate, they are not very effective in getting rid of BBA.
Why?
Because BBA spores are small enough to pass right through a micron filter cartridge and circulate right back into your aquarium.
Most micron cartridges are anywhere from about 15 - 100 microns in size, where diatomaceous earth (the filter media used in a diatom canister filter) will filter particles down to 1 micron (one millionth of a meter in size). Needless to say, this is why the 50 year old technology in the Vortex line of diatom filters remains the ultimate means for fine filtering your aquarium's water column.
And why these filters still command their high price as single purpose specialty filters.
They are simply the best mechanical filters for what they were created to do; remove the smallest and oftentimes most dangerous organisms that can inhabit your aquarium's water column.
Yes, you can add diatom powder to filters with micron cartridges, such as the Marineland Magnum 350 and HOT 250, however, their motors bog down quickly, and it will take forever for them to clear anything but a nano sized aquarium.
As such, the Vortex line of diatom filters (to my knowledge the only diatom filters presently being manufactured) are the only real choice for removing BBA and other microscopic organisms from your water column. Moreover, the Vortex filters are also excellent for removing dead microscopic organisms from your aquarium's water column, that your UV sterilizer has killed off.
Until recently I owned a Vortex D-1 since the early 1980s. And while I have always liked this filter and tolerated its quirkiness because of its superior capability in fine filtering an aquarium's water column, its design has always been compromised by the way the D-1's powerful electric motor is secured to its mason jar.
The D-1's motor is secured to its mason jar by a cap which twists onto the grooved surface of the top of the glass jar. You are supposed to be able to tighten this cap by hand, however, in this aquarist's experience, the D-1's cap cannot be tightened enough by hand to properly secure it to the D-1's mason jar.
If you attempt to hand tighten this cap, the D-1's mason jar will leak water onto your floor.
Moreover, if you cross thread this cap onto the top of the mason jar, it will develop an air leak which will prevent the filter from priming; forcing you to remove the cap and reattach it.
I've found that the best way of securing the D-1's cap to its mason jar, was to place a rubber band wrench around the body of the mason jar to hold it in place, and to then use a monkey wrench to tighten this cap.
I would use the same procedure to loosen the cap. However, there are times where regardless of how careful you are, the top of the cap will become cross threaded, and it will have to be loosened and then retightened.
It is also very easy too over tighten this cap, and to crack the glass mason jar. The plastic jar that Vortex replaced the original glass jar for the D-1 with also cracks very easily.
Fortunately, the Vortex XL has a different system for attaching its motor to the filter's larger mason jar. You attach the XL's motor to its mason jar by securing the motor to the jar, using the six thumbscrews that are installed onto the XL's motor housing.
All you need to do is to tighten them just until you get a bit of pressure. This will ensure that a water tight seal is created, and that air cannot enter the XL's canister chamber.
You then prime the XL the same way that you do the D-1. There are different ways of priming these filters, however, the following has worked best for this author.
Remove the motor of the D-1 or XL from its mason jar.
Fill the mason jar with enough water to allow you to place the filter pad for the D-1 or XL into the jar, without the water spilling over the surface of the jar.
Then attach the motor housing to the top of the mason jar on these filters.
Get a small *Tupperware container that is about 8 inches high by 6 inches in width, and place this container in the aquarium that you intend to diatom.
*I drilled a small hole in one of the sides of my container, and inserted a two piece suction cup, which attaches to the side of my aquarium, thus preventing the container from floating around the aquarium.
Once you have done so, move your Vortex filter to this aquarium and hook the inverted u-shaped intake and output hoses on the top of edge of your aquarium.
Then insert the other sides of these hoses around the intake and outputs on the respective Vortex filter that you are using.
Make sure that the hose connections are secure, then turn the Vortex filter on, and place it upside down for about 15 - 20 seconds, in order to prime it. Once you have done so, turn the filter right side up again. If the filter loses its prime during this time, turn it off for a few minutes and its tubes will likely fill with water priming the unit.
If not, turn the filter back on and upside down for another 20 seconds or so and it should prime. If it is not priming, check the cap for an air leak.
Once your Vortex filter is up an running properly, add a cup full of *diatom powder to the small container that you have placed in your aquarium. Once you have done so, wait for the filter to coat the surface of the fabric pad that is installed in your Vortex canister.
*Also remember to wear a mask so that you don't inhale any diatom powder, since this powder can be very dangerous to your lungs.
Remember that the diatom earth is the filter; not the fabric insert.
Moreover, you will find that some of the diatomaceous earth will cake on the bottom of this small container, so gently stir it with your fingers until all of the diatom powder has been removed from the bottom of this container, and attached to the Vortex's fabric insert.
Once the water in the container is clear, you are now ready to remove the container from your aquarium, by gently sliding it downward and underneath the intake and output strainers for the Vortex.
The Vortex filter can now be used to filter your aquarium.
If you have more than one aquarium and want to move your Vortex filter to another aquarium in order to filter it, place the container back into your aquarium before turning your Vortex off.
Place the filter tubes for the Vortex back into this container, and then gently lift the container out of the tank, while wiping it down with a small towel so that you don't wet your floor.
With your other hand, grab the motor of your Vortex and carry the unit and the bucket to the aquarium you want to filter, and repeat the aforementioned procedure.
This entire setup procedure sounds a lot more complex than it is, and becomes intuitive over time, as you get used to the idiosyncratic nature of these quirky, yet loveable pieces of aquarium history.
UPDATE: The Ideal Setup When Using A CO2 Drop Checker
Over the past several years some manufacturers of aquatic retail products have begun marketing CO2 drop checkers. A CO2 drop checker is used to measure the amount of CO2 in an aquarium's water column.
When the CO2 drop checker is blue, there's not enough CO2. When it turns green there's about 30PPM's (parts per million) of CO2 in an aquarium's water column - the ideal amount. When the CO2 drop checker fluid turns yellow it indicates that there is too much CO2 in your aquarium's water column and that your fish or invertebrates (such as dwarf shrimp) are in danger of being oxygen deprived.
When used correctly in the planted aquarium, CO2 drop checkers are an inexpensive and invaluable tool for monitoring the CO2 levels in one's tank.
There are several companies now producing these neat little devices, which can range in price for a simple plastic unit costing as little as $10, to more than $50 for hand blown glass versions of CO2 drop checkers; like the beautiful ones offered by Cal Aqua Labs.
The more expensive ones are nicer looking from an aesthetic viewpoint. However, they are based on the same scientific principle, and appear to be no better or worse than their cheaper alternatives.
This author is presently using CO2 drop checkers from UP Aqua, and they work well, even though the manufacturer's directions for using these products are open to interpretation.
For example, UP Aqua instructs the user of their CO2 drop checker to add 5 drops of their reagent solution to the drop checker, and then fill the remaining area up to the top of the line in the drop checker cap, with aquarium water.
Many of the aquarists who use CO2 drop checkers have claimed that these units only work properly if perfectly calibrated 4DKH water is used in place of tank water.
This fish-keeper has never used a commercial 4DKH preparation, which is difficult to find in the United States, and fairly expensive when you can, given that it's just a small vial of water.
I managed at one point to luck out when testing the water hardness in my aquariums, only to find that one of my tanks actually gave a perfect 4DKH reading. So I filled a large bottle with this 4DKH water and have been using it ever since for my CO2 drop checkers. I have found that with the UP Aqua drop checkers, it is best to use 3 drops of their reagent solution instead of the 5 they recommend. With the 3 drops the reagent solution is easy to read. With 5 drops the color becomes very dark and more difficult to distinguish blue from green.
If you can't find 4DKH solution in your country, there are Websites which offer directions on how to make your own. However, you will probably need to purchase a few items in order to mix the proper amount of distilled water with the baking soda that's used to create 4DKH solution.
Earlier...
UPDATE: The Dreaded Black Brush Algae Outbreak - Time To Get Out My Vortex XL Diatom Filter
In this fish-keeper's decades of experience in this wonderful hobby, there is no algae that is more stubborn or damaging to an aquarium's appearance than that scourge known as black brush algae.
BBA grows in small black tufts, and on every surface in your aquarium, from its panes of glass to your tank's substrate and plants.
It is arguably the nastiest form of algae that an aquarist must contend with. I omit blue green and red string algae here, only because they are not really algae at all, but instead, an ancient form of single cell bacteria that quickly carpets on your aquarium's plants and substrate, while killing your plants and poisoning your fishes.
Since BBA originates in an aquarium's water column, it must be removed before it can attach itself to anything in your aquarium.
BBA is particularly nasty to plants, where it quickly attaches to their leaves, and as it grows, gradually kills a plant by preventing it from obtaining any light.
Learning how to deal with BBA, whose most common cause is fluctuating CO2 levels, can be extremely frustrating. However, learning to keep this beast under control will be very rewarding, since it (along with other challenging situations in this hobby) will help you to become an expert aquarist over time.
UPDATE: Fertilizing Your Potted Plants While Avoiding A Massive Algae Outbreak In Your Planted Aquarium
It never fails. When most newbie aquarists decide that having some nice aquatic plants in their aquariums would be both beneficial to their fishes as well as aesthetically pleasing, they take either head to the their local fish store (LFS) or Web surf to one of a plethora of online aquatic merchants who cater to the fishkeeping hobby.
They purchase a liquid fertilizer and then happily begin adding a few capfuls of it to their aquarium water a few times each week. Soon after, different forms of opportunistic algae appear in large numbers, and gradually take over the entire aquarium.
In worst case scenarios, the result is what is referred to as an algal bloom; where aquarium water takes on the appearance of pea soup, and the fish-keeper cannot see either their fish or their plants.
Their usual response is to either begin rapid water changes, or to return to their favorite aquatic merchant, where they are given a number of suggestions ranging from purchasing a diatom filter to a UV sterilizer (both of which are in reality useful additions to fresh and salt water aquaria).
And while this fish-keeper owns both diatom and micron filters as well as UV sterilizers, I find that keeping aquarium pots planted has become a more convenient way of owning aquatic plants, since unlike rooted plants, potted plants can be readily removed from the aquarium for either cleaning or fertilizing.
In the case of the plants that I maintain - Amazon Swords and Anubias Barteri - the Barteri are easily removed from the aquarium to a bucket filled with about an inch or two of tap water and capful of Flourish liquid plant fertilizer.
There I allow them to soak for at least 20 - 30 minutes, before placing them back in the aquarium.
In the case of the Amazon Swords, these plants are larger, and with their floppy leaves are better off left in the aquarium when fertilizing them.
Here, instead of using Flourish liquid fertilizer, I instead use Flourish fertilizer plant tabs. I place one plant tab on the bottom of the terracotta pot that I keep each Amazon Sword in, and then place the small plastic pot that the Amazon's roots are planted in, directly over the plant tab, so that it doesn't move around.
This enables each Amazon Sword plant to gain its fertilization via a plant tab, which usually lasts for about three months before it has completely dissolved and must be replaced.
This technique has avoided huge algal outbreaks.
However, I do use T-5 lighting in my planted aquariums along with DIY injected CO2 systems, so there are always plenty of nutrients in their water columns for algae to feed on. And this is where the UV sterilizer and diatom or micron filters come in handy.
The diatom (or micron) filter provides for the removal of much smaller particulate than the standard filter media used in my regular canister filters. And the UV sterilizer does an excellent job of killing off many different types of algal spores that remain suspended in the water column, which gives the water column a nice polished look.
However, in spite of these precautions, there are certain scourge types of algae that can wreak total havoc in the planted aquarium, if they are not carefully monitored and quickly removed.
These include the much dreaded black brush algae and blue-green algae; the latter of which is actually not an algae at all, but rather, an ancient and primitive form of bacteria that has likely been around for thousands of (if not millions of) years.
Any experienced fish-keeper will describe their own battles with these aquatic menaces, and how they eventually learned to keep them under control.
I say control, because rapid algal growth in an aquarium is a sign that the aquarium's water column is healthy. And of course, healthy water is good news for your fishes and other fauna.
So as fish-keepers, we learn to live with algae, however, develop ways in which to minimize its growth in our aquariums.
Earlier...
UPDATE: Making A Practical Aquarium Filter Even More Useful - Adding A Valve Tap To Your Marineland Magnum HOT 250
I have been using a few Marineland canister filters for the past several years: including a Magnum 350 and few HOT 250s.
About a year ago, after more than two decades on the market, Marineland decided that it was time to pull them from their canister filter lineup.
What has made the Magnum 350 and HOT 250 so popular over the years, is the ability to convert them from regular canister filters to micron filters; by replacing the standard filter cartridge with a microm cartridge expressly designed for the 350 and HOT 250.
This feature, while more than twenty years old with these two filters, has only been adopted by other canister filter manufacturers since the early 2000s.
Moreover, with the addition of valve taps on the Magnum 350 over the past decade, this filter gained even more flexibility, since even though it's rated for aquariums up to 100 gallons in size, it can now be used with much smaller aquariums; including those in the pico and nano range.
However, the HOT 250 did not benefit from the valve taps the way the Magnum 350 did, simply because there was really no way to plumb valve taps into the HOT 250's design without having to retool either the intake or return tubes. And this would have made the filter more costly.
So for a while now, this fish-keeper has been thinking about a way in which to inexpensively add a valve tap to the HOT 250, so that this filter could be installed on smaller aquariums.
I decided that since Marineland already made valve taps for the Magnum 350, to purchase some so that I could integrate them into the HOT 250's return flow.
In order to accomplish this, I only used 1/2 of one of the valve tap sets. I then used some superglue to fasten the valve tap to the return flow of the HOT 250.
Then applied some marine silicone to the area where the valve tap was joined to the HOT 250 return flow.
This modification now gives the HOT 250 far more flexibility, since it can be used in virtually any aquarium that is taller than the HOT 250.
So the HOT 250 can be used as a full time filter in a small aquarium, using its standard filter media, or used with its micron filter, in order to filter a pico or nano aquarium.
The expense here was minimal, given that the price of the valve tap was about $17 for an entire tap (I used only 1/2 of this setup), making the cost $8.50 ( since shipping was included). And I keep the other half of the vale tap in the event that the clips on one of the valve taps on my Magnum 350 breaks.
The Magnum HOT 250 has always been a cleverly designed filter, which is why it has lasted for so many years; while other filter manufacturers were regularly discontinuing their own filters for newer ones.
The Magnum HOT 250 used to be a bargain when it was still in production, as was the Magnum 350. I paid $45 a piece for my HOT 250s and $79.99 for my Magnum 350 two years ago, during a Doctor's Fosters & Smith clearance sale.
When Doctors Foster & Smith dramatically lowers the price of one of its aquatic items, it is usually because they know in advance that that item is going to be discontinued by its manufacturer.
This is how you can get a great deal on many aquarium products that are being replaced by newer models.
The problem with the HOT 250 and the Magnum 350, is that since they are no longer produced, New Old Stock supplies have become very limited, and the prices for these filters have skyrocketed.
NOS Magnum 350s have become almost non existent, and when they are actually available, with asking prices of as much as $400 - more than the original list price!
The same is true to a slightly lesser extent for the HOT 250, when NOS filters can actually be located.
I have seen asking prices for the HOT 250 topping $180, without the biowheel feature.
As good as these filters are, these prices are ridiculous, and you are better off spending less on a more modern canister filter, that will serve your needs just as well.
When those who are gouging the price of these filters eventually get tired of trying to cash in on the HOT 250 and Magnum 350s lack of availability, and start offering them at a more reasonable price, then you might consider purchasing one.
Until then caveat emptor.
UPDATE: The AquaTop RD-30G & RD-Pre HOB Canister Filter - Now Discontinued, So You Can Only Purchase New Old Stock When Available

Editor's Note: Over the past year AquaTop has discontinued its RD-30G canister filter and its RD-PRE (the RD-30G minus its electric motor) external attachment.
The likely reason that this filter was discontinued was due to a few problems. The first had to do with the poorly written instructions that came with this filter.
The second had to do with the RD-30G's need to be completely filled with water before it would prime. I remember reading about several aquarists who described having to return the RD-30G, simply because they could not get it to prime at all. This had to do with the filter's need to be filled completely to the top of the canister.
In order to do this properly, before you run the filter after attaching it your aquarium, unscrew the intake tube from the top of this canister and fill it to the very top with some filtered water, then install the intake tube.
This will ensure that the RD-30G primes correctly. Such a simple problem to fix, yet most RD-30G owners never realized this, before returning their filters in total frustration.
The more annoying problem is with the dreaded media baskets which for some reason, AquaTop decided to base on an interlocking system.
The problem is that the plastic clips are nearly impossible to remove, which prevents you from being able to access the media in order to clean or replace it.
The answer here is to take a pair of pliers and break the clips off.
Doing so isn't a problem, because each media container is grooved, which allows for them to be perfectly stacked atop one another.
Why AquaTop chose to create the interlocking system makes no sense.
Especially since it never worked properly, and was one of the two main reasons why aquarists who returned this filter did so.
Now that I have remedied the problems with this otherwise cleverly designed little filter, I have found that they make ideal micron filters.
Especially since there is very little bypass in them.
The way that I configure the RD-30G is to discard the chemical and biological filter media, while keeping only the mechanical filter media that was included with the RD-30G.
I then add micron filter padding from a Marineland C-160 canister filter, which is then fitted into two of the four media trays for this filter. Given its HOB (hang on back) capability, the RD-30G becomes the perfect filter for polishing the water in your aquariums, since it can easily be moved from one aquarium to another.
For larger tanks, use the same setup for the RD-PRE canister, and then use the bridge fitting that comes with the RD-PRE to attach it to your RD-30G canister.
Doing this allows you to double the filtering capacity of the RD-30G.
Another major benefit of using the RD-30G, over say an HOB filter like the Marineland Magnum HOT 250, is that the RD-30G has valves built into its intake and output tubes, which allow you to adjust the water flow through the filter.
This makes the RD-30G ideal for nano tanks, where the water flow from the HOT 250 would be too strong for your fishes.
For larger tanks, the HOT 250 is an excellent little HOB filter and also serves well as a micron filter.
And so is the Marineland Magnum 350, because of both its micron filter cartridge as well as the valve taps included with the Magnum 350, which allow you to use the 350 on everything from tiny pico aquariums, to aquariums in excess of 100 gallons.
It's too bad that Marineland finally decided to stop manufacturing the Magnum 350 and HOT 250 after more than two decades on the market, because these were really well designed filters that were ideal for the aquarium hobbyist.
At least spare parts for both filters are readily available if replacement parts are needed. Even if they are in many cases overpriced.
As for the RD-30G, it's a bargain filter at the $19.95 price that I purchased my two for, during a clearance sale a few years back.
Even at the usual $49.99, these are excellent little filters.
So if you plan on purchasing one, keep the aforementioned caveats in mind and you'll find that the RD-30G makes a welcome addition to your aquarium gear.
Earlier ...
HOB canister filters are still fairly rare to the aquatic pet market, even though they provide filtration performance more on par with a canister filter than that of a power filter.
One, if not the oldest types of such filters is the Marineland HOT 250 canister filter. A very cleverly designed filter that has aged quite well given that it has been around for nearly two decades.
Given the flexibility of the HOT 250, which is rated for up to a 55 gallon aquarium, and the fact that the HOT 250 can be used as both a two stage filter (mechanical and biological is what it is best suited to) as well as a micron filter for water polishing (just not at the same time, since the mechanical & biofilters must be removed and replaced with a Marineland micron filter in order for the HOT 250 to be used as a micron filter).
In spite of this, the HOT 250 is simple to set up and does a superb job of keeping an aquarium's water column clear.
The HOB canister is really a great concept that more aquarium manufacturers should be availing themselves of, by offering HOB canisters of their own.
Thus it comes as no surprise that over the past few years, the ever creative people at AquaTop came up with a two chassis HOB canister filter offering enough capacity to filter a 60 gallon aquarium.
The AquaTop RD-30G HOB canister filter puts out a maximum of 135 gallons of water per hour, and is rated for up to a 30 gallon aquarium.
With the addition of its pre-filter companion, the RD-Pre, the RD-30G is rated for aquariums up to 60 gallons.
I find the nomenclature to be a bit confusing here, since pre indicates that the filter would go before the main filter, such as the Fluval foam pre-filters that fit on the intake tubes of Aquaclear HOB filters. The Fluval pre-filter was designed with the filter for the Aquaclear 20 in mind, given that Fluval includes the AC 20 in both its Edge 6 and 12 gallon aquariums.
However, the Fluval pre-filter can be stretched to accommodate intake filter tubes with a diameter of up to about 1/2 inch.
As for the nomenclature of the AquaTop RD-30G and its RD-Pre system, the Pre is actually designed to come after the RD-30G, which in reality would make it a post-filter, rather than a pre-filter.
This is, however, a niggling point, since the RD-30G on its own does an excellent job of filtering an aquarium. And its performance is only enhanced when the RD-30G is combined with its RD-Pre sibling.
I am only sorry that I waited for over a year to purchase this combo, since they really do a nice job of keeping the water in the particular planted aquaria that they are setup in clean.
However, the savings was significant - a full 60% off the usual selling price.
In fact, I was so impressed with the RD-30G and the RD-Pre, that I purchased a pair of these systems for less than half of what they would have cost me prior to this sale.
This is how I purchase most of my aquatic equipment, deciding on components that I want to buy, then waiting for some pet retailer to have a sale on them.
This is why it is so important to be familiar with many different pet retailers instead of dealing with just a few of them.
As for negative experiences in regard to the RD-30G, there are but two that this fish-keeper has found. However, neither is a deal breaker.
The RD-30G and RD-Pre setup instructions are terrible. However, they are not particularly important in assembling this filter, since it comes pre-packed with filter media, and there are only a few external parts which must be added to these filters before you can use them - the additions of which should be self explanatory to most people.
The more concerning caveat with the RD-30G and the RD-Pre is that their canisters must be filled to the very top, or these filters will not prime. A few people have commented about this on Amazon.com.
And I write about this here because a consumer who purchases an RD-30G as a stand alone HOB canister, or with its RD-pre filter, could end up returning this filtration system thinking that it was defective, when in reality it just needed to be full of water to prime correctly.
The fishkeeper should keep this in mind with this particular filter system.
Used as a maintenance filter for polishing the water in your aquarium, an RD-30G could be used with a micron filter pad in order to fine filter your aquarium water.
It could also be moved from tank to tank ever day or so, to reduce the level of algae and other waterborne life forms to a minimum.
In any event, the RD-30G is a terrific little filter on its own, or with its RD-Pre addition.
At the $49.99 price for the RD-30G and $29.99 for the RD-Pre, both units represent a good value. However, at the $19.99 price for the RD-30G and the $14.99 for the RD-Pre, these filters are practically a steal.
As such, this fish-keeper highly recommends them, and will be updating my experiences with this filter combo as time goes by.
If you are considering the purchase of a new aquarium or filter for your already existent aquarium, you may want to give some consideration to AquaTop, since this company has some very clever engineering designs for its aquatic components, including a line of HOB/UV sterilizer filters that this author has found to be extremely beneficial to the general health of my planted aquaria.
Earlier ...
Update: New Hydor 600 Professional Canister Filter For One Of The 17 Gallon Tanks
I have wanted to try one of the new Hydor Professional series filters for awhile now, however, they have been selling at either list or close to list price since they were first introduced to the pet retail market about two years ago.
Over the past year the prices on these filters have begun to drop, so I thought that I would take this opportunity in which to purchase one.
I chose the Hydor 600 because it was discounted from its regular price of about $230, to $148.
My first impressions, having received this filter yesterday, and installing it on one of my 17 gallon planted aquariums, is that the 600 PRO is both very well designed and constructed.
The 600 PRO is also a very large filter, standing more than 20 inches in height, which easily dwarfs both my Fluval 305 and Marineland Magnum 350 canister filters.
The 600 PRO comes with 5 nicely constructed media trays: three of which hold biological media, while the top and bottom trays hold mechanical media of different sizes.
The 600's electric motor is whisper quiet, and the motor head is well constructed.
This filter's motor head has four points for attaching it to the 600's canister. The 600 PRO has front and back latches, as well as side latches to ensure that the head of the unit maintains a tight fit with the 600's canister chassis.
The 600's aesthetic is refreshingly unlike most other canister filters in this day and age. Which is to say that its smoked perspex plastic is very attractive in an industrial sort of way.
It's not quite as pretty as Fluval G Series' canister filters are, however, the 600, like the rest of Hydor's PRO canister line, is a lot better looking than much of its competition.
The greatest standout here is in price, since at $148, the Hydor 600 PRO is a lot of canister filter for the money.
I used to think that it was wise to purchase a filter that was rated for the size aquarium you were using.
However, having been back in this hobby for the past six years, after more than a 20 year hiatus, I have found that the less often I have to open a canister filter to change its media, the better.
And that means using a canister filter that has a rating which is significantly larger than the aquarium I am maintaining.
The Hydor 600 PRO is rated for a minimum aquarium size of around 100 gallons, which is more than 5 times the size of the aquarium that I am using it on.
And this means that the 600 PRO should not need a media change for at least a year.
Moreover, over the past several years a wonderful feature that is now included with most of the better aquarium canister filters are valve tap inserts which are installed in both the intake and output tubes for these filters.
This gives any aquarium canister filter tremendous flexibility, since these valve taps allow these filters to be used with virtually any aquarium.
The ability to install a filter rated for a 150 gallon tank on a 50 gallon aquarium enables a fish keeper to clean their filter media once a year, instead of three to four times a year, or more.
I have gone a year without changing the media in an Eheim 2211 without a problem. Although the water flow on this tiny canister at the time was barely at an ebb.
And because I don't use chemical filtration, this means that I can use my canisters until the water flow becomes so reduced that they must be cleaned.
As for the 600 PRO, it's a really nice filter, and is an exceptionally good value at just under $150.
If you are in the market for a canister filter, the Hydor Professional line is definitely worthy of your consideration.
Update: What To Do When Black Brush Algae Attacks Your Plants
BBA is one of the most aggressive forms of algae in the aquarium hobby. Once it takes hold of a tank it is relentless.
It quickly grows in small tuffs on every surface: plant leaves, substrate, glass panes, and the intake and output of your filter tubes.
Some fish keepers have used Flourish excel (carbon) to kill off BBA, however in doing so, they disrupt the biology in their aquarium which oftentimes results in killing fish and other fauna.
Once your aquarium has become overrun with BBA the best thing that you can do is to remove the substrate and replace it.
Before adding new substrate remove all of the plants from the tank and soak their leaves in a mixture of 9 parts of water to 1 part of chlorine.
Scrub your filter with the same mixture and remember to thoughly rinse them in filtered water before adding them back to your aquarium.
The same is true for any fixtures that you have in the aquarium.
Moreover use a micron filter to filter the water in your aquarium for at least two weeks to remove BBA spores that are still in the water.
BBA is one form of algae that UV sterilizers don't work well with because the spores attach to the aquarium glass. plants and everything else that is under water.
This is why it is so important to micron filter your tank with either a micron cartridge, or even better, a diatom filter like the Vortex D1 or XL.
It's difficult situations like this where these filtration systems really shine.
Moreover, if you have plants that can be grown emersed (above water) like Anubias, you can remove them from your aquarium and add them to a terrarium so that they can grow new leaves without having new BBA attaching to the leaves.
This is what I have done since a BBA outbreak nearly killed several of my Anubias plants.
What's the most common cause of BBA? Erratic CO2 production as the result of a DIY CO2 system, which causes large swings in the PH in an aquarium.
There are other causes for BBA, however, this is by far the most common one.
If you place your Anubias in an aquarium it will take time for the plants to adapt to their new environment. Moreover, they will shed their waterborne leaves and grow leaves that are suited to a non aquatic environment.
Remember to spray your plants with tap water at least two or three times a day, while spraying the glass panes in your aquarium to ensure that it stays moist.
This will prevent the leaves on your plants from drying out.
UPDATE: The Death Of Aquascaping Guru Takashi Amano - The Father Of Aquascaping Dies Of Cancer At Age 61, Due To The Radiation Fallout From The Fukushima Daiichi Nuclear Powerplant Disaster
8/14/15 - Nigata Japan: World renowned cyclist and professional aquascaper, Takashi Amano, died last week at the age of 61 from cancer. Two decades ago, Amano founded the international design firm, Aqua Design Amano, which he used to create an entirely new genre of decorating aquariums, that has since revolutionized the way in which aquarists now plant their aquariums.
Amano, also a former professional champion cyclist, was an award winning photographer, whose photographs of nature won him accolades the world over. He was involved in a project that concerned photographing all of the natural rain forests on this planet, when he became stricken with terminal cancer.
Takashi parlayed his artistic talent to create an entirely new genre within the aquarium industry, with what he simply referred to as The Nature Aquarium.
Using myriad different types of plants from his native Japan, as well as uniquely styled rocks from his country, Amano created aquascaping designs for custom aquariums featured as the center pieces in many corporations around the world.
By the late 1990s he began catering to the aquarium hobbyist, when he focused part of his business on the pet retail industry.
To say that Takashi Amano's creations are breathtaking is an extreme understatement.
There is nothing quite like them, since Amano's aquascapes represent what can only be described as living works art.
Many of his custom aquascapes can be seen by typing Takashi Amano into Google, and choosing the images feature.
Takashi Amano lived in Nigata, Japan, less than 100 miles from Fukushima, where the nuclear disaster occurred after a HAARP created tsunami struck Fukushima back in 2011.
Amano developed cancer since that time, and is more than likely one of millions of victims of the radiation fallout which circulated across Japan in the aftermath of this artificially created catastrophe.
With his death, the aquatic community has lost an enormous talent and visionary who died far too soon.
The American people must demand that Congress stop appropriating funds for the Pentagon's HAARP facility in Gakona, Alaska. And there must be a global ban on HAARP by other nations who maintain access to this technology, as well as directed energy weaponry, in the future.
Including Russia.
UPDATE: Fluval 305 Priming Problem Solved/Rescaping All Of My Aquariums
The Fluval 305 priming pump is known to have problems once this canister becomes a few years old. It simply won't prime any longer.
While Fluval designed the filter with the priming pump is beyond this fish keeper, since you can fill the 305's canister up with water after you clean its filter media, and then reinstall it on your aquarium, and it primes fine the moment that you turn the filter motor on.
It should prime the moment you turn the filter on. Even if you have removed the intake and output tubes for the 305, in order to clean them as well.
This is an easy solution to what mars an otherwise excellent canister filter.
So instead of tossing your 305 when its primer fails, fill the canister with water and it should prime on its own.
Every year or two the substrate in aquariums tends to become so concentrated with detritus collected during that time, that it is often easier just to replace it with new substrate.
This also allows you to add new plants and other items as part of the new rescape.
I decided to remove all of the old substrate from my aquariums and to replace it with Fluval Shrimp substrate.
This was on sale at Big Al's Online for $26.99 for a 17.6 LB bag. This is an excellent price for a very good substrate.
I picked up several bags knowing that I will find a use for them in the future.
This substrate is especially useful if you plan on keeping dwarf shrimp like RCS or CRS.
I keep my plants potted, and the Marimo Moss balls that I have in my tanks are free floating, so I don't need more than a 1/2" of depth in these tanks.
Earlier...
UPDATE: Best Method For Euthanizing Fish/ How To Remove The Dreaded Black Brush Algae From Your Aquarium Floor/Fixing A Leaky Marineland Magnum HOT 250
The only aspect of fishkeeping that I do not enjoy is when I have to euthanize one of my fishes. It's painful to do this, however, it is worse to watch them suffer.
I have found that either clove oil or fresh cloves are very effective in euthanizing a sick fish. They become very calm when the clove is added to some tank water that has been placed in a small container, and they gradually just drift off to sleep.
I would recommend this to any fish keeper who is concerned about finding the most humane way to euthanize a sick fish.
One of the Magnum HOT 250 filters has had a slow leak in it since I purchased it. The unit was purchased new at Doctors Foster and Smith a few years ago. Even after siliconing the intake and output tubes where they meet the housing for the top of the HOT 250, the filter still leaked.
I finally remembered that I had a spare HOT 250 top from the first HOT 250 that I purchased, whose motor burned out after I was vacuuming up some gravel and gravel jammed the impeller. This filter has since served as a source for inexpensive parts for my other HOT 250s. Very functional canister filters that are terrific for doing maintenance on your aquariums. Everything from cleaning your tank's water after a rescape to microning the water to remove algal spores.
So after replacing the defective HOT 250 top with the replacement, the HOT 250 now works fine. Now I have a pair of HOT 250s up and running
The Anubias Barteri Var. Barteri are gradually making a comeback. However, in a few cases, the plants were so overrun with black brush algae that their new leaves were not getting enough light to grow. I now have to clean these plants on a regular basis to keep the BBA off of them.
I was tempted to purchase a large Anubias plant, however, by the time I paid for shipping this plant would have cost $60. Given that the Anubias Barteri Var. Barteri that I purchased were about $7 each, and a few of which have grown substantially since that time, I decided not to waste the money on just one plant, and instead purchased 10 smaller Anubias plants for about the same price.
One of the best uses for the HOT 250 is as a vacuum for the floor of your aquarium. I use one of the three foot hoses from my Vortex XL diatom filter and insert it into the intake tube of the HOT 250. Then I turn the HOT 250 on and I can vacuum the bottom of my aquarium. I can also vacuum up particles floating in the water that get stirred up from the floor of the aquarium, before they have a chance to sink back to the bottom of the tank.
Being able to vacuum the bottom of an aquarium becomes especially important when you are using a substrate (bare bottom) free aquarium.
Over the past few days I removed the BBA infested substrate from both of my Mr. Aqua 17 gallon aquariums and am now using these tanks without substrate. I like the cleaner sculpted look of a rimless aquarium, which looks like a piece of aquatic art when it is bare bottomed.
Black Brush Algae is one of the most bothersome species of the algal family. It grows on everything in your aquarium, including your gravel, and can quickly cover the entire bottom of your aquarium.
Attempting to remove it by hand is impossible. Even using a fishnet to stir up BBA and then catch it in the net is less than effective.
So what will work? A siphon will work if you don't mind having to refill the aquarium water that you remove while vacuuming up BBA from your tank's substrate.
However, this is impractical since you don't want to remove more than about 25% of the water in your aquarium on any given week.
And you'd have to refill the water in your aquarium a few times before you were able to vacuum all of the algae on the gravel in your tank up.
Get a clear run of 1/2 inch plastic tubing and insert it into the intake tube of a filter that you use for doing tank maintenance.
A Vortex diatom filter, or even better, a Marineland Magnum HOT 250 works great for this. I use a HOT 250. Once you insert the 1/2 inch plastic tube into the intake tube on the HOT 250 it operates as the perfect marine vacuum. It's powerful suction easily vaccums up black brush algae and much of the detritus which is lying within the cevices of your gravel.
Avoid using this system to vacuum up sand though, because the tiny sand particles will become trapped in the HOT 250's impeller housing and cause it to seize up. I destroyed the motor on a HOT 250 by doing this. Fortunately, the filter was on sale at the time so it wasn't as much of a loss. And since I purchased two other HOT 250s for $90 the pair, the damaged one served as a spare parts unit saving me a lot more in parts than the $47 I spent on the first filter.
Black Brush Algae can drive a fish keeper to distraction, and the system that I use really does work at removing tufts of BBA from your aquarium.
So, give it a try.
Earlier...
UPDATE: Using A Cobalt Aquatic's DUO 500 Submersible LED UV Clarifier Internal Filter As A Powerhead/UV Clarifier


I've owned a pair of Cobalt Aquatics' DUO 500s for the past six months and thus far they've been a pleasure to use, having only been removed from my aquariums once for a thorough cleaning in about six months time.
The DUO 500 and its larger brethren, the DUO 1000, have ample mechanical filtration (a pair of rectangular sponges which each fit over a pair of plastic fittings that insert directly into the motor housing of these submersible filters).
So if you are using one of these *filters in a fairly heavily planted aquarium, where plants do much of the work of the biological stage of your electric filter, than you can probably get by with just using one or two of the DUO filters - depending on how large your aquarium is.
Recently, I decided to use the DUO 500s that I have in two of my planted aquaria as just power heads and UV clarifiers. So I removed the twin sponge filter pads from each of the units so that aquarium water now passes directly into the filter's water pump and through its LED clarifier, then gets recirculated back into these aquariums.
The reader might wonder why I have done this. The reason is that these mechanical sponges are small and tend to fill up with gunk and detritus very quickly, which means that they must be removed every week or two for cleaning.
Since I use canister filters in these two planted aquaria which do most of the filtering given their much greater surface area, I find that there is really no reason for the extra filtration from the DUO 500s.
This means that the DUO 500s don't have to be cleaned for at least six months, which means less work. And given all of the work that aquariums involve, the less work the better.
However, if you own a small aquarium that is very lightly stocked, and non planted, the DUO 500 filter pads should be able to go for a month or so without cleaning.
The DUO 500 is rated for up to a 30 gallon tank and the DUO 1000 is rated for up to a 55 gallon aquarium.
However, if you plan to use a single one of these filters and just plants to filter your aquarium, you will have to clean the mechanical stages of these filters more frequently.
I use at least one to two other filters in the aquariums that I keep my DUO 500s in, so I only have to clean their filter media every month or so.
On occasion I have waited a few months before cleaning the DUO 500's mechanical filter pads, however, because the pads were so clogged they had greatly reduced the flow of the water through the filter pump.
So if you are going to use the DUO 500 as an internal filter, you're better off cleaning the pads once every week or two.
If you are changing out (or cleaning) your filter media every few weeks or so because your water is dirty, you either need a larger filter or a filter with UV clarification.
I have several planted tanks, and I usually clean them once or twice a year, depending on the tank, since my plants do quite a bit of the water filtration on their own.
Which brings me to an important point regarding the difference between UV clarification and UV sterilization.
UV clarification is used to polish an aquarium's water column so that it is sparkling. Over the past few years a number of aquatic manufacturers have brought to market very affordable lines of UV clarifiers that are incorporated into canister, hob and submersible filters, giving much greater flexibility to these components.
Among some of the better known companies are AquaTop, Cobalt Aquatics and Green Killing Machine.
These cheaper alternatives to the significantly more expensive UV sterilizers which have been on the pet retail market for a number of years now (first offered for the salt water aquaria), have also spawned quite a bit of controversy in regard to how effective they are when used as UV sterilizers.
The main argument here, and it is a valid one, is how can an inexpensive UV sterilizer compete with a much more expensive one, which has a lot more wattage and a better quality UV bulb and ballast?
This argument has also extended to the need for a certain amount of "dwell time" regarding the gallons per hour rating of such UV sterilizers, since the lower the GPH, the more time the UV sterilizer bulb stays in contact with the pathogens circulating through its housing; thus the more pathogens are eradicated from an aquarium's water column.
For this reason, some of the companies which are offering these more affordable filters are not referring to them as UV sterilizers, but instead, UV clarifiers; in order to avoid any issues regarding false representation of their products.
As a fish-keeper who believes in the importance of excellent water quality in the aquarium, I think that using a micron filter in conjunction with a UV clarifier or UV sterilizer - in order to remove many waterborne microbes - makes good sense.
Especially since while UV sterilizers and clarifiers may kill off these organisms, they will still be left in the water column of the aquarium, because they are simply too small for regular sized mechanical filtration to remove.
In this case, an excellent micron filter such the Vortex XL or D-1 can be used in conjunction with the UV clarifier, in order to remove harmful pathogens from the aquarium, without the need to actually kill them while they are still in the aquarium.
So when using a diatom filter in combination with a UV clarifier, the end result should be comparable to using a better quality UV sterilizer.
I will update my experiences with the Cobalt Aquatic's DUO 500 over the next six months, to see how well they stand up under daily use.
And before I forget to mention this important point, unlike the UV clarifier bulbs in the AquaTop HOB/UV clarifiers (which give off a blue light to tell you that they are working), the LED lights in the Cobalt Aquatic's units show no sign of being on when you look at their translucent purple covering.
As such, in order to ascertain whether these LEDs are working or not, you must remove their plastic housing from the Cobalt Aquatic's DUO 500, dry the housing off with a piece of toweling, and then (with the LED bulbs facing away from you and about an inch from a wall) plug the LED in to see if it lights up. (Don't ever look directly into a UV bulb, as it can cause permanent damage to your eyes.)
Interestingly enough, in spite of their ability to kill algae, I have found that both of the LED lights from my DUO 500 filters were covered with algae that I needed to clean off, before placing them back in my aquariums.
I will update how the DUO 500s stand up over the next six months, and hopefully little will have changed by then.
After nearly 5 and a half years back into this hobby after a 22 year hiatus, I am enjoying it more than ever!
Earlier...
UPDATE: Using Your Nano Filter To Micron Filter Your Nano Tank/Update On Aquariums/Long Term Experience Using A Fluval 305 Canister Filter
I use a Toms Mini filter on a Mr. Aqua 1.5 gallon aquarium that I keep Red Cherry Shrimp in. The Toms' Mini filter is probably the smallest commercially available aquarium filter on the market, measuring about an inch in diameter and about five inches high.
The filter circulates a maximum of 45 gallons per hour (about 10 gallons per hour on its lowest level), and does a fine job of filtering my Mr. Aqua 1.5 gallon aquarium.
The problem with having such a small aquarium (which is perfect for housing Red Cherry Shrimp) is that you must use mini components for it, including a mini heater, filter and lighting system.
I use a Cobalt Aquatics Mini Therm 10 watt heater which does a good job of keeping the water in this aquarium warm during the colder months of the year. And I also use a Finnex mini LED aluminum lighting fixture which puts out a total of 5 watts. 5 watts may not sound like a lot of light, however, in a 1.5 gallon aquarium it works out to about 3 watts of light per gallon of water; more than enough to grow most plants - including carpeting plants like baby tears, dwarf hairgrass and microsword.
Which brings me back to the importance of being able to micron filter this mini aquarium, since I use DIY injected CO2, high tech lighting and fertilizer tabs to grow dwarf hairgrass - which can result in an algae bloom if the water is not micron filtered on a regular basis.
My answer to this is to periodically replace the tiny sponge filter which is seated at the bottom of the Toms Mini, with a small wadding of micron padding. This turns the Mini into a micron filter that polishes the water in the Mr. Aqua 1.5 gallon tank.
This periodic micron filtering of the water in this aquarium keeps the aquarium from becoming overrun with algae.
So if you own a small aquarium and a mini filter like the Toms, and want to grow a carpeting plant using injected CO2 (other pressurized or the DIY fermentation method), without concern for algae overrunning your aquarium, the micron filtering system described above is the logical way to go.
I've not posted on this site in about a year. Basically, the tanks are running themselves. All I do is feed the fish and shrimp each day and fertilize the plants each week.
Every several months I clean the filters, and scrape the algae off the walls of the tanks every few months.
For all of the contraptions being sold to clean algae off the glass in your aquariums, the Mr. Clean Magic Eraser (without any additives) still works best for most algae in my experience, and razor blades work best for removing the stubborn diatoms which stick to the walls of the tank.
After five and a half years back in this hobby I am still enjoying it very much.
I have been using two Fluval 305 canister filters for about four years now and overall, I have been very pleased with them. They have been used on a few aquariums in the past, and one is presently being used to filter a Mr. Aqua 17.1 gallon aquarium.
I like to use oversized filters when possible because they have to be cleaned less often. Many new fish keepers are misled into believing that they must purchase new filter media on a regular basis, and to clean their filters frequently.
However, the reality is that in a normally stocked aquarium mechanical and biological media don't need to be cleaned very often, and can last for years before needing to be replaced.
As for chemical filtration, it is not needed unless you want to remove medications from your aquarium, or to remove certain discolorations from the water. For instance those types of discolorations caused by tannins.
I usually clean my Fluval 305 once a year (unless I have done a rescape in which it must be cleaned sooner), and find that it still has filtering capacity left at the time of cleaning.
I also use DIY CO2 injection, and use the 305 as the CO2 reactor for this particular aquarium.
When using smaller filters for CO2 reactors their impellers tend to become overwhelmed by all of the CO2 bubbles being fed into them, which causes the filter to expel CO2 gas before it can begin circulating water.
This has never been a problem with my 305 given its larger size , however, it has been a problem with the Fluval 106 that I use in another tank. Last night the cavitation of the 106's impeller became so noisy that I turned the filter off.
So if you are considering using a DIY CO2 system and want to employ a canister as the reactor, you really want to purchase a filter which is oversized for your tank.
The Fluval 305 is rated at a maximum of 70 gallons, which is more than four times the size of the Mr. Aqua 17.1 aquarium this filter is in . And while this may seem like overkill, the fact is that the 305 works perfectly in this setup. It never bogs down due to CO2 overload of the impeller, and because the filter is so oversized for this particular planted aquarium, the filter only needs to be cleaned once a year.
Fluval canisters are well designed and for the most part fairly sturdy. They can also be very expensive depending on where you purchase them.
I purchased my Fluval 305s on Amazon.com a few years ago, when they were on sale. Prior to its being replaced by the 306, many online retailers were selling the Fluval 305 for upwards of $180. I paid $120 for one unit and $100 for the other (including shipping), which turned out to be a real bargain for the 305.
The 306 usually sells for about $150 - $175 depending on where you purchase it. Interestingly enough, for awhile you could also purchase the 305 after Fluval began selling the 06 series, before supplies of the NOS dried up.
Today, it is very rare to find a NOS 05 series filter for sale, although they can be found from time to time. There is a seller on Amazon.com who has a NOS 305 at the offered price of $239.00, which has been sitting for awhile.
If the $239 price seems high, consider that when this filter was first introduced several years ago, some local fish stores were selling it for around $300!
If you use the 305 as your sole filter for years on end, you will eventually have to replace the AquaStop fitting, which warps over time and will no longer close. You will also eventually have to replace the impeller assembly (shaft, impeller, impeller cover), and the primer. However if you are careful with this filter, and gently remove its parts during a cleaning (especially the delicate impeller shaft), it should be years before you have to replace the rest of these parts.
However, regardless of how careful you are, the AquaStop fitting will have to be replaced within a few years. I had to do the same with my Fluval 106, whose AquaStop warped within a year of purchase.
Overall, the 305 has been a very good filter which I heartily recommend it to other fish keepers, with the aforementioned caveats.
UPDATE: Finally Added Some Red Cherry Shrimp To My Mr. Aqua 1.5 Gallon Aquarium
As of this month, I have been back in the fish-keeping hobby for nearly five years; after a 22 year hiatus.
During the past few years I have learned far more about this hobby than I had ever known during my initial foray into fishkeeping.
And this has enabled me to propagate a number of planted aquaria with different types of fishes.
About two years ago I started reading up on different types of invertebrates and thought that at some point it might be nice to have some dwarf shrimps in some of my aquariums.
I ended up purchasing some ghost shrimp, only to find that they are not particularly hardy, and do tend to get eaten by any fish that is larger than something like a Neon Tetra or Rasbora Harlequin.
After two attempts at keeping ghost shrimp, I decided to go with a hardier type of shrimp. The logical choice was Neocaradina, or as it is more commonly known, the red cherry shrimp.
I purchased about 12 of these little shrimp during the Winter of 2014, however, they froze to death out of carelessness by the USPS.
I felt badly about these neat little invertebrates dying in shipment, however, I was glad that I was able to receive a credit for them.
I promised the merchant that when the weather warmed up I would purchase from him again.
So a few weeks ago, I put in an order for 5 red cherry shrimp, which arrived fine. And for the past two weeks they have been growing out in my Mr. Aqua 1.5 gallon aquarium, along with about 50 guppy fry.
The other day I noticed a couple of very tiny RCS climbing on some algae, and feeding on it. They are grayish in color, however, aside from that, complete miniatures of their parents. From what I have read, RCS are, like guppies, prolific breeders. To quote one RCS owner: "Once they are established in your aquarium and feel comfortable, they will breed like cockroaches."
Which for this fishkeeper is fine, because I have 7 nano sized planted aquaria which could benefit from having RCS in them.
The only caveat here will be that I use DIY CO2 in all but one of my aquariums, and injected CO2 is risky to use when you are keeping RCS in your aquariums. However, I have read of people who do. So I will attempt to explore the possibility of keeping some of my RCS in some of the tanks that I use DIY in, in order to see if they can survive.
I will try just one at first and keep a close eye on it, in the event that it is adversely affected by the DIY CO2.
I would think that these RCS should be fine, since I use a very light mixture of DIY CO2 for each of my planted tanks, which allows for a slow and steady buildup of CO2 in these tanks.
This as opposed to using a larger CO2 mixture which results in a massive production of CO2 within a few hours, that could be very dangerous to RCS.
I will continue to update how the RCS population in my 1.5 gallon tank does, as well as how individual RCS fare once they have been transferred into some of my other planted tanks.
Earlier..
UPDATE: Using Liquid Fertilizer To Grow Your Aquatic Plants Without The Algae Blooms Which Usually Take Place In Lightly Planted Aquaria - Some Recent Photos Of Some Of My Planted Aquaria
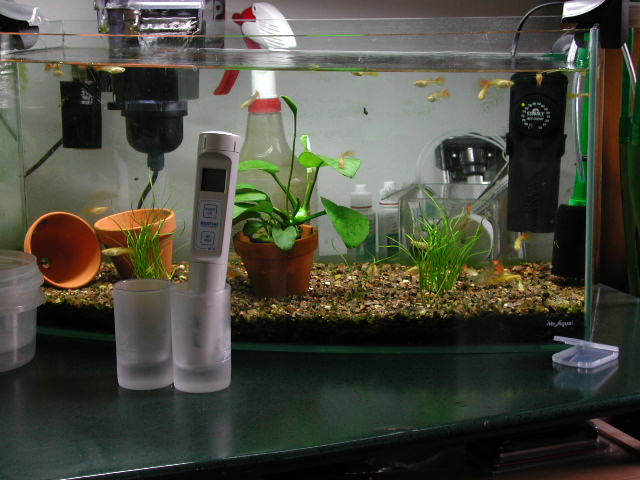
If you have a heavily planted aquarium, you are most likely using a nutrient based substrate like ECO-Complete, Fluorite , or an inert substrate and supplemental plant tabs. You are more than likely also dosing your tank with some brand of liquid fertilizer at least once or twice a week.
And your plants are growing beautifully.
However, oftentimes, liquid fertilizer is recommended for such growth by local fish store retailers, when in fact in a lightly planted tank, fertilizer root tabs would be a better choice for growing these plants, without as much concern for algae outbreaks.
The end result is an algae bloom.
It's happened thousands of times in the past to newbie aquascapers, who are interested in having a beautifully planted aquarium.
So from one fish-keeper to another, my advice to you is this:
Don't Add Liquid Fertilizer To An Aquarium That Is Lightly Planted!
Stick With Fertilizer Root Tabs!
How I wish that someone had told me that when I got back into this hobby nearly five years ago, after a 22 year hiatus. I could have saved myself so much aggravation in regard to seeing the water in my tanks turn from a nice clear color to a dark pea green!
However, this experience did turn me on to UV sterilization, which in this fish-keeper's opinion is a very worthwhile investment for any fish-keeper, whether you are maintaining a planted aquarium, or salt water or reef tank.
So what should you do if you have green water in your aquarium?
Once this green water occurs, the best way to get rid of it is to use a micron filter of some kind, in order to remove the algae from the water column in your aquarium.
If you have a dedicated diatom filter like a Vortex XL, D-1 or System I, these are your best bet. If not, use a filter that has micron media, such as a Marineland HOT 250. Or even get some micron filter pads and stuff them into the media basket on your HOB filter, and they will work too. Although not as well as with the Vortex diatom filters, since they have next to no bypass.
This fish-keeper uses a few Aquaclear 20 HOB filters stuffed with micron filter pads for polishing the water in my planted aquaria each week, and they do make a significant difference in keeping the water columns in these aquariums cleaner; including keeping algae growth to a minimum.
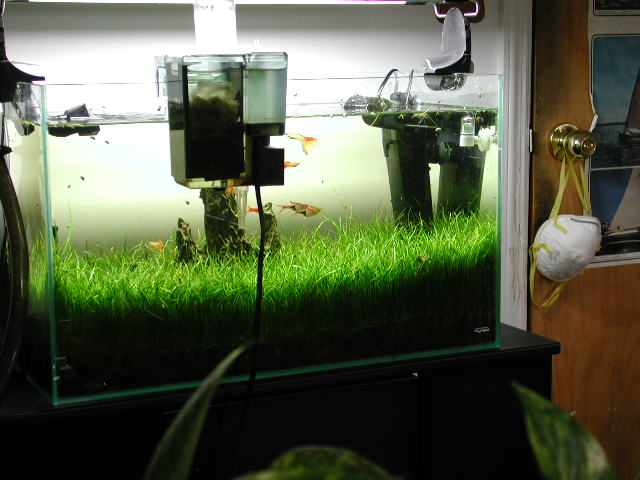
Moreover, the best way to ensure that you avoid algae blooms in the future is to make sure that you don't do anything that would contribute to them in the first place.
And that means not adding liquid fertilizer to an aquarium that is lightly planted, since it is a sure bet that the algae in that aquarium is going to feed on this liquid fertilizer before your plants do.
Instead, the fish-keeper would be much better off using fertilizer root tabs, since these are planted in the substrate so that the plants can get to them before the algae does.
There are many companies that offer these for sale. This fish-keeper uses Flourish plant tabs in the 40 count size, since I have several planted aquaria, and these fertilizer root tabs usually last about three or so months before they dissolve and need to be replaced.
If you have recently added a few plants to your aquarium, this is the most efficient way to ensure that your plants are receiving plenty of nutrients.
However, if you still insist on dosing your plants with liquid fertilizer, instead of adding it to your aquarium, remove your plants and let them soak in a sink filled with about 4 inches of tap water.
You can then add a capful of liquid fertilizer to these plants so that their root systems can absorb them. Leave them in the sink for about 30 minutes, then rinse the plants off before adding them back to your aquarium, so that algae does not form on the leaves of your plants.
Remember to stir the water with your fingers so that it is better absorbed by your plants.
This is the best way to grow your plants, while avoiding one of the main pitfalls which has turned so many would be aquascapers away from maintaining planted aquaria.
Algae Blooms!
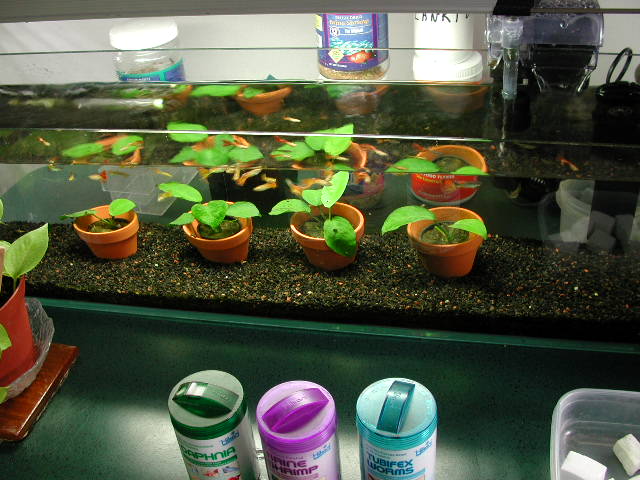
Earlier...
UPDATE: New DIY CO2 Mixture Working Well & It's Much Less Expensive Than The Older DIY Mixture
Over the past month I decided to try a different DIY CO2 mixture using 25% of the sugar that I had used in the past, to determine how much time I could get out of the mixture.
I now use 1/2 cup of granulated sugar, 1/3 teaspoon of SAF bakers yeast, a pinch of baking soda (to stabilize the PH in my aquarium water), in a 64 ounce bottle, 1/2 filled with tap water.
The results have been positive with consistent CO2 production for about one and a half weeks before I have to tinker with the bottle (read shake it a few times to get the CO2 bubbling more aggressively) before I have to change the DIY mixture.
The cost of sugar for five planted aquaria is about $45 a year plus about $12 for yeast, since I purchase both in bulk.
I use Dominos sugar and SAF yeast.
$57 annually to fuel 5 DIY CO2 systems is downright cheap When compared to the expensive mini pressurized CO2 systems offered from companies like ISTA and Fluval, which can cost up to 200% more annually.
Specifically, using the DIY CO2 method for all of my aquariums combined, costs me about 1/2 of what it used to annually to use a pressurized CO2 system for just one of my aquariums.
The only downside here is that DIY CO2 systems are not very effective once you go beyond a 20 gallon aquarium.
So it's best to use these systems with nano planted aquaria, in order to gain the most benefits, while keeping the PH swings to a minimum. Using less sugar and yeast means that you will have less intense CO2 production, however, the production will last longer since you have less sugar and yeast than with a larger DIY concoction.
In other words, using 1/2 cup of sugar with 1/3 of a teaspoon of yeast will yield a similar duration to the larger concoction before the CO2 bottle needs to be recharged. However, because you are producing lower amounts of CO2, when your CO2 bottle (AKA generator) starts running down, your aquarium will produce less of a PH swing than would be the case with the larger amount of sugar, which means less of a threat to the health of your fishes.
Overall, this is well worth noting; especially in regard to how PH swings adversely affect the health of one's fishes.
Earlier...
Setting Up The Mr. Aqua 1.5 Gallon Aquarium/Trying To Get An Old Rose Sword Plant To Grow Healthy Leaves/What To Do With A Cobalt Aquatics Neo-Therm Heater When Its Heating Coil Burns Out

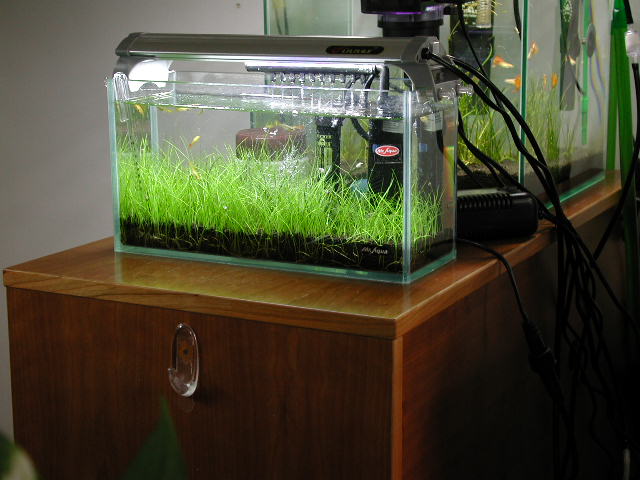
UPDATE: Aquascaping & Fishkeeping In Minature - The Mr. Aqua 1.5 Bookshelf Aquarium Makes For A Neat Tank For Keeping Your Fry In & Growing Carpeting Plants
I purchased a Mr. Aqua 1.5 gallon aquarium about six months ago and have finally set it up.
I've also recently added a 5 watt Finnex LED light fixture to the unit, and with the addition of a Cobalt Aquatics mini 10 watt heater and a TOM mini internal filter, the tank is now ready to house some red cherry shrimp fry.
I also plan on keeping some red cherry shrimp in my Mr. Aqua 7.5 gallon aquarium (along with some of my orange guppy fry) once the weather warms up and I can purchase some of these shrimp.
For the moment I am using it to house some of my orange guppy fry, as you can see in the photo.
I am also growing dwarf hairgrass and microsword in this tiny aquarium, and using DIY CO2 and Flourish fertilizer plant tabs, which have allowed these plants to carpet nicely.
Once I obtain them the red cherry shrimp will grow out some in the Mr. Aqua 1.5 until they are large enough to be transferred over to the Mr. Aqua 7.5 rimless cube, where they can co-exist with some of my guppies.
I am also in the process of getting an old rose sword plant to grow new leaves, in my Mr. Aqua 11.4 gallon aquarium, after having had to remove all of the old leaves on the plant. Most leaves were badly damaged from snails eating them. Moreover, from being cramped in a very low aquarium which I was using to breed some Panda Corys, the plant's growth had become dwarfed.
Now in a much taller aquarium, this plant has the chance to regrow its leaves and to again serve as a sanctuary for the Panda Corys which have hidden under its leaves for the past year.
Ordinarily I would not have removed all of the leaves from this plant at one time, however, virtually all of them were practically breaking off the plant, and so ridden full of holes, that they had no chance of repairing themselves.
So instead of this plant using its energy to try to fully grow these leaves, it was easier to just remove them so that the plant could put of all its energy into creating brand new healthy leaves.
It has only been a few days and I have already noticed that the plant is now growing nice green baby leaves. So this would indicate that removing all of the leaves was probably a good idea.
I will update how this plant grows, in addition to how the Anubias Barteri var. Barteri plants continue to do in three of my other planted aquaria. Thus far, they are all growing new leaves, which is good.
Earlier...

I recently added an AquaTop IFE-10 internal filter to the Mr. Aqua 7.5 gallon rimless cube aquarium.
These filters have a spray bar and a very gentle flow, which should be good for red cherry shrimp, since they like calm water.
The filter was only $19.99 including shipping, and I am intrigued by its design. So I will update what the filter is like to use, and how good a job it does in filtering this tank.
I am going to take the Eheim 2211 that I have been using on this aquarium and keep it as a backup for the three other Eheim 2211 filters that I have running on other planted aquaria, in the event that one of them needs a service.
Over the past four years since getting back into this hobby, I have come to realize the importance of having a lot of backup equipment (heaters, filters, lighting, bulbs etc.) in the event that an aquatic component fails prematurely.
All of the Aquaclear HOB filters that I had been using earlier on in this hobby are now at least three to four years old. So I keep them as backup filters in the event that any of my canister for UV/sterilizer power filters has problems.
I also use the smaller Aquaclear 20s and an Aquaclear 50 for micron filtering these planted aquaria, since the AC filters are very easy to use. I install a micro filter pad atop the standard sponge pad in these filters. The sponge pad traps the larger debris, while the micro filter pad traps much smaller particles.
I usually micron filter these tanks every week, which along with UV sterilization helps to keep the algae in these tanks under control.
For heavier cleaning jobs I use my Marineland HOT 250 canister filter with a micron cartridge. These filters are great for cleaning up a tank after you have added new plants or rescaped it. I purchased two of them this past summer when Doctor's Foster and Smith were having a summer sale, for $90 the pair - including shipping.
I purchased a second one for spare parts, since at $45 it was about 1/3 what it would have cost me to completely build a HOT 250 from scratch, by purchasing each of these parts separately.
That is why I recommend waiting for an aquatic component that you intend to use in your aquarium setup to go on sale, and buying at least two of them. This way you have an inexpensive complement of spare parts available when you need them.
More photos of the AquaTop IFE 10:


Earlier...
UPDATE: Added Another Aquatic Fundamentals' Aquarium Stand To My Planted Aquaria Setup
I always try to purchase my aquarium equipment when it's on sale, which helps to make this wonderful hobby a bit more affordable.
So when Doctors Foster & Smith recently had a sale on Aquatic Fundamentals' stands, I decided to replace one of my ageing stands (a 20 year old *IKEA kitchen cart) with an AF 55 gallon stand.
The IKEA, which is made from solid pine, has been great for supporting both myriad pieces of hi-fi equipment as well as aquariums in the past, and now serves as a plant cart as well as storage for some of the aquatic products that I use in the maintenance of my 7 planted aquaria.
The Aquatic Fundamental stands arrive in kit form, yet they are very simple to assemble.
This is my third AF stand, and without exception, the quality of materials used by AF in these stands, as well as the quality control of these stands is exceptional.
The only caveat is to wipe up any water which spills on them quickly, or you will risk having the water seep beneath the stand's powder coated surface, and cause the powder coat to bubble up.
If this occurs the water will eventually damage the fiberboard.
The 55 gallon stand has a decent amount of storage space, however, because its back is open items have to be stored towards the front of the stand.
You can also purchase a larger stand than is required to hold the weight of your aquarium, since the extra space can come in handy.
I have a Mr. Aqua 17.1 gallon tank on this stand, which also leaves room for some plants.
In this fish-keeper's opinion these stands represent the best value of any aquarium stands manufactured today.
Earlier ...
UPDATE: Using A CO2 Drop Checker TO Measure The CO2 In Your Planted Aquaria
This method of measuring CO2 in your aquarium's water column became the rage around 2007, and has since spawned many different companies who produce CO2 drop checkers.
Some are fairly expensive works of art, while other are very inexpensive utilitarian devices. However, both get the job done as long as 4 DKH fluid is used in the drop checker, along with two drops of reference fluid.
The problem with obtaining 4DKH fluid is that very few stores in the United States carry it. This has led to some fishkeepers making their own. However, there are a number of different formulas on the Internet for making 4DKH water; some of which require the purchase of expensive chemicals and ancillary equipment for used for measuring the proper amounts of these chemicals.
Most fishkeepers have surmised that it does not make sense to make such a costly investment for the limited amount of 4 DKH fluid that they will be using, so they purchase it wherever they can.
4 DKH fluid appears to be readily available in the UK, however, it this author has only it found it being sold at a few retail stores in the United States. An on occasion Ebay vendors have included what they claim is 4 DKH fluid as an addition of the CO2 drop checkers which they are selling.
This left this author wondering what to do. So I decided to check the water in each of my planted aquaria only to find that the DKH in each tank varied. It seemed that the newer the tank, the harder the water, and the older the tank the softer the water.
Anyway, I've actually found that the water in my Mr. Aqua 7.5 planted cube is precisely 4 KDH. So I washed out a 250 ML bottle that had been holding a the few drops of liquid fertilizer left in the bottle, and then fully immersed the bottle in my 7.5 gallon cube.
Instant 250 MLs of 4 KDH fluid! This would have cost about $21 including shipping had I purchased it online. So I am pleased to find that I was able to finally save some money in regard to this hobby.
Even though I have averaged around 40 % savings on most of my equipment, the hobby is still pretty costly when you are maintaining 6 planted aquaria - even if they are all under 20 gallons each.
Latest Aquariums In Use - Transitioning From Rimmed Tanks To Rimless Ones - I've Found That Mr. Aqua Rimless Tanks Represent A Good Value To The Fishkeeper Looking For A Well Made & Aesthetically Pleasing Aquarium
As of last week all of the aquariums that this author is presently running are Mr. Aqua rimless tanks. These tanks are well made, aesthetically pleasing, and represent a good value when compared to the more expensive offerings from companies like Aqua Design Amano.
My present aquarium setups are as follows:
Mr. Aqua 17.1 gallon aquarium
Cobalt Aquatics DUO 500 submersible filter/UV sterilizer
Marineland Magnum 350 canister filter
Hagen Glo 24" 24 watt x 2 T5 fluorescent lighting system with 6700K bulbs
Cobalt Aquatics Neo Therm 100 watt heater
Aquatic Fundamentals aquarium stand
(7) Rasbora Harlequins
(4) Orange Fancy Guppies
Dwarf Hairgrass & Microsword
DIY CO2
Mr. Aqua 17.1 gallon aquarium
Eheim 2213 canister filter
Cobalt Aquatics DUO 500 submersible filter/uv sterilizer
Hagen Glo 24" 24 watt x 2 T5 Fluorescent lighting system with 6700k bulbs
Cobalt Aquatics Neo Therm 100 watt heater
(11) Fancy Orange Guppies
(1) Platinum Blue Angel
(3)Red Eye Tetras
Dwarf hairgrass and microsword
DIY CO2
Mr. Aqua 13.3 gallon aquarium
Eheim 2211 canister filter
AquaTop PF15UV uv sterilizer/hob filter
Fluval E 100 100 watt heater
(50) Orange fancy guppy fry
Dwarf hairgrass & microsword
DIY CO2
Mr. Aqua 12 gallon tank
Eheim 2211 canister filter
AquaTop PF15UV uv sterilizer/hob filter
Hagen GLO 36" 39 watt x 1 T-5 light
Cobalt Aquatics Neo Therm 75 watt heater
(70) Orange fancy guppy fry
Dwarf hairgrass & microsword
DIY CO2
Mr. Aqua 11.4 gallon aquarium
Eheim 2211 canister filter
AquaTop PF15UV uv sterilizer/hob filter
(2)AquaTop Nano Type P LED lights
Cobalt Aquatics Neo Therm 75 watt heater
(7) Panda Cory catfish
Rose sword plant
Mr. Aqua 7.5 gallon aquarium
Eheim 2211 canister filter
AquaTop PF15UV uv sterilizer/hob filter
(2) Fluval CF 13 watt lights
Cobalt Aquatics Neo Therm 50 watt heater
(3) Orange fancy guppies
Dwarf hairgrass & microsword
DIY CO2
Earlier...
UPDATE: Hatching Brine Shrimp Eggs In Under Two Hours! This Is How Long It Takes Me To Hatch Brine Shrimp Eggs With My New BBS Hatchery
Having tired of the San Francisco Bay Shrimpery's erratic hatching, due to the inability to place a heater in the Shrimpery, this author decided to create a new BBS in-tank hatching system.
I purchased a new Whisper 100 air pump with dual outlets, then ran *twin air lines into my aquarium. These air lines are each attached to a small plastic bottle with a central hole for each air line, and then some ventilation holes.
The bottles are both under 1/2 an ounce in size.
* I have included an air control valve and check valve on each air line as well.
When it comes time to add some BBS eggs, I add a pinch of eggs, a pinch of marine salt and a pinch of baking soda to each container. Then I leave them to hatch.
The process consistently takes under two hours for most of the these BBS eggs to hatch and within another few hours all of the eggs have hatched.
This is extremely important if you want to hatch BBS eggs and feed them baby brine shrimp to your fish the same day.
It's also important to purchase good quality BBS eggs, and to freeze the ones you aren't going to be using for several months.
This will ensure that they are fresh when you eventually do decide to use them.
San Francisco Bay BBS eggs are a good quality and can be purchased in a premixed package with salt, or in small vials, where the salt must be added separately, and mixed with the BBS eggs as they are withdrawn from these vials. There are companies that sell much larger containers of BBS eggs, however, they are expensive. Yet, if you consider how many more BBS eggs you receive in these larger containers, they are a better value than the vials or hatch packets that *San Francisco Bay sells.
This author is unaware if San Francisco Bay sells larger containers of BBS eggs, so the reader may want to investigate this for themselves.
Using An Aquaclear 20 As A Two Stage Mechanical HOB Micron Filter
I have found that the best way to micron filter an aquarium for purpose of water polishing is using some Aquaclear 20 hob filters; specifically, using the sponge that Aquaclear includes for mechanical filtration, in conjunction with a polishing filter pad and a Fluval pre-filter on the intake tube of the AC filter.
The micron filter pad goes at the top of the media. For example, I use two stage mechanical filtration in my Aquaclear 20: A 25 micron filter pad and then the Aquaclear mechanical sponge at the bottom of the media basket. On occassion I also attach a Fluval pre-filter to the intake tube on my Aquaclear 20.
This way the pad which filters the larger particles catch them before they reach the smaller micron filter, which allows this filter to do its job more effectively, by preventing it from clogging prematurely.
Each filter pad is then working optimally, creating an efficient mechanical filtering system.
I am presently using Aquaclear 20s for micron filtering my planted aquaria, which each have a maximum output of 100 gallons of water per hour.
For a faster micron filtering I also have Aquaclear 50, 70, and 110s available.
The AC 50 is good for 200 gallons per hour, the AC 70 for 300 gallons per hour of water flow and the AC 110, a whopping 500 gallons per hour capacity!
What I like most about these micron filter pads is that they can be used in virtually any aquarium filter and repeatedly. Even better, if you have some older aquarium filters that you've since replaced with others that are now just laying around, they can be used as dedicated micron filters.
Imagine having the ability to achieve nearly the same results that you do with a Vortex diatom filter without the mess, nor the time consuming factor involved in using and cleaning these filters!
This author has found that there aren't too many aquarium stores that sell micron filters under about 15 microns in size. And most filter pads are a bit larger. However, wineries carry "sterile" pads as fine as 0.5 microns in size, which work well for polishing the water in one's aquarium.
And they usually sell for a few dollars a piece.
However, they fall apart after a few uses, which makes them impractical for aquarium use.
As such, it is best to use the type of micron filters that Marineland sells for its canister filters. You just fold them over and insert them into the basket on your hob filter.
The nicest thing about using an Aquaclear hob filter for micron polishing is its simplicity. It takes less a minute to setup, and cleaning is a breeze.
The Magnum HOT 250 and 350 filters are still a fairly quick setup, however, not nearly as quick as the AC filters.
As for the Vortex D-1 and XL filters, they take by far the longest times to setup and breakdown for cleaning. However, even though their technology is nearly 50 years old, they still do a superb job of water polishing.
So I plan on using each of these filters in combination with the AC hobs to obtain the best results.
Earlier...
Since replacing them with AquaTop HOB filter/UV sterilizers, I have several Aquaclear power filters sitting around; including 4 AC 20s, and AC 50, AC 70 & AC 110.
As you may have surmised by now, I really like Aquaclear filters for their media loading flexibility. In fact, I wish that Hagen would incorporate uv sterilizers into these filters as AquaTop has done with four of its HOB filters, since these uv sterilizers really do help to keep the water columns in my planted aquaria crystal clear.
Thus far, AquaTop has cornered the aquatic market here, since no other company manufactures an hob filter with a built-in uv sterilizer.
A bit of helpful trivia is in order here regarding AC filters.
With the exception of the Aquaclear 110, all other AC filters, including the 20, 30, 50 and 70 use the same electric motor and impeller. It is only the impeller fans which graduate in size from the AC 20 through the AC 70.
And you can substitute the fans from one size filter to another, to either increase the number of gallons the filter pumps per hour, or decrease them.
For instance if you have an Aquaclear 20 laying around that you aren't using, and find that the Aquaclear 70 (this can also be applied to the AC 30 or 50) is simply too powerful for the aquarium you are using the AC 70 on, you can remove the impeller from the AC 20, and add it to the AC 70. This way you have greater filtering capacity than you would with the AC 20, however, with less water flow than you would normally have when using the AC 70 fan.
At first I was thinking of using the AC 20 as a refugium with live rock, however, upon further consideration decided not to, since live rock will not survive indefinitely in fresh water. It will also leach into the water column, and thus raise the PH and water hardness in a fresh water aquarium.
Instead, I attempted to use this AC 20 as an HOB diatom filter.
I cut two fabric pads from a Vortex D-1 diatom filter's fabric insert, and placed them in the AC 20's media compartment.
However, there was far too much bypass in the AC 20 for it to be used as a diatom filter, even though the diatomaceous earth did collect on the fabric pads I placed in the AC 20's media compartment.
I have since decided to use the AC 20 with micro filter pads, in order to polish the water in my planted aquaria; since micron filter padding can be purchased down to about a half micron in size - and in larger sizes as well; ranging from about 1 micron to about 50 microns. Once you go above 50 - 75 microns, you've moved beyond water polishing and are dealing with filters that collect larger particles from your aquarium's water column.
These filters are for long-term use, unlike the micron filters which clog quickly - especially if your aquarium water is really dirty.
In addition to the regular canister and HOB/UV sterilizer filters which I use on each of my aquariums, I also have some filters that are strictly for heavy duty tank maintenance - including two Marineland Magnum HOT 250s and a Vortex XL diatom filter.
As I stated earlier, I have already purchased a few 25 micron pads, so that the AC 20 will offer similar benefits to a diatom filter. The real benefit of a diatom filter, is that diatomaceous earth filters particles from the water column in your aquarium, down to 1 micron in size.
A 25 micron filter pad does the same thing (only not quite as good because it filters out particles that are 25 times larger than the size of the 1 micron filter) however, without the mess of having to deal with diatom powder.
I rarely diatom my tanks anymore, instead micron filtering them weekly with my AC 20 micron filters.
However, from time to time I will still use both types of filtration to obtain the best results.
Earlier...
br>
UPDATE: Consistency In Hatching Brine Shrimp Eggs By Locating Your Brine Shrimp Hatchery In Your Aquarium m- A Nice Affordable Brine Shrimp Hatchery That Works Everytime
In my last post, I described the difficulty I'd been having in obtaining a consistent hatch rate using a San Francisco Bay Shrimpery brine shrimp hatchery.
The concept behind the Shrimpery is sound - the BBS eggs hatch in the dark container, then the free swimming newly born baby brine shrimp swim up into the freshwater container attached to the top of the Shrimpery.
The only real shortcoming with this is that it is difficult to maintain a consistent temperature with the Shrimpery, and this adversely affects the BBS hatch rate.
Consequently, I have found that it makes more sense to place your BBS hatchery in your aquarium, where the water temperature is made more consistent through the use of an aquarium heater.
Hatch rates improve substantially, and much faster. This author has consistent BBS hatch rates daily, and within 12 hours of placing the BBS eggs in the hatchery.
This means that my tropical fish - Rasbora Harlequins, Orange Fancy Guppies, Red Eye Tetras, Panda Corys, and my lone Platinum Blue Angelfish, Goldman, have live baby brine shrimp as part of their daily feeding.
There's also no need to enhance the nutrition of the BBS with Selcon or some other additive, since the egg sags are still attached to the baby brine shrimp, making them far more nutritious than they are after 24 hours of hatching.
This is why I feed them to my fish within this critical 24 hour period.
While the Fluval 88 Gram CO2 bubble counter works very well as a mini BBS hatchery, I have found that it makes more sense to use larger containers.
I use two: a .42 ounce plastic plankton bottle, whose top I have drilled to accommodate an airline, along with a few ventilation holes; and the small container which came with Shrimpery. I use both of these containers as BBS hatcheries each day, and they provide enough baby brine shrimp for all of the fish in my 6 planted aquaria.
As soon as I feed the BBS out, I reload the containers with a pinch of marine salt, a pinch of baking soda, and a pinch of BBS eggs. This combination, along with a constant water temperature, has significantly improved the BBS hatch rate over the Shrimpery - whose hatch rate was at best, erratic.
I have read of some fishkeepers' concerns over the high price of BBS eggs. This is especially true if you are feeding your fish BBS on a daily or regular basis.
For this reason, it makes more sense to purchase a larger size container of BBS eggs, and from a quality source such as San Francisco Bay or the company that collects eggs from Salt Lake in Utah.
You store these containers in the freezer, and remove just the BBS eggs that you will need to use for a week at a time, in order to ensure that the rest of the eggs remain fresh for quite some time.
Earlier...
Update: I Purchase A New Vortex XL After My 33 Year Old Vortex D-1 Stops Functioning - Out With The Old And In With The Old
Up until last week the electric motor on my Vortex D-1 was functioning fine.
That is, until I removed its top cover to clean in innards of decades of dust bunnies.
Now, this motor is getting power (it makes noise when it's plugged in), just not spinning. What's strange is that the fan which attaches to the motor shaft spins without any effort at all.
I have no idea what Vortex would charge to repair the D-1, however, it's probably a lot more than the unit's worth. So I'm just going to keep it as a paperweight - conversation piece of fishkeeping history.
Moreover, given that my D-1 is more than three decades old, and that I paid about $75 for it back then, the filter owes me nothing. Besides, the D-1's plastic casting and impeller are also well worn.
So, I decided to treat myself to a new diatom filter. This time around, a Vortex XL. I really like the design of the *Vortex filters and there's nothing else like them when you want to diatom the water in your aquarium quickly.
* The only other dedicated diatomaceous earth filter that this author knows of is called the System I. However, it hasn't been produced in years, and they can be difficult to find on the used market.
I have, however, seen two on Ebay recently. One was sold for about $30 plus shipping, and the other - which is being advertised as New Old Stock - is presently being auctioned on Ebay with a starting bid of $60.
Based on what I've read, the System I is a well designed diatom filter which doesn't need external hosing to operate (unlike the Vortex diatom filters which use a 4' pair of 1/2 hoses for their intake and output tubes.
As for my new Vortex XL diatom filter, the XL has one feature that works considerably better than that of the D-1; it's mason jar cap. With the D-1, you have to screw the plastic cap onto the top of the D-1's mason jar, which never seems to seal properly; no matter how much you tighten it.
This author even cracked two mason jars (including the original Kerr glass jar)for my D-1, by using a monkey wrench and plastic band wrench to tighten them. In my opinion, the sealing system on the D-1 is a poor design.
However, the cap on the XL contains six thumb screws which do a much better job of sealing the cap to the XL's mason jar. Just remember not to over tighten them. I was using my new XL for the first time the other day, and unlike my D-1, the XL did not leak. Other than that, the XL works just like the D-1, except that it's a bit more powerful. And the motor on my XL seems quieter than the one on my D-1 ever was.
I also own a few Marineland Magnum HOT 250s which are very easy to use. The HOT 250's micron filter is about 8 microns and does a nice job of keeping the water in my aquariums clear. However, it doesn't compare to the polishing job that the Vortex D-1 and XL do with their ability to filter out particles as small as 1 micron (1 millionth of a meter).
That is, unless you decide to use the HOT 250 as a diatom filter. Yes, you really can use the *HOT 250 as a diatom filter. You prime it in much the same way you do with the Vortex filters, except that you don't have to turn the HOT 250 upside down first.
* You can also use a Marineland Magnum 350 as a diatom filter, when installing the micron filter. Just charge it the way you would a Vortex D-1 or XL diatom filter.
Just don't expect to get the same water flow as you do with the Vortex filters, since the impeller on the Magnum 350 is much smaller than the impellers on the D-1 and XL; both of which share the same impeller design.
What's also nice about the HOT 250 is that you can *turn it off and then back on again without the diatom powder getting blown back into your aquarium. If you turn the D-1 or XL filters off, you must crimp the end of the exhaust hose and let the filter run for a few minutes to get the diatom powder to attach to the fabric insert in these filters, before you unclamp the exhaust hose.
* You can do this once or twice in rapid succession. However, if you try it too many times, the HOT 250 will blow some of the diatom powder back into your aquarium.
If you fail to crimp the exhaust hose on the Vortex filters, you will blow quite a bit of the diatom earth back into your aquarium. It's not a big issue since the powder will be removed once these filters are running for any length of time. However, it can be annoying.
As for the HOT 250's performance as a diatom filter, it actually works quite well, however, with one caveat.
The motor in the HOT 250 is not nearly as powerful as those found on the D-1 and XL. As such, the HOT 250's water flow - once the diatom powder has collected on the HOT 250's micron filter - is about what one would find after the D-1's fabric filter is roughly 75% clogged with detritus. There's still ample flow, however, not nearly as much as when the filter pad is completely clear.
Moreover, in a small tank, this turns out to be an advantage, since your fish will not be disturbed by the greater turbulence of the Vortex filters.
I was able to diatom five of my six aquariums - ranging in size from 7.5 to 20 gallons - before the HOT 250 needed to be recharged.
However, as for using a HOT 250 to diatom an aquarium that's more than about 30 gallons or so - forget it. Since it would take days to do with the HOT 250, what a Vortex D-1 or XL would be able to accomplish within a few hours.
I plan on using my Vortex XL as a high speed diatom filter to clean my 20 long and 17.4 gallon aquariums with quickly. The rest of the time I'll use HOT 250 for them, and the Magnum 350 for the Panda Cory tank.
I'll use the *HOT 250 to diatom my smaller aquariums, since it really does just as good a job as the Vortex filters. It just works much, much slower.
Warning!
Something that I don't recommend doing with the HOT 250 is to attach a plastic hose it its intake tube for the purpose of using it to vacuum your aquarium's substrate, if the substrate is comprised of sand. If the substrate is made of gravel this should be fine. Just not sand.
The sand will get into the impeller on the HOT 250 and seize its motor. I had this happen with a two week old HOT 250. Fortunately, I purchased it on sale, and the parts I was able to save from this filter after tossing the motor and container still amounted to about $100 when purchased separately. I only paid $47.99 for this filter during Doctors Foster & Smiths' summer sale.
I decided to buy another HOT 250 since I now had some replacement parts, and since the aforementioned store was still having a sale ($44.99 this time around) for the HOT 250, I decided to purchase two of them, in addition to a Marineland Magnum 350 canister filter.
I will use the Vortex XL as an "antique" given its nearly 50 year old design. That means using it sparingly.
Earlier...
I have owned a Vortex D-1 diatom filter since 1981, and it remains the best mechanical filter I have ever used.
I presently use several Aquaclear filters on different aquarium setups as well as a few Eheim and Fluval canister filters (all of which do a fine job of filtering my tanks), however, the water is never as clear as it is when I use the D-1 (the XL is just a larger version of the D-1 with a greater filtering capacity).
As good as the other filters are, a few days after diatoming my tanks the water loses some of its clarity. However, once I run the Vortex D-1 again, the tanks become crystal clear.
Over thirty years I have replaced the hoses, u-shape connectors and mason jar, however, the motor assembly, including its casting and original jar cap remains the same. One of the people commented on this review list, that the new Vortex motors are not as well made as the earlier ones, however, I have no way of knowing if that is really the case or not.
What I can say is that the electric motor on my 1981 Vortex D-1 is built like a tank. All it requires is back flushing it when you change the diatom powder, and a little bit of electric oil a few times a year.
As for Vortex's claim that the D-1 and XL can be used as full time filters for your aquarium, this author has found that while you can do so, these filters don't offer the ever important biological filtration that is necessary for good aquarium health. Moreover, the fabric clogs easily, which will require far more frequent cleanings than the standard HOB or canister filter.
As such, I would only use the Vortex for polishing your aquarium's water, in which case it can go for months before needing a cleaning.
However, the Vortex can also be used for heavy duty tank cleanings, such as stirring up your substrate, or removing the occasional green water that many fish-keepers experience, provided that you are willing to clean the filter right after you have used it.
Many aquarists claim the Vortex filters are a pain to set up. However, if you have a few of the necessary tools, this can be accomplished easily.
An adjustable monkey wrench and rubber band wrench can be used to remove the Vortex's cap from the Kerr mason jar.
When replacing the cap, remember to coat the plastic threads on the mason jar with a little bit of water (and make sure to remove any diatom powder which has become caked under the cap), since this will make it easier to tighten the cap on the mason jar.
When you put the Vortex intake and exhaust tubes into your aquarium, make sure that the intake and exhaust strainers are also inserted into these tubes.
Then, turn the D-1 on and turn it upside down for about 10 seconds. Then turn the D-1 right side up again and off. Allow it to sit for about 20 seconds, and then turn it back on for about 30 seconds to expel any air that's left in the hoses and canister.
While the D-1 is still running, get a small bucket - about a half gallon will do - and place it in your aquarium so that the D-1's intake and exhaust tubes are in the bucket, and the bucket's top edge is above the surface of your aquarium's water. This will prevent any diatom powder from entering your aquarium once you charge the fabric filter in the D-1 with diatomaceous earth.
Remember that the pad isn't the filter - the diatom earth attached to the pad is.
Now, before you add the diatom earth remember to put a mask on, since breathing in diatomaceous earth, can cause irreparable damage to your lungs.
Once you've donned your mask, remove the intake strainer from the intake tube on the D-1 and gradually begin to add about a cup of diatomaceous earth to the bucket that you have the tubes resting in.
The water will turn white as the diatom powder swirls around in the bucket.
Within a few minutes the water in the bucket will turn clear, and you can then carefully remove the bucket from your aquarium; making sure to reinsert the intake strainer before you do (to prevent your fish from being harmed by the suction of from the intake hose).
You're now ready to diatom your aquarium.
Moreover, now that the Vortex D-1 is primed you can move it from one aquarium to another by lifting the top bucket and moving the *lower one which contains the diatom filter with your foot, until you've reached the tank that you want to diatom.
You will keep the D-1 primed by using the priming crimp that comes with the D-1 to crimp the end of the output hose before you place it into the next aquarium that you are going to diatom.
Once you have done so, you remove the priming crimp as well as the upper bucket from the aquarium.
* It's always wise to place the D-1 in a bucket in the event that the D-1 starts to leak.
This setup sounds more involved than it really is, and becomes intuitive over time. Once you get the hang of it, you will be able to diatom each of your aquariums as often as you like. Usually a few times a week on problem tanks or weekly or twice on a month on tanks without any algae, viral, or bacterial, in order to keep the water column in your aquarium healthy and crystal clear.
If you are going to do heavy duty clean ups with your Vortex D-1 or XL, use these filters without diatom powder, since you will be able to run them much longer before they clog with detritus.
The Vortex diatom filters may be quirky and a pain to use, but they are still the finest high speed mechanical filters ever made, which is why this fifty year old technology remains the best for its intended purpose.
Vortex maintained aquariums are crystal clear and free of many of the harmful microscopic pathogens that can kill your fish.
This alone makes these filters indispensable for the fish-keeper.
Earlier...
UPDATE: How To Fix A Noisy HOB Filter - The AquaTop PF25UV And PF40UV HOB UV Sterilizer Power Filters - Long-Term Update
If you have ever used an HOB (Hang on the back of your tank) filter in an aquarium that has a sand substrate, if you leave your HOB filter on when agitating this substrate during a cleaning or replanting, you will eventually get sand into your HOB filter's electric motor.
When this occurs, you will hear a grinding sound as the sand gets caught between the electric motor's housing and its magnetic impeller.
While this situation can often resolve itself, there are times where the damage to the impeller and motor are bad enough that it requires that they be replaced.
I had this happen with an Aquaclear HOB 50. I eventually just tossed the motor and its impeller (both of which were rusting out) and replaced them a new motor assembly.
However, there are times where the damage is not severe enough to replace the impeller or the motor. In such cases, a non toxic lubricant used to coat the inside of the motor as well as the magnetic impeller itself, can often remedy this problem.
When I experienced this situation with my AquaTop PF40UV, I found that using olive oil did nothing to remedy the problem. However, a liberal coating of petroleum jelly did the job. The AquaTop's motor has been quiet ever since.
If you keep these filters long enough, you will eventually have to replace their impellers. You may even have to replace their electric motors, depending on how long they have been in use, since these motors are little work horses that operate 24 hours a day for years on end.
However, prior to the need for such replacement, a non toxic lubricant is your best bet.
I noticed early on that the Aquaclear filters I own had some common parts, including their electronic motors and impellers. In fact, the only difference between the Aquaclear 20, 30, 50 and 70 motors is the size of the impeller fan.
Each larger filter has a correspondingly larger impeller fan. However, the impellers and motors for these Aquaclear filters are identical. That is, except for the AC 110, which uses a completely different motor.
As for those AquaTop power filters that include a uv sterilizer bulb, there are three: The PF15UV, PF25UV, and the PF40UV. While the PF15UV has no parts in common with the latter two filters, the PF25UV and its PF40UV sibling do share some parts.
Specifically, these filters have the same uv sterilizer fitting, 7 watt bulb, and power supply unit for their uv bulbs. They also use the same water intake tube. And while the PF40UV's electric motor is slightly more powerful than that of the PF25UV, the motor is identical in size to the one used in the PF25UV. So they are also interchangeable.
I have had my PF25UV for almost 14 months now and really like the job it does in keeping my aquarium's water crystal clear.
I have also been using a pair of PF15UV's and a PF40UV, and am equally impressed with their performance.
For the money, you can't beat these filters, given that they offer the benefits of both a uv sterilizer and a two stage filtration system.
Earlier...
UPDATE: Using The Marineland Magnum HOT 250 As A Diatom Filter
As luck would have it, I recently disassembled my 33 year old Vortex D-1 diatom filter in order to replace some parts and clean the inside of the motor, and now the motor will not spin. The D-1 motor turns on when it's plugged in. It just won't spin.
So I am going to have to troubleshoot it when I get a chance. I may even purchase another one, or even an XL model this time around, since I really need a diatom filter for my shorter tanks.
The Magnum HOT 250 is fine for my taller tanks, however, it's too tall for the planted aquaria I maintain which are less than a foot in height.
In my last post I described how well the HOT 250 worked in cleaning up my 20 gallon long tank, after doing a replanting.
I was using the 8 micron filter at the time and wondering if the HOT 250 could actually be used as a diatom filter; adding diatomaceous earth to the micron cartridge in the same way I add it to the Vortex D-1's fabric insert.
Sure enough, I found a few posts on the Internet from fish keepers who'd decided to try the HOT 250 as a diatom filter, finding that it worked quite well.
Now if you want to get an idea of how significant the difference between 8 microns and 1 micron is, try using the HOT 250 with just the micron cartridge first, and then add diatomaceous earth to it. You'll notice that the flow with the diatom powder is significantly lower than it is with the HOT's 8 micron filter.
This proves that there's nothing better for polishing (fine filtering) the water in an aquarium than diatomaceous earth.
It also shows that diatomaceous earth should only be used for polishing the water in an aquarium, and not for doing heavy clean up jobs which would clog the filter's 1 micron media very quickly.
One caveat when using the HOT 250 with diatom powder: The HOT 250 does not have nearly the flow of the Vortex D-1 when using diatom powder, which in this case is fine for my smaller tanks; since my aquariums are all 20 gallons and under, and would be overwhelmed by the strong flow of a HOT 250 with its micron or standard filter cartridges. However, if you were to use the HOT 250 on a larger aquarium - say 30 gallons and up - it would take quite sometime to diatom it. So your money would be better spent on a dedicated diatom filter like Vortex's D-1 or XL.
Yet, if you just want to use the 8 micron filter that comes with the HOT 250, it should be good for polishing the water in a tank up to 55 - 60 gallons in size, within a reasonable amount of time.
However, you won't be able to filter out pathogens like ICH with the 8 micron filter, unless you are coating it with diatom powder first.
Overall, I really like the flexibility of the Magnum HOT 250. Especially since you can remove the media and dump the dirty water from the filter into a bucket, without having to take the HOT 250 itself, to a sink.
Something else that I like about the HOT 250 is that unlike the Vortex D-1, you can turn the HOT 250 off and let it sit overnight without having to worry about the 250 blowing diatom powder back into your aquarium the moment that you turn it on again.
This was always a problem with the D-1, since the diatom powder would drop off the fabric insert on the D-1 and fall to the bottom of its mason jar. When you would turn the D-1 back on, before all of the powder could adhere back on the fabric pad for the D-1, quite a bit of it would get blown back into your tank.
What I also like about the HOT 250 is that you can remove the micron filter within 30 seconds, clean it in under a minute, reinstall it in about 30 seconds, and in about two minutes be ready to continue filtering your aquarium.
Overall, the HOT 250 is a simple, well though out design that has quite a bit of flexibility incorporated into it. And the HOT 250 chassis itself, is very light weight and easy to handle.
One of the nicest features is that the HOT 250 has an on/off switch which comes in very handy when moving it from one aquarium to another.
As for those who have claimed that the HOT 250 uses too many parts and is too confusing to use, I have not found this to be the case at all.
In my experience, the HOT 250's assembly instructions are straightforward, and its design is both clever and clean - with a reasonable number of parts.
As for parts, I would make certain to purchase some spares for this filter, including extra micron cartridges, an impeller, and the two washers which attach to the HOT 250's impeller shaft.
Given that the HOT 250's been on the market for more than a decade, virtually every part of this filter is carried by pet stores who sell Marineland products.
However, in this author's opinion, if you can get the HOT 250 at a good price (I paid $47.99 for mine at Doctors Foster and Smith), buy two of them, and keep one for spare parts. It's a lot less expensive than having to rebuild a HOT 250 by purchasing each part for it separately.
Highly recommended!...
UPDATE: Marineland Magnum HOT 250 Arrives Today!
As I stated in my last update, I've contemplated the purchase of a Magnum HOT 250 for a few years now. However, I've always felt that it would be too powerful to use as a full time aquarium filter.
And based on the grunt that this filter has, I was right to be concerned.
I can see why some people with decent size tanks (one fishkeeper with a 55 gallon tank comes to mind), really like the HOT 250. There's something completely utilitarian about this thing.
It is also cleverly designed, fairly well constructed, and very practical in that it can be used as both a full time filtration system, as well as micron filter which can be used once or twice a month for polishing the water in one's aquarium.
It is definitely a filter that has stood the test of time, and has many admirers; albeit, the HOT 250 also has its detractors as well. However, most of these people appear to have gotten a lemon, which left its negative impressions.
That aside, and given my limited use of the HOT 250, I find that the 250 is better suited to polishing the water in my planted aquaria from time to time, and heavy cleanups when the substrate is stirred up doing replanting, or removing outbreaks of algae - which in spite of the use of my AquaTop uv sterilizers, still does occur to some extent from time to time.
However, not nearly as much as it did before I invested in uv sterilization.
And the water remains crystal clear with the uv sterilizers; the problem being the algae which grows on the dwarf hairgrass and microsword. The HOT 250, like all aquarium products, it seems, varies quite a bit in price depending on where you purchase it. And for this reason it pays to shop around - especially if you're looking to obtain this item over the Internet.
However, for $47.99 including shipping, the Magnum HOT 250 is worth ever penny. It's a workhorse with quite a bit of flexibility.
I plan on using the HOT 250 in conjunction with my other workhorse - a thirty something year old Vortex D-1; a diatom filter which this author purchased in my youth, and my foray into this wonderful hobby.
Earlier...
UPDATE: Long-Term Update Of The Eheim 2213 Classic Canister Filter
About a year and a half ago, Big Al's online was having a sale on the Eheim 2213. They were selling for $69.99 a piece, so I purchased two.
Overall, I really like these filters. Especially since the 2213 is the only Classic model which comes with a media basket to hold the 2213's filter media.
This enables the user to rinse the basket under filtered water, without having to actually remove all of the media by hand, clean it, and then add it back into the canister.
I have found that the 2213 does an excellent job of keeping the water in my planted aquaria clean. And the 2213 does have more than adequate output flow for a 20 gallon aquarium. I had one of these filters on a 37 gallon and found that the water was not as clean as I would have liked. So I added another 2213 which resulted in crystal clear water.
This was before I began using uv sterilizers in my planted aquaria.
I think that the single 2213 would have been fine in the 37 gallon tank, had it been used with a uv sterilizer.
As for the durability, this is where the review gets interesting.
Especially since I own two Eheim 2213's.
One has stood up quite well over time, while the other filter began to leak from its intake fitting on the bottom of the canister.
The bottom line was that I ended up tossing the canister section (which turned out to have a small hairline crack in it), and just kept the 2213 motor as a spare for my other 2213.
I also own three Eheim 2211's for some of my other planted aquariums, and thus far they are working quite well. For about $63 including shipping, they are a bargain. And their diminutive size and light weight make cleaning their media a pleasure.
The other shortcoming of the Classic series pertains to the valve taps Eheim includes. They are a great idea which makes cleaning these filters so much easier than it was in the days before these tube inserts existed.
However, they have a tendency to leak over time, which can result in a significant spill if you are not careful to examine them at least once a week.
That aside, this author really does find the Eheim Classic series to be a fine aquarium filter that continues to age gracefully.
If you decide to purchase an Eheim Classic, prior to installing it, make certain that the intake fitting on the bottom of the filter is tight (but take care not to over tighten it, or it will crack the canister). For some reason Eheim does not tighten this fitting from the factory, so if you fill the canister with water and then run it before tightening this fitting, the canister will leak onto your floor.
On an aside, Doctors Foster and Smith is having a sale on the Magnum HOT 250 canister filter this week $47.99 (including shipping if you add an inexpensive item to get you to the $49 mark - I added a bottle of brine shrimp eggs), so I decided to purchase one. I've wanted to try a HOT 250 for a few years now, but did not want to spend $60 or $70 on this filter. Especially when some of the owners of the HOT 250 have stated that it isn't worth more than about $30 or $40.
So I will document my experiences with this filter after I install it.
I have now counted at least 7 Panda Cory fry (there may be more hiding in my plants), and I am estimating that there are at least 80 fancy guppy fry who've been born over the past six or so weeks.
I am hatching out live baby brine shrimp for them every few days, and feeding them fry food as well. Some of the fry are now large enough to consume regular fish foods such as flakes, and freeze dried foods such as brine shrimp and tubifex worms.
Overall, watching these little fishes grow out is very enjoyable. It also beats having to spend money purchasing new fish, when you can get the fish that you already have to make more for you for free!
What a great hobby fishkeeping is!
Earlier...
UPDATE: Panda Cory Fry Coming Out Of The Woodwork!
Over the past few weeks I have noticed several more Panda Cory fry in my Glasscages 1/2 15 acrylic aquarium.
I have counted at least seven, and there maybe even more that are still hiding out in the Rose Sword plant. They are of various sizes, so the female must have laid her eggs on more than one occasion. She is plump now, which tells me that she may be ready to lay more of her eggs soon.
The oldest of the fry, the first one I spotted about a month ago and nicknamed Skipper, is at least twice the size he was when I first saw him. And there are two other fry who are about the same size as Skipper was when I first saw him.
There are other fry, some so tiny, that they can't be much more than a week old.
They have the typical mannerisms of this type of fish. They're very peaceful, gregarious and enormously fun to observe in their own environment.
I am pleased that the Glasscages' tank has been a successful venue for them to propagate in. This tank isn't going to win any aquascaping contests, however, it does a nice job of offering these fish a nice place to live; with plenty of cover from the T-5 lighting.
Will update on the growth and number of these charming little fish soon.
On an aside, the two Java Fern plants I purchased some months back have given me about 60 new plantlets thus far, which are now rooted in the substrate of the Glasscages 1/2 15 tank.
I plan to grow them out using 3.2 watts of T-5 lighting, using various kelvin bulbs. And I may eventually add DIY injected CO2.
I have never owned Java Fern in the past, so I am looking forward to experimenting with this plant to see how it does in a high-tech tank.
Earlier...
UPDATE: Rescaping My Aqueon 20 Long With Some New Dwarf Hairgrass & Microsword
After more than three years of using this aquarium to grow out dwarf hairgrass and microsword for several of my planted aquaria, the dh and ms in this tank developed a chronic case of black brush algae.
The water column itself was nice and clean, however black brush algae had thoroughly infested the ms and dh to the point where it was growing on their surface and preventing them from growing the way they should.
So, since I have four other tanks with dh and ms in them, I decided to tear out the infested dh and ms, diatom the Aqueon 20 long with my Vortex D-1 and plant some dh and ms from the Mr. Aqua 13.3 gallon in the 20 long (which got its dh and ms from the 20 long in the first place!).
So far the dh and ms is growing well, however, a bit of bba is still apparent. So I will have to prune these plants regularly to get rid of the bba.
Earlier...
UPDATE: Long Term Use Of The San Francisco Bay Shrimpery BBS Shrimp Hatchery
In fishkeeping, sometimes you find a product which is so inexpensive, simple, yet clever in design, that it quickly becomes a treasured part of the equipment which you regularly use in this hobby.
A few years ago, when some of my female guppies began having fry, I purchased a San Francisco Bay Shrimpery which was on sale at Big Al's online pet retailer.
The Shrimpery came with three packets of San Francisco Bay baby brine shrimp for about $6 and change. And it has been worth every single penny.
I use the Shrimpery for hatching BBS constantly when my fishes are having fry, like they are right now: my Mr. Aqua 12 long must have at least 50 guppy fry of various sizes, and my Glasscages.com 1/2 15 gallon aquarium has a pair of Panda Cory fry swimming around in it.
This means the Shrimpery will have to be up and running producing BBS several days a week, since I also supplement these fry with Spectrum and Hikari fry foods. That is in addition to the foods they find readily swimming in these aquariums.
So these little fish eat quite well.
When the fry have grown out they will still enjoy some freshly hatched BBS once or twice a week as their parents do. And my Rasbora Harlequin fishes go crazy for BBS, quickly devouring this aquatic gourmet dish!
Which brings me to the only shortcomings of the Shrimpery, which are easily remedied.
In order for the BBS to swim into the collection container the water from the Shrimpery must overlap the top of the Shrimpery itself.
Unfortunately, this usually results in the Shrimpery overflowing and water running down the sides of the unit onto your table.
A quick fix is to either leave the Shrimpery in the bottom of a Tupperware container while you are hatching BBS, or even better, silicone the top of the Shrimpery with its bottom half, and make sure to also silicone the *1/2 inch hole that you drill for the airline. This way, as long as you keep the water level just slightly above the lip where the collection container fits into the Shrimpery, the water won't overflow onto your table.
This should prevent the Shrimpery from leaking at all, unless you completely overfill it from the top.
* See the following:
The other problem is that on its own the Shrimpery does not agitate the water the BBS are hatching in enough to get a first rate hatch.
However, this is easily remedied by drilling a 1/2 inch hole into the top of the Shrimpery and placing a plastic airline into the hole, which can then be attached to a small air pump. I use Whisper and Millionaire electric air pumps and they work well.
As I mentioned previously, when you silicone the top of the Shrimpery to its bottom, remember to also silicone the tube to the 1/2 inch you drill, otherwise, the water from the Shrimpery will exit this hole once you turn your air pump on.
Once you have performed the two aforementioned mod's to the Shrimpery, you'll find that it really is convenient to use, and will hatch out more than enough BBS for a snack for your fishes a few times per week.
Of course, if you have lots of fry you will need to purchase a larger BBS hatching device. Or you can purchase a few Shrimperies and make the aforesaid modifications to them. Either way, they should work well for you.
And your fishes will truly enjoy having a live snack that they can catch for themselves a few days per week!
Earlier...
UPDATE: Pandy Cory Fry Unexpectedly Shows Up In My Glasscages.com 1/2 15 Gallon Aquarium!
An Informative Webpage On Panda Coryadoras Catfish
Today, I find a second Panda Cory fry which is not as mature as the Panda Cory fry I found yesterday. This one has a clear body and is likely only a few days old. The Panda Cory fry I found yesterday, whom I've nicknamed "Skipper" is probably three weeks to a month old. It is an exact miniature of its parents.
I also noticed that the adult female Panda Cory is very round, so she's probably full of eggs. From what I have read, female Panda Corys can lay anywhere from 1 to 5 eggs at a time. That's quite a difference from a female guppy which can give birth to as many as 200 fry at one time.
Yesterday afternoon this author found "Skipper" : the first Panda Cory fry in my Glasscages.com "1/2 15" gallon aquarium. At first I thought my eyes were deceiving me, until I took a closer look into this aquarium, and found a perfect miniature version of a pair of Panda Corys that I keep in this aquarium.
About two years ago my Dad gave me three Panda Cory catfish as a gift. One's skin color was very pale when I received it. However, it managed to last about two months before I found it floating dead in some dwarf hairgrass. It appeared to have had some type of wasting disease as the result of an internal parasitic infection.
The other two Pandas, whom this author has always thought were male and female from the way they hung out together (and whom since the birth of these baby Panda Cories, I now know are), have been in three different aquariums over the past few years. However, until now they have never reproduced.
During the 2012 XMAS holidays I decided to purchase two additional aquariums, one of which I chose to dedicate just to the Panda Corys. At the time I was thinking that if they had their own tank, they might reproduce if I could make the tank appear more like where these fish live in the wild.
So, I gathered some small rocks that I had laying around, added a Rose Sword plant which I'd had in a 37 gallon Aqueon tank, and some dwarf hairgrass and microsword. I had to really trim the Rose Sword plant back, since it was very large and would not fit in an aquarium that was about 1/5th the size of the Aqueon 37.
Instead of cleaning the brown algae off the walls of the Glasscages.com aquarium, I instead left most of it growing on the sides as a source of food, and for additional cover for the male and female pair of Panda Corys that now call this aquarium home.
They have been in this tank for about five months, so the two of them must have started mating at the time that I put them into this tank.
I will have to check to see how long the gestastion period for the female Panda Cory is to determine when she was impregnated by the male. As for determining which Panda is the male, I've read that the male is usually the smaller of the two. And one of my Panda Cory's is noticeably smaller than the other.
I keep a single Aquaclear 20 filter on this aquarium for use as a two stage filter - biological and mechanical filtration. I also use a prefilter so that I don't have to clean the filter media in the Aquaclear as often.
The Glasscages.com "1/2 15" is a neat little aquarium that is sold as a 1/2 15 gallon tank, because the unit has the same footprint as a 15 gallon aquarium, yet is exactly half as high - making for a total of 7.5 gallons.
This aquarium is manufactured in both glass and acrylic. I had my tank made of out the latter. If you want to use an hob filter for this aquarium you will have to modify it so that it can fit in the short height of this tank.
A regular Aquaclear 20 intake hose would be several inches too long.
I keep this tank on a formica shelf which I took from an old kitchen cart that was replaced with a new one.
The shelf is about 3/4 of inch thick, 30" long and 18" wide. It is placed directly on my den floor next to an old IKEA solid wood kitchen cart, that I use to hold my 20 gallon long planted aquarium.
I also recently added some of the small light green plant leaves that fall off my Java Fern plants (which float on the surface of the water like lilypads) to the Glasscages 1/2 15 tank. They carpet the surface of the water very quickly and I use a small tupperware container to scoop out the excessive growth. Even doing so, the water surface of the tank is completely covered again within a week or so.
It is so enjoyable to setup an aquarium (or several) in your home to watch these ecosystems in action. It's a tremendous learning experience for anyone.
Thus far I have only been able to find one Panda Cory fry in this aquarium. And I am not exactly certain when this little fish hatched. I am going to read up on these beautiful little fish to see if I can learn more about their breeding habits.
Evidently, the water quality in my Glasscages 1/2 15 must be good enough to breed Pandy Cory's in, since this little Panda Cory fry whom I've nicknamed "Skipper" is proof of it.
Hopefully Skipper will flourish in this aquarium and find himself (or herself "Skippy") with some siblings in the future.
Some other photos of my Panda Cory aquarium:


Earlier...
UPDATE: Overall Impression Of The AquaTop HOB/UV Sterilizers After
Nearly A Year's Use
This author purchased my first AquaTop power filter which also incorporates a uv sterilizer bulb, in June of 2012. The filter is AquaTop's PF25UV.
I have been very impressed with the overall performance of this filter.
In fact, the PF25UV has done such a good job of keeping the water in my Mr. Aqua 13.3 gallon aquarium crystal clear, that I have since purchased an AquaTop PF40UV and two PF15UV's for some of my other planted aquaria.
Thus far, each of these filters has done an excellent job of keeping the water in the aquarium it has been installed in crystal clear.
I have also found that these filters are useful for both uv clarification (keeping your water column clean) and also uv sterilization (provided that their water flow setting is kept at its lowest level).
This is not to say that these filters function as well as a first rate uv sterilizer costing hundreds of dollars more.
However, for the money, they do a surprisingly good job of keeping the harmful pathogens which can reproduce in your water column from doing so.
Prior to using these filters in my planted aquaria, green water was a constant problem. And there were times when the water would become almost white with bacteria; something which no longer occurs since I've installed these AquaTop HOB/UV sterilizers in my aquariums.
Moreover, thus far they have been very reliable.
Given that the PF25UV has been in constant operation for nearly a full year, and only turned off at night, I am interested in seeing how much longer this uv bulb will last before it will need to be replaced.
I am also wondering if, as is the case with manufacturer's claims regarding the useful life of their fluorescent bulbs, these uv sterilizer bulbs can last much longer than manufacturers claim. And without losing much of the spectrum they were originally designed to operate in.
For example, I have been using Hagen GLO and Coralife T-5 linear fluorescent bulbs with a 6700 Kelvin rating for well over a year, and I am still seeing tremendous growth in my dwarf hairgrass and microsword plants.
The readers will keep in mind that I am also using Flourish plant tabs every three to four months, and weekly dosing of liquid Flourish, in addition to DIY CO2.
As you can see from the photos in my last update, these plants are flourishing under this system.
This gives more credence to the claims being made by several veteran aquascapers, that fluorescent bulbs only lose about five to ten percent of their Kelvin rating over the life of the bulb. In the case of 6700K, this would mean that the bulb will still function within an acceptable Kelvin range for adequate plant growth.
And this is very important from an economic standpoint, since these bulbs can last for three or more years before their filament burns out. Think about the savings in regard to replacing, say, six bulbs once every three years, as opposed to replacing them once every six months.
The savings is considerable, which is very important in a hobby that can become quite expensive over time.
So I am presently watching the visible water quality in the 13.3 gallon aquarium since the AquaTop PF25UV's uv sterilizer bulb is nearly a year old. If it burns out shortly I will know that the life rating for the lamp is accurate.
However, if like many of the T-5 bulbs I am using, this bulb continues to operate, and the water quality in my 13.3 gallon aquarium remains crystal clear, I will infer from this that the manufacturers are being ultraconservative in regard to the life expectancy of their uv sterilizer bulbs as a point of economics.
Specifically, they want you to spend more money with them by purchasing these bulbs more frequently than you really need to.
Anyway, as the saying goes, time will tell.
For now, I am continuing to enjoy the clarity of the water in my aquariums, thanks to these cleverly designed filters from AquaTop.
I hope that this company decides to expand their line of hob/uv sterilizer filters in the future, since the present lineup, with the exception of the PF40UV, will only work for nanoaquariums up to about 25 gallons.
For larger aquariums, it would be nice to see AquaTop manufacture some more powerful versions of these filters, such as a PF75UV for aquariums up to 75 gallons; and perhaps a PF100UV or even a PF125UV for aquariums up to 100 or 125 gallons.
These filters are very cleverly designed and work extremely well. In fact, they make fishkeeping so much more enjoyable when one is maintaining heavily planted aquaria which makes use of high-tech lighting systems and supplemental fertilizer, that this author considers them a necessity in such situations.
In fact, I would not be surprised to see more companies which cater to the aquarium hobby eventually riding AquaTop's coattails, and creating their own HOB/UV sterilizer filters in the future.
They are a product whose time has, in this author's opinion, finally arrived.
Earlier...
UPDATE: Plants Doing Great With DIY CO2 Injection
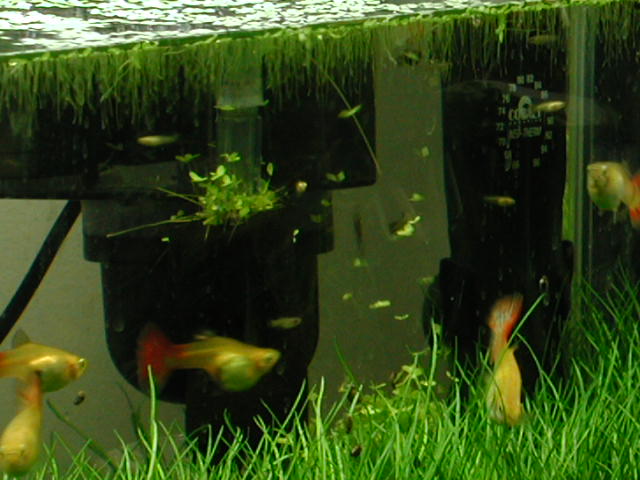
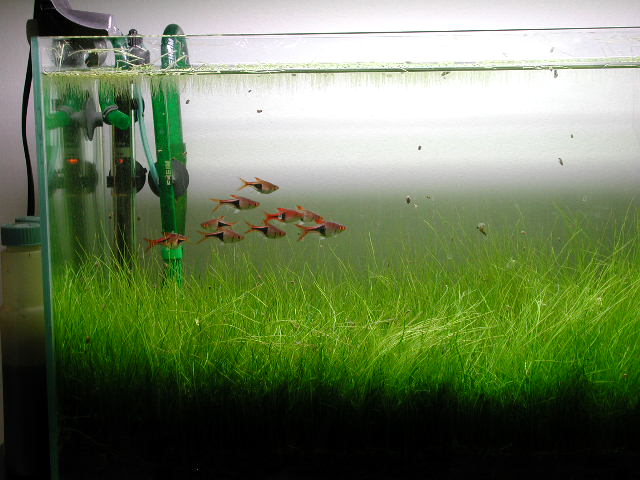
I've recently setup my old Nikon Coolpix 990 digital camera and will be taking more snaps of my planted aquaria in the future. Under the DIY CO2 concoction that I have been using for the past few months, plants are growing extremely well in these aquariums. And this mixture lasts at least three weeks before it needs to be replaced.
Some of my female fancy orange guppies have recently given birth, and I now have about 20 fry inhabiting my Mr. Aqua 12 long; in addition to these fry are 20 or so adult females who were born in my old 16.5 gallon sectional aquarium a few years back(this aquarim has now been broken down for good).
Fishkeeping and photography go hand in hand, as there really is a synergy between the two. For a relaxing evening some time, you may want to access the YouTube Website to watch some of the videos posted by aquarists, of their own aquariums. Many are set to classical music, so the viewing experience is usually very relaxing. And some of these videos are good enough to be considered works of art. Especially the ones posted of the Aqua Design Amano aquariums, and some of the aquarium contests held around the world.
After three and a half years back in this hobby after a more than 20 year hiatus, this author continues to truly enjoy fishkeeping and aquascaping.
If there's a more enjoyable hobby I've yet to find it.
Earlier...
UPDATE: Digging Out The Trusty Old Vortex D-1 Diatom Earth Filter To Do Some Heavy Cleaning On The 20 Gallon Long Planted Tank
Over the past two years I have been using the 20 gallon long to grow dwarf hairgrass and microsword for the rest of my aquariums. It has saved me a small fortune in obtaining plants for these other aquaria.
I now have five other aquariums, four of which have completely carpeted with dh, ms, or a combination of these two hardy and beautiful plants.
The other day I decided to give the 20 long the attention it deserves, by removing much of the older dh and ms that have been there for at least three years; some of which has turned perpetually brown.
At the time I also removed a healthy patch of microsword and dh, and replanted it in my Mr. Aqua 7.5 gallon cube.
This left the water in the 20 long looking more like the brown water in the Rio Negro, than that of a home aquarium.
I decided to get out my quirky, yet trusty 33 year old Vortex D-1 diatom filter to help clean up the tank.
One of the things that I really like about the Vortex D-1, in spite of all of its ideosyncrasies, is its use as a dedicated high-speed mechanical filter.
When you want to use the D-1 like this, setup the D-1 the way that you usually would, while omitting the diatom powder, since the powder is only used to turn the D-1 into a micron filter.
You'll find that when used as just a high speed mechanical filter, the D-1 works quite well; doing as fine a job at removing large gobs of algae, detritus, and other plant materials, as it does when being used as a micron filter, to remove microscopic organisms from the water.
There was a time prior to this author's purchase of uv sterilizers, that I would use the diatom filter on a weekly basis to fine filter my aquariums. However, once I began using T-5 lighting, DIY CO2 injection and supplemental plant fertilizers, there were so many nutrients in the water columns in my aquariums, that I was faced with tanks so green with algae, that I could no longer see my plants or fish.
Diatoming, while still useful for fine filtering the tanks water to remove harmful pathogens, had become all but useless in water clarification, since a day or so after using the D-1, the water in my planted aquaria would be green again.
This was when I decided to invest in some affordable hob/uv sterilizers from AquaTop, which continue to keep my planted aquaria's water crystal clear. They are affordable and worth ever penny I spent on them.
However, they do nothing for the high-speed cleaning of an aquarium's water column, when chunks of uprooted plants and detritus have completely overrun the aquarium.
This is where the D-1 really shines, being used as a high-speed liquid vacuum cleaner, sucking up everything in its path.
When you are stirring up the substrate in your aquarium, there is no better mechanical filter on the market for cleaning your aquarium in a hurry.
So even though I only use the D-1 a few times a year now, it's nice to know that I can still depend on it to take a murky aquarium and have it looking spotless within an hour.
Not bad for a piece of aquarium gear whose technology is about forty years old!
Earlier...
UPDATE: A DIY CO2 System That Is Affordable And That Consistently Produces CO2 For About Three Weeks
Given that this author maintains several high-tech planted aquariums, I am always searching for more cost effective means in which to keep these plants healthy.
I have read many articles on DIY CO2 systems, some of which were helpful, others not so. I have also used different types of CO2 systems, including those which were pressurized.
My concerns regarding the pressurized systems have more to do with safety than they do with expense, since once the initial purchase price of a pressurized CO2 system has been made, filling the CO2 tank up is relatively cheap.
The only pressurized CO2 systems that while convenient to use quickly become exorbitantly expensive, are the small CO2 canister systems which must be replaced on a monthly basis, and at a cost of somewhere between $12 and $20 for each CO2 cylinder.
I stopped using a Fluval CO2 88gram system for this very reason, even though I liked the system very much. It was nice looking and very convenient to use.
However, with three high-tech planted aquariums setup, it would have cost me over $400 a year just for CO2 cylinder replacements for these aquariums, as opposed to about $50 a year for the same three aquariums using a DIY CO2 system.
I presently own a 5 lb. CO2 tank and a Milwaukee MA 957 pressure regulator that I have found to be of good quality. And I may eventually incorporate them into one of my planted aquariums at a later date.
However, for the time being, I am enjoying successful plant growth through DIY CO2 via the fermentation process. And through a process of trial and error, I have found that DIY can be very inexpensive if you purchase yeast and sugar in bulk.
I have also found that there is a very noticeable difference in the quality of certain instant yeast products. For example, I had been using Fleishmann's instant yeast for the past few years and have always found it adequate.
However, I recently went shopping on the Internet for some instant yeast and I decided to try yeast manufactured by a company called SAF. I purchased 8 lbs. of SAF instant yeast for .23 an ounce, as opposed to about $3.50 for an ounce of Fleishmann's.
This is a substantial savings, given that the same amount of Fleishmann's yeast would have cost over $400!
I have also found that the SAF yeast lasts about twice as long as the Fleishmann's yeast, which should reduce my annual expenditure on DIY CO2 by about half the cost I had been spending using the Fleishmann's yeast.
Moreover, a 25 lb. bag of granulated sugar can be purchased through Costco for about $15. If I have to recharge the CO2 bottles every three weeks, this works out to about three (25 lb. bags of sugar a year), and about 24 ounces of SAF yeast per annum. So the total cost of DIY CO2 for three of my hi-tech planted aquariums should be about $50 per year.
The benefit here is lush green plants that not only look terrific, but also provide a much healthier water column for my fish, at an extremely low cost.
Some fishkeepers spend thousands of dollars each year using pressurized CO2 systems for their many planted tanks.
In doing my research on DIY CO2 systems, I have read about several different CO2 concoctions.
However, I've personally found that two cups of granulated sugar mixed with a teaspoon of SAF instant yeast, in a 64 ounce plastic bottle filled 3/4's of the way with warm water (hot water will kill the yeast), supplies about two weeks of consistent CO2 bubbles.
The way that I determine how effective this concoction is, is to see how many days the plants give off oxygen bubbles for.
Once the plants have stopped producing oxygen bubbles will determine when I recharge my CO2 generator. I now recharge my CO2 generator every 14 days, so that I can overlap the CO2 production before the old DIY CO2 concoction is completely spent. This also prevents large swings in the PH of my aquariums' water.
As with the other myriad aspects of fishkeeping and aquascaping, a DIY CO2 injection system takes time to perfect, through much trial and error. The benefit is lush green aquatic plants at a very reasonable cost.
Earlier...
UPDATE: No Sign Of The Two Ghost Shrimp Fry That Had Survived For At Least A Week - Affordable Quality Yeast Purchased Very Inexpensively
I have been checking my 7.5 gallon cube shrimp tank for the past few days, in the hope of finding the two ghost shrimp fry that had survived from a brood of at least eight. However, they are nowhere to be found.
The fry had developed legs and were actually able to attach themselves to plant leaves, however, they may have been eaten by the two adult ghost shrimp in this aquarium.
The female is already carrying eggs again. So if she gets impregnated I am going to move the shrimp fry to a birthing compartment to see if I can grow them out there. If these shrimp cannot succeed in propagating their own fry, I may just move them to another aquarium.
I say this because I intend to purchase some red cherry shrimp for the 7.5 gallon cube, given that cherry shrimp propate their fry much more readily than ghost shrimp do, and have a reputation for being hardier than ghost shrimp.
RCS are also less likely to eat their own fry.
This author is always seeking ways in which to economize regarding my fishkeeping hobby. This is especially true since I maintain six nano aquariums ranging in size from 20 gallons to 7.5 gallons.
All of my aquaria are planted, however, only four are high-tech systems that utilize CO2 injection.
I have used pressurized CO2 in the past and do in fact still have a pressure regulator and 5 LB. CO2 tank (which is empty at the moment).
However, the pressurized CO2 systems are expensive when you are dealing with more than aquarium - that is unless all of your aquariums are adjacent to eachother, so that you can run your CO2 tubing from a splitter which is connected to the main CO2 tube which runs your CO2 regulator's bubble counter.
If you have this type of a setup, then you can probably get away with filling your CO2 tank up once a year or so, and for a nominal charge (you can get a 5 LB. CO2 tank filled up for about $15).
However, if you are like most fishkeepers who maintain more than one aquarium, your tanks are probably located in a number of different locations, which would make it impossible to actually use one CO2 system for all of these aquaria.
This is when DIY CO2 systems come in handy, since with the right mixture of sugar and yeast, you should be able to get at least a week's worth of steady CO2 production before you have to recharge your CO generator.
25 lb. bags of sugar can be purchased at the local supermarket for under $20, so the cost here is reasonable.
However, there are many companies that produce yeast which is of dubious quality, and expensive. For example, for the past few years I have been purchasing Fleishmann's yeast packets for about $3 for .75 ounces.
To a fishkeeping newbie this might seem to be a reasonable cost. However, it's actually very expensive. To illustrate just how expensive, I recently purchased 128 ounces of SAF instant yeast for about $29 including shipping.
This works out to about .23 per ounce of SAF yeast, as opposed to about $3.50 per ounce of Fleishmann's yeast - or about 15 times the price. And the SAF yeast is considered to be superior to Fleishmann's - and for that matter - most if not all of the other yeast products available on the consumer market.
Moreover, the SAF yeast packs can be stored in the freezer for years without this yeast losing much (if any) of its quality. The package that you open can be placed in a plastic jar and kept in the freezer until you are ready to use it.
This works out quite well for this author, since I recharge my DIY CO2 generators once a week, and like to use a nice heaping teaspoon of yeast in each of them.
I also like the fact that DIY CO2 is far safer than having a compressed CO2 tank in your home, which can cause tremendous damage if it were to explode. There is also the danger that the CO2 canister might leak, causing any persons located within its vicinity to become ill - or even suffocate.
So these are yet further justifications for using DIY CO2. The key here is to make it affordable.
Three weeks worth of SAF yeast for my DIY CO2 generators cost about 23 cents an ounce, whereas the Fleishmann's yeast would cost about $3.50 for the same amount. This is quite a difference in price.
In fact, in doing a comparison between the two, I estimated the cost based on $3.50 for an ounce of Fleishmann's yeast, and multiplied it times 128 ounces; which is the amount of SAF instant yeast that this author purchased for $29 including shipping. The total for the Fleishmann's yeast was about $430 for what I paid for $29 worth of SAF! And the SAF is a better quality yeast.
Now if I can only find a company that will ship 25 to 50 lb. bags of granulated sugar for a nominal charge, it would make my DIY CO2 venture truly ideal.
Earlier ...
UPDATE: At Least Two Ghost Shrimp Fry Have Survived For Nearly Two Weeks And Also Grown Legs - My Platinum Blue Angel, Goldeon's Pectoral Fin Grows Back
It's been about 12 days since the female Ghost Shrimp gave birth to several fry. I have since seen at least two which have survived. They usually come out when it's dark, so in order to see them, I have to turn the tank lights on in the middle of the night.
They are neat to watch. Only 2 of the 20 adults I received actually survived, so I am hopeful that the remaining ghosties and the fry fare better.
The tank is loaded with infusoria from the cycled sand substrate that I added from another established aquarium, and I have a few Java Ferns which further enhance this.
I also add some freshly hatched baby brine shrimp and powdered fry food to the tank daily, to ensure that the fry have plenty of food. What they miss the adult ghosties and myriad snails will feed on.
On the many fishkeeping forums that this author visits from time to time, I have seen more than one post in regard to a frantic aquarist, describing how a fin on one of their fish was torn up. The main question they want to know is if it will grow back at all. The next is usually, if the fin will grow back, how long will it take.
About two years ago I noticed a Rasbora Harlequin of mine not shoaling with his fellow tankmates. Upon closer inspection, I found the poor little guy to be in shock, shivering and sporting a nearly completely chewed off caudal fin.
At first I thought that I might have to euthanize him, however, I only do so when a fish is really suffering and has no chance of being healed.
I decided to move him into another aquarium with nothing but Rasbora Harlequins, and hope for the best. For the first few days, he stayed in the same place just shivering; not appearing to eat any food. However, within the next few days I noticed that he was gradually moving closer to his Razzy tankmates, and taking a bit of food at feeding time.
Fortunately, he had been able to avoid death after a vicious attack by an Angelfish in the other tank - which is why I recommend not keeping smaller fish like Rasbora Harlequins and Neon and Cardinal tetras in tanks with Angelfish - no matter what the local fish store proprietor tells you about them being good tankmates.
After about a month I noticed that the little Razzy's tail had started growing back, and within about three months it had grown back completely.
About a month ago, I noticed that my Platinum Blue Angelfish was listing slightly to one side. When I took a closer look I saw that his right pectoral fin had been split in half practically down to his body. He was clearly having a difficult time negotiating the aquarium, with only the use of his left pectoral fin to negotiate his way around the aquarium.
However, Goldy was his usually ravenous self at feeding time, which I knew was important if he were to make a full recovery.
Moreover, when fins are damaged like this, opportunistic bacteria and parasites can truly wreak havoc, causing a wound to become infected.
Fortunately, I use uv sterilizers on most of my planted aquaria in order to keep bacteria and algae growth to a minimum, since they thrive on the nutrient rich water in my tanks.
And in my opinion, it's the uv sterilizer which has played a significant role in Goldy's right pectoral fin nearly completely healing in slightly more than a month.
So for those fishkeepers who are frantic about their fishes' fins being damaged, the reality is that under the right conditions they will grow back. However, it's a good idea to make sure that the fishes you choose to keep in your aquarium are compatible, since this will avoid fin nipping and other aggressive behavior.
Earlier ...
UPDATE: Female Ghost Shrimp Gives Birth To Several Fry / Getting A Great Buy On Some Hagen GLO T-5 Linear Fluorescent Lighting Fixtures
I added some ghost shrimp to the 7.5 gallon Mr. Aqua cube that I started over the XMAS holidays. Although all but two of the ghost shrimp that I received have since died (they were purchased from PetSolutions.com), one of the remaining ghost shrimp was berried (carrying eggs) when I received her.
Over the past few days she laid her eggs. Since that time I have noticed several ghost shrimp fry moving around this tank. They tend to go exploring when the tank lights are out, and stay hidden when the lights are on.
I have no idea if they will survive or not, however, the tank should have plenty of infusoria available in its water column, and I add some freshly hatched baby brine shrimp as well as fry food daily.
It should be a few weeks before I know how many of these ghost shrimp fry have survived, as by then they will have grown significantly.
Over the past few months I have noticed that some stores have had closeout sales on the Hagen GLO line of T-5 linear fluorescent lighting systems. Doctors Foster and Smith did this about a year ago, and recently it appears that some other online pet retailers are doing the same thing.
Evidently, the German made Hagen GLO fixtures are not selling as well in the USA as they are in other countries. Since these T-5 systems are themselves only a few years old, T-5 only becoming mainstream around 2008 or 2009, it would appear that T-5 systems are taking a back seat to LED lighting systems, and that Hagen's GLO lighting line of fixtures may be suffering for this.
If this is indeed the case, then it's unfortunate, since the Hagen GLO lighting systems are well constructed with a hefty ballast, are quite good at growing a wide variety of plants, and are very appealing aesthetically.
I own *five GLO lighting systems, one of which I have used for nearly three and a half years, and these lights are a very good value at their normal retail prices.
* Now six after purchasing another GLO 24" X 24 watt single light.
Moreover, the fact that each version of the GLO lighting system is now being discounted, sometimes at firesale prices, is of benefit to any fishkeeper who maintains a planted or marine aquarium.
As an example of just how much these lights are being discounted, the Hagen GLO T-5 24" x 24 watt single fixture lists for $169.99, and usually retails in the range of about $85 - $100, depending on whether or not the fixture includes a T-5 bulb.
About two months ago, this author purchased a GLO T-5 24" 24 watt single for $51.90 shipped; about $40 cheaper than most retailers continue to sell this light for.
As if this were not a good enough deal, yesterday, *I purchased two GLO T-5 24" 24 watt T-5 lighting fixtures in a value pack, for $51.90, including shipping costs!
* As it turns out, the retailer selling this valuepack on Amazon.com claimed to have made a mistake on the Webpage, incorrectly listing the valuepack, when the listing should have been for a single GLO T-5 24" lighting system.
They offered to refund my money or workout a deal, so I split the difference in price between what I would have paid for each light in a valuepack, vs the retail price they were listing for a single light.
It worked out to about $41 shipped for the single GLO T-5 24"; still about $10 less than I had paid for the last 24" I had purchased, which was an already excellent deal at about half the price the GLO T-5 24" usually sells for.
So there are some really excellent deals to be had on these GLO T-5 lights if you are willing to shop around. Just make sure that the listings you are reading are accurate, and not advertising the incorrect number of items for sale.
Earlier...
UPDATE: Panda Cory & Ghost Shrimp Aquariums Up & Running - On An Aside, What About A Mr. Aqua Aquarium Based On The 12 Gallon Long But In A 5 Foot Length?
I have finally been able to setup two 7.5 gallon aquariums that I had purchased during the holidays. The first is a Mr. Aqua 7.5 gallon cube being used to house some ghost shrimp. The second tank is a 7.5 gallon acrylic aquarium based a similar footprint to the Aqua Design Amano 60-F aquarium.
This tank is manufacturered by a company called Glasscages.com. The tank is for all intents and purposes, a 15 gallon aquarium that is horizontally cut in half.
The tank is 24" inches long by 12" deep by 6.5" in height; nearly the same dimensions as the ADA 60-F, except about a half inch shorter.
I like the styling of this Glasscages.com aquarium; especially the way that the acrylic wraps around the corners in one piece, instead of having to silicone the side panes as you would have to do with a glass aquarium.
This tank houses two Panda Coryadoras catfish and a large rose sword plant. It actually looks very nice, as it is setup under a Hagen GLO T5 24 watt single lighting fixture with an 18000K spectrum bulb. And the Pandas seem very pleased in it.
The Mr. Aqua 7.5 gallon cube is housing some ghost shrimp and some low light Java fern plants, under an AquaTop Nano Type P LED lighting system.
Overall, the tank looks very nice. However, the Nano Type P, like all inexpensive nano lighting systems, does not give off enough light to effectively grow moderate to high light plants, such as microsword and dwarf hairgrass.
This is something to consider when you purchase a low powered LED lighting system. Sure, you can purchase a much more powerful LED aquatic light for your reef or planted aquaria, however, you are going to have to pay a lot of money for it.
In this author's opinion, T5 is still the best value for growing moderate to high light plants. And the Hagen GLO series of linear fluorescent lights may be the best value on the market at this time. These lights are nice looking, give off plenty of light for their respective rating, and are durable.
I have had a Mr. Aqua 12 gallon long for almost 6 months now, and I really like this tank. It is well constructed and has a nice sleek look to it. My 12 long is carpeted with microsword and dwarf hairgrass, and home to about 20 female fancy orange guppies.
I like the look of this tank so much that I was thinking of eventually replacing a 20 gallon long Aqueon that I have with a rimless 20 gallon aquarium based on a longer version of the Mr. Aqua 12 gallon long.
I like the longer lower profile look of tanks like the Mr. Aqua 12 and the ADA 45-F, 60-F, 90-F and 120-F. However, the cost of such aquariums must remain reasonable, otherwise they are not going to sell. The cost of the ADA 45-F and 60-F are a bit steep for what you get, however, not ridiculously overpriced like the 90-F and 120-F.
As for the latter two aquariums: the ADA 90-F and 120-F are 15 gallons and 18 gallons respectively.
These aquariums are so ridiculously overpriced for what the purchaser receives for their money, that they have not sold in any signficant numbers.
The fact that both aquariums were recently discontinued by Aqua Design Amano only serves to reinforce this.
The 90-F sold for about $500 and the 120-F a whopping $800, so is it any wonder why these aquariums did not make it in the market place, in spite of how nice looking they are?
In the case of the Mr. Aqua aquariums, they are some of the most reasonably priced aquariums on the market. Beautiful styling, well constructed and very competitively priced.
Like ADA, Mr. Aqua is also not above taking some chances when it comes to manufacturing some interestingly designed aquariums. For instance, the 12 long and the 5.2 gallon aquariums serve as just two examples of such creatively designed fish tanks.
After seeing the ADA 120-F (12" X 7" X 48") and taking note of its outrageous price, this author was hoping that Mr. Aqua would build something similar in size but for a much more reasonable price.
How about a rectangular aquarium with the same height and width as the Mr. Aqua 12 gallon long, however, two feet longer?
This aquarium would be the same height and depth as the Mr. Aqua 12 long, however, a full five feet in length. 8.3" X 9.4" x 60" would be the dimensions of the new Mr. Aqua aquarium - the tank when full would displace just about 20 gallons in volume.
As for lighting there are many choices, including a Hagen GLO T-5 fixture with a single or double 54 watt bulb. This fixture would stretch out 48" across this aquarium and give either 2.7 watts per gallon of light with a single 54 watt bulb, or a whopping 5.4 watts of T5 light per gallon of water with the 48" double fixture.
Now, if only Mr. Aqua can build such an aquarium at a reasonable price - say somewhere in the area of $120 - $140, they may be able to sell all that they build. The aquarium can also be offered in a more expensive low lead glass version as well.
Filtration for this tank could be an Eheim 2211 or 2213. And heating this tank could be achieved through the use of either a Hydor 200 watt inline heater or a Cobalt Aquatics Neo Therm 75 watt job. I have the Neo Therm 50 watter on my Mr. Aqua 12 and like it very much. I also like the Neo Therm's sleek aesthetic.
Of course, if Mr. Aqua chooses to build this aquarium or one similar in dimensions, fishkeepers who purchase this tank will have an enjoyable time outfitting it regardless of which associated components they choose. I know that I will!
After more than three years back in this hobby I am enjoying it more than ever; finding fishkeeping to be not just a hobby as it was in my first go around decades ago, but this time around, a way of life.
Earlier...
UPDATE: Breaking Down The 37 Gallon Aqueon After Nearly Three Years Of Use And Replacing It With A Mr. Aqua 17.4 Gallon Aquarium
The Aqueon has been a very reliable aquarium for the past three years, never leaking, and holding over 400 lbs. of water and substrate.
However, I have decided to replace it with a lighter, smaller aquarium from Mr. Aqua (the 17.4 gallon), which will be used to house a school of Rasbora Harlequin fish and dwarf hairgrass and microsword plants.
I have also ordered another 7.5 gallon aquarium. This one is made by Glasscages.com, and is identical in its footprint to the Aqua Design Amano 60-F.
However, this aquarium is a half inch shorter, and sports a plastic band around its top and bottom border for additional support. The tank was also less than half the price of the ADA tank, and is made of acrylic.
For the time being I am going to use it to grow a Rose Sword plant which I had in the Aqueon 37, and to house my two Panda Cory catfish.
I would also like to see if I can get this plant to grow the emersed leaves that it had when it arrived, by keeping only its roots in water. In other words, the reverse of how the plant has been grown thus far.
I may also add guppy fry to the tank to grow out in as they are born.
Update: Current Aquarium Setups
Aqueon 20 long
Fluval 305 canister filter
AquaTop PF-40UV HOB filter/UV sterilizer
(1)Hagen Glo 24" 24 watt x 2 T5 fluorescent lighting system with 6700k bulbs
(1)Hagen Glo 24" single 24 watt linear fluorescent lighting system with 18000K bulb
(1)Via Aqua 200 watt heater
(1) Platinum Blue Angelfish
(4) Red Eye Tetras
Mr. Aqua 17.4 Gallon aquarium
Eheim 2213 canister filter
(1) Hagen Glo 24" 24 watt x 2 T5 linear fluorescent lighting system with 6700K bulbs
Via Aqua 100 watt heater
Aquatic Fundamentals aquarium stand
(10) Rasbora Harlequins & (1) Jumbo Neon Tetra
Plants - Dwarf Hairgrass & Microsword
Mr. Aqua 13.3 gallon bowfront aquarium
(15) Fancy Orange Guppy males
(1)AquaTop PF-25UV hob/sterilizer filter
(1)Eheim 2213 canister filter used for biological and mechanical filtration
(1) Hagen Glo 24" x 2 24 watt T5 linear fluorescent light with 6700k/18000k bulbs
Plants - Dwarf Hairgrass & Microsword
DIY CO2 System using Eheim 2213 as the CO2 reactor
12 Gallon Mr. Aqua aquarium
(1)Fluval 106 canister filter
(1)Hagen GLO 36" 39 watt x (1) T5 linear fluorescent lighting system with 6700k bulb
(1)Cobalt Neo Therm 50 watt digital heater
(1)AquaTop PF-15UV hob/sterilizer
(1)Supreme Aquamaster Heetmaster II 50 watt heater
(18)Female Fancy Orange Guppies
Plants - Dwarf Hairgrass & Microsword
DIY CO2 system using Eheim 2213 as the CO2 reactor
Mr. Aqua 7.5 gallon cube
(5) Fancy Orange Guppy males
(1) Eheim 2211 canister filter
(1)Via Aqua 100 watt heater
(1) AquaTop Nano Type P LED Lighting System With 6500K spectrum
Plants - Dwarf Hairgrass & Microsword
DIY CO2 system using Eheim 2211 as the CO2 reactor
Glasscages.com 7.5 gallon aquarium
(2) Panda Cory catfish
(1)Aquaclear 20 hob filter
(1)Elite 50 watt heater
(1)Hagen GLO 24" x 24 watt T5 linear fluorescent lighting system
(1)Plants - Potted XXL Rose Sword Plant
Earlier...
UPDATE: What To Do When A CO2 Generator Using Yeast Backflushes Into Your Aquarium Making A Complete Mess Of Your Tank
While CO2 injection is important in growing plants in a freshwater aquarium, it is also important to recognize some of the inherent problems with this method of plant fertilization.
The most obvious one, and this applies to a pressurized CO2 system, is not properly monitoring the CO2 dispersion in your CO2 tank, which can result in far too much CO2 being injected into your aquarium over a short period of time, that can kill your fish.
Moreover, even if you are careful about monitoring it, the CO2 regulator may malfunction causing a dangerous level of CO2 to rise in your aquarium. There have been a number of posts on Internet fishkeeping forums in regard to this problem, with several fishkeepers describing how they arrived home from work only to find a tank full of dead tropical fish.
This is a sad situation regardless of what type of fish you keep. However, imagine coming home to find that you have lost thousands of dollars in marine fish, or freshwater fish like a large school of Discus - it would certainly do nothing to improve your day.
Another problem regarding pressurized CO2 involves the fermentation method of producing CO2 in one's aquarium. Sometimes, when using a canister filter as the CO2 reactor (many people do this without any problem and have found that the canister is also serves as an excellent CO2 reactor), the CO2 will backflush into the aquarium as the CO2 bubble count drops off when the batch of CO2 made perhaps a week earlier stops producing CO2.
The backflushing of yeast into an aquarium makes an algae bloom pale by comparison. The yeast can end up coating everything in the tank, depending on how much escaped before the fishkeeper noticed the CO2 generator malfunction.
This type of a clean up can involve everything from breaking down your filters to remove the yeast coating from their media, to a complete emptying and cleaning of your aquarium, if the yeast has also heavily coated your plants.
Fortunately, in most cases the situation is not that dire. However, the situation can be quite annoying, when yeast clouds your water table and propagates as it feeds on nutrients in your aquarium, in the way that bacteria, parasites and algae do.
Of course, if you already own a uv sterilizer it will help to kill off the yeast in great numbers. Even better, if you also own a diatom filter like the Vortex D1, you can use it to remove much of the yeast. Just as important, several small water changes over the course of a week or two will help to completely remedy the problem.
But how annoying it is!
This author recently ordered a new Mr. Aqua 7.5 gallon cube aquarium which I will use to spawn guppies, as well as a home for some ghost shrimp which I plan on adding to the tank in the next few months.
I chose the Mr. Aqua 7.5 because I have owned two other Mr. Aqua aquariums for a few months now, and overall am very pleased with them. These are nicely made aquariums which sell for a very reasonable price, given their quality construction.
I think that the rimless aquariums are quite nice looking and do have aesthetic advantages over an aquarium which utilizes heavy plastic rims to strengthen the tank.
However, as nice as the rimless aquariums are; and regardless of whom they are manufacturered by - Aqua Design Amano, Do Aqua!, GLA, Mr. Aqua or the host of other companies that now make rimless tanks - the fact is that these tanks are only held together by silicone.
An aquarium with a nice heavy plastic border framing its top and bottom will do a much better job of reducing the damage to the surrounding area of the aquarium should it develop a leak, then one which has no additional support to its superstructure.
As for the ongoing arguements between the owners of many of the aforementioned aquariums in regard to which brand is better, the fact is that while the newest ADA aquariums do have an edge in quality over tanks like the Do Aqua! and Mr. Aqua(and at a premium over the rest), the ADA is ultimately subject to the same failing as all other rimless aquariums, in that it has no additional means in which to support its superstructure.
If the silicone fails for whatever reason, there is nothing preventing the panes of glass on these aquariums from collapsing and spilling the contents of the tank onto one's floor - a horrifying thought!
As such, and as beautiful as an ADA 120 or even 90 series aquarium is, this author would not want that large an aquarium unless it had a plastic frame used to strengthen its superstructure. And that is why even though my nano tanks are rimless, the aquariums that I own which are above 20 gallons all have plastic rims on them.
To further drive this point home, you'll notice that ADA's own Takashi Amano, had his personal aquarium constructed with a metal frame for its superstructure, and for a very good reason. Would you want 2400 gallons of water ending up on your floor? Or for that matter even 60 or 90?
Earlier...
UPDATE: Setting Up Another Rimless Nano Tank
Over the past few months I setup one of my old 5.5 gallon Aqueon aquariums in order to spawn some guppies. I purchased an Eheim 2211 to serve as the filter for this aquarium.
I recently decided to replace the 5.5 tank with another rimless tank. I was considering purchasing an ADA 60F, which is a very nice looking 8.6 gallon glass tank with an interesting footprint. The only other nano tank that I have seen that is as interesting looking as this one is, is my Mr. Aqua 12 long, which also has an interesting footprint.
The Mr. Aqua 12 is nearly 3 feet long, however, only about 8 inches deep, and 9 inches in height. The ADA 60F is about a foot deep, 24 inches long, however, only 7 inches high.
Yet both tanks look spectacular when setup with even a simple aquascape.
I've narrowed the field down to two tanks which I am considering using, to replace the 5.5 Aqueon: The ADA 60-F and a Mr. Aqua 7.5 cube. Even though the ADA tank is only a gallon more than the Mr. Aqua 7.5, it has a much larger footprint.
On the negative side, the ADA tank is so short that it really doesn't allow the fish much headroom to swim, even though it gives them more room lengthwise.
Given that I already have four planted aquariums up and running in addition to the Aqueon 5.5, I really just wanted a small rimless acrylic tank to raise some ghost shrimp in, and a tank which can from time to time also serve as a spawning venue for some of my guppies.
Prior to the purchase of this new tank, I had also purchased a new AquaTop Nano Type P LED lighting system and a new Cobalt Neo Therm heater, which I was just going to add to the Aqueon 5.5.
However, I then thought that since I had already purchased these items, that I would also add a new aquarium.
I really like both the *ADA 60F ($109.95) and the Mr. Aqua 7.5 (49.95), so purchasing one over the other was going to be a tough choice to make. That is, until I went to the ADG Website here in the United States (ADG is one of about three U.S. importers for Aqua Design Amano Japan) and saw that it would cost about $70 to ship this little aquarium to the East Coast.
I only paid $40 to have my 37 gallon Aqueon shipped to my home in 2010!
* ADA also offers a less expensive version of the 60-F under its Do Aqua! brand name ($85 instead of $109).
Do Aqua! are the earlier aquariums that ADA once sold as their cube garden line, however, with slightly tinted glass. There are several models of the Do Aqua! line of aquariums that are identical in size to ADA's new line of aquariums, except that the new line of tanks don't have green tinted glass.
ADA also has several shorter aquariums with a fairly large footprint, yet low profile. These tanks include the 45-F (4.6 gallons - $85), the 60-F (8.6 gallons - $109), the 90-F (15 gallons - $390) and the recently discontinued 120-F (18 gallons - $700).
The 120-F is about four feet long by a foot deep and about eight inches in height. It really is a nice aquarium, however, its $700 price tag is absolutely ridiculous.
The shipping on these aquariums also starts at about $70 while the Mr. Aqua 7.5 on the other hand cost about $5.50 to ship. This has made my decision between the purchase of the ADA 60-F or the Mr. Aqua 7.5 that much easier.
So I am now awaiting the delivery of my Mr. Aqua 7.5 cube, as well as the new nano heater and light, so that I can setup the Mr. Aqua 7.5 and get it ready to house some ghost shrimp in the near future.
Earlier...
UPDATE: After About A Year & A Half Since My Female Guppies Last Had Fry, I Recently Found Some Guppy Fry In My Mr. Aqua 12 Long Aquarium
*Addendum - I found one dead fry in this aquarium and wonder if other fry over and above the two that I had found swimming may have died at birth, or a short time later. Of the two remaining fry which I first saw about a week ago, one is already growing nicely, however, I have not seen the second fry in the past day or so and wonder if it has also perished?
Having recently put a male guppy along with three females into the 5.5 gallon spawning tank, I am waiting to see if any of the guppy females will be having some fry in the near future.
Since purchasing a Mr. Aqua 12 long this past Summer, I have used it to house several female guppies. Prior to purchasing this tank, I placed a few males and females into a spawning tank for a few weeks, then sent them back to their respective aquariums.
I didn't give it much thought until two days ago, when I spotted a few guppy fry swimming around in the Mr. Aqua 12. I have an idea which female gave birth to these baby gup's, however, I have no way of knowing if she has other fry that she is going to deliver, or if these two are all she's going to have for the time being.
Fortunately, I always keep guppy fry food on hand in the event that some of my guppies give birth. They can really take over your aquariums in a hurry, regardless of how many you have. The 20 long has been home to some Rasbora Harlequin fish and a few Neon Tetras for quite some time. Over the past year I lost a few of each species, and while the remaining Razzies look fine, the three remaining Neon Tetras are all suffering from various stages of Neon Tetra Disease. They are all approaching three years of age.
When the Neons die off, I am going to *move the Razzies to my 37 gallon community tank, where I have several more Rasbora H., and use the 20 long as another fancy guppy tank.
This will be my fourth guppy tank, including the 5.5 gallon spawning tank, and my two Mr. Aqua acrylic rimless aquariums; a 12 long and a 13.3 bowfront.
* I may even move the Razzies before the Neons pass on, since there are nine Razzies in my 37 gallon which they can school with.
Earlier...
UPDATE: Making Your Aquarium Setup As Simple To Maintain As Possible Will Make This Hobby Even More Enjoyable
As novices to fishkeeping, when we setup our first aquarium we tend to be very optimistic (actually, naive is a better description) of what maintaining this aquarium will entail.
This was especially true before the advent of the Internet and the tidal wave of free information that became available to the fishkeeper over the past few decades.
Most people who setup aquariums for the first time, do so after visiting their local pet store, buying an aquarium and the requisite ancillary components - filter, heater, lighting etc. - which are necessary to keep the fish in the aquarium safe.
Once the fishkeeping newbie does this, they will set up their aquarium, allow it to complete the nitrogen cycle (or purchase chemicals which now do this instantly) and then add some fish and possibly even some plants.
Once the fish are added to the new tank the fishkeeping newbie breaths a sigh of relief and takes time to enjoy their new hobby.
However, usually within a few days algae starts to form on the sides of the once pristine aquarium. And the water will often become cloudy as new forms of bacteria gradually colonize the water table.
The fishkeeper, unaccustomed to maintaining an aquarium, now attempts to frantically find a way in which to clear the water in their new fishtank.
They may do water changes and clean or change the media in their filter only to find that the water will not clear.
Thus begins their indoctrination into the fishkeeping hobby, in which if they choose to remain, they will establish a new lexicon in regard to this hobby which will ultimately serve to make them expert fishkeepers.
Over the past few years this author has found some ways which make it simpler and more cost effective to maintain my aquariums.
For example, instead of purchasing new filter media on a regular basis, I simply reuse the filter media. I have also refrained from using chemical filtration (in this case carbon) since it isn't necessary. Many an experienced fishkeeper already knows this, as well as the fact that if they maintain several aquariums, by not replacing the filter media on a regular basis they can save hundreds or depending on the number of aquariums they maintain, thousands of dollars each year in mechanical, chemical and biological media.
As for saving money, one can make the arguement that because fluorescent bulbs only lose about 5-10% of their kelvin rating over the life of the bulb, that one can use these bulbs until they burn out (perhaps as long as 3 to 4 years), instead of replacing them annually.
Moreover, growing certain types of plants in abundance as well as maintaining fish which are easy to spawn (such as guppies) can ensure that you don't have to purchase additional fish or plants for quite some time. That is, unless you want different species.
As for simplifing the maintenance in your aquaria there are a number of things which the fishkeeper can do.
For example, if you use a canister filter, unless you have an extremely heavy biological load in your aquariums, these filters don't need to be cleaned every month. They can be cleaned a few times a year without concern for the health of your fish or plants.
Moreover, just to play it safe, if you choose this method of canister maintenance, you should check the nitrate levels in your aquarium at least once every month or two, just to ensure that these levels don't exceed 20ppm.
If you have a heavily planted tank, nitrate should never be a problem as long as your plants are healthy, since plants use nitrate as a source of fuel to help them grow.
This author also recommends adding a *uv sterilizer to a planted aquarium, since this will ensure that the organisms in your aquarium's water table are kept to a minimal level - organisms such as algae, bacteria and parasites can also cause your water to become cloudy, as well as rob your plants of the nutrients which they need to grow.
* I use uv sterilizers in four of my planted aquariums; an inline on my 37 gallon and AquaTop hob/uv sterilizers on some of the smaller tanks.
Periodically, I need to clean the intake tubes on these filters since they can get pretty dirty. And once a week I remove the mechanical filter pads in order to clean them. Other than that, these filters are as close to maintenance free as you can get.
The fishkeeper will also find when using a uv sterilizer, that there is far less algae growth on the walls of his/her aquarium, which means less time scraping this pesky stuff off an aquarium's glass panes.
This author has also found that *lighting timers are invaluable given that they ensure that my T5 lighting systems and uv sterilizers turn on and off automatically.
* Each of my Hagen GLO T5 lighting systems included a GLO timer. These timers are a bit quirky to use at first, however, once you learn how to set them up, they are very flexible in enabling you to customize a lighting schedual for each of your aquariums.
With the canister filtration systems not needing a cleaning for months at a time, and your aquarium's lighting, uv sterilizing and heating systems automated, the only thing left to do, aside from topping off the water every few days, dosing with liquid fertilizer once or twice a week, and adding new fertilizer tabs to your aquarium's substrate every few months, is to feed your fish and trim your plants.
Of course, there can always be a component failure, which is why you should keep spare parts on hand, and have some extra heaters and filters laying around that can also be used if necessary.
Earlier...
UPDATE: MTS (Multiple Tank Syndrome) Is Commonly Experienced By Many A Fishkeeper Who Become Completely Emersed In This Wonderful Hobby
Presently maintaining 5 aquariums ranging in size from a 5.5 gallon nano tank up to a 37 gallon community aquarium, this author has more than enough work keeping these aquariums running properly.
Over the course of the past few years I have learned several ways in which to economize, which makes the hobby easier on the wallet and less time consuming.
And of course with every dollar you save on your aquarium setup(s), you have more money to spend on new aquariums. This often leads to what many a fishkeeper has referred to as the fishkeeper's disease; or as it's otherwise known - multiple tank syndrome (MTS for short).
I have read myriad posts on many of the fishkeeping/aquascaping forums, and was surprised at how many fishkeepers maintain several aquariums, including some very large ones.
I have read of fishkeepers who claim to have as many as 100 aquariums; many of them over 100 gallons in size. In addition to the regular costs associated with this hobby, can you imagine the cost of a monthly water bill to top off the water in 100 tanks a few times each week?
Moreover, there's the maintenance involved. I have read of many fishkeepers who have at least three aquariums which start at 55 - 75 gallons and go up to 200 or even 300 gallons each. Can you imagine cleaning the algae off these aquariums even a few times each month?
In this vein, can you imagine maintaining a super sized aquarium like the 2400 gallon planted Altum Angel aquarium that *Takashi Amano had custom built in his home in Niigata Japan?
* See the video at the beginning of this Website to view a short video of Amano's magnificent aquarium.
With any aquarium there is a certain amount of maintenance which must be done, however, there can be a tremendous amount of work involved with these larger aquariums. Especially if you own several of them. Not that working on aquariums can't be fun. In fact, it can be very enjoyable.
I would imagine that many of the fishkeepers who maintain several aquariums have found a number of shortcuts which can make this hobby easier.
For instance, using a uv sterilizer in an aquarium can greatly reduce the amount of algae in a tank. My planted aquariums have little algae growth because of the uv sterilizers used in them. This means that I can go for weeks without cleaning the glass, when prior to using uv sterilizers I would have had to clean the algae off the glass in my aquariums several times per week.
This is especially true when dealing with dot algae, which can be difficult to remove from your aquarium's glass.
There are many other ways of cutting corners which an experienced fishkeeper is likely aware of - a number of which I discuss on this Website.
The logical answer to the above question is that only each fishkeeper can decide how many aquariums are enough, based on their finances, the room they have to house these aquariums in their homes, and the time they have in which to maintain them.
For this fishkeeper, the eighty some odd gallons of aquarium that I maintain in five separate fishtanks is more than enough for me. Moreover, tending to these aquariums is always a learning experience. And more times than not, an enjoyable one.
Earlier...
UPDATE: CO2 Injection Allows For Rapid Plant Growth - Removing A CO2 System When Your Tank's Plants Have Grown Substantially May Be A Good Idea For Both Plants And Fish
Over the past two years, this author has been using CO2 - pressurized as well as DIY by the fermentation method - in order to obtain increased growth in my planted aquaria.
Plant growth has been rapid and consistent in each of these aquariums. However, in two of my aquariums, I am now waiting to see how well my plants can sustain themselves without the use of additional CO2.
Thus far these plants, a large Rose Sword plant in my 37 gallon tank, as well as dwarf hairgrass and microsword in my 12 gallon long, are doing well. In the other two aquariums I am still using DIY CO2 to increase the growth of these plants.
In the 20 long, much of the dh had turned brown as a result of losing electricity for two weeks, courtesy of Hurricane Sandy. However, after a few weeks with consistent light and injected CO2 recently added again, there is now rapid growth of new dwarf hairgrass and microsword.
The microsword in the Mr. Aqua 13.3 bowfront acrylic aquarium is growing well. However, it will take a bit longer before it has completely carpeted the bottom of this aquarium.
When growth has become substantial enough, I will also remove the injected CO2 from these aquariums to see how well the plants grow without CO2.
The real objective with CO2 is to take newly added plants and to get them to grow to the point where they dominate the aquarium, so that they can absorb nutrients in the water column before bacteria, parasites and algae do.
Once you have accomplished this (a uv sterilizer can be very helpful here, in killing off enough of the algae, parasites and bacteria to allow for better plant growth) your plants should be able to grow at a sufficient enough rate to keep your aquariums' inhabitants healthy.
The objective is to reduce maintenance and expense as much as possible, and to instead simply enjoy the beauty of your aquariums; spending your time feeding your fish, and on occasion trimming your plants.
Moreover, the addition of CO2 also puts more stress on your fish, regardless of how careful you are in using a CO2 system in your aquarium.
If you're not careful, you can suffocate your fish if the CO2 dispersion gets out of control, as many a fishkeeper has done in the past. There is also the fluctuation in PH levels that a CO2 system causes in an aquarium, unless you are using a PH meter which automatically shuts your CO2 system off when the PH drops to a preset level.
The truth is that you are better off not using injected CO2 unless you have to. And once you have achieved significant plant growth, you should be able to grow your plants with the proper spectrum of lighting and enhanced fertilization, such as plant tabs and weekly dosing with liquid fertilizer.
After more than three years back in this hobby, returning from a 22 year hiatus, this author finds fishkeeping to be as challenging and enjoyable as ever.
Earlier..
UPDATE: Making Fishkeeping More Affordable - Free Plants & Free Fish Make This Hobby Even More Enjoyable
When purchasing an aquarium, filter, heater and lighting system, the costs can add up quickly - even if you buy a pre-packaged system. And the problem with purchasing many pre-packaged aquariums is that you don't get the best equipment available - which can be costly in the long run when you have to start replacing it.
After the basic setup, comes the costs associated with adding fish to your tank. And if you decide that you want a planted aquarium, the costs can continue to mount up.
However, if you purchase certain types of plants which spread along the bottom of your aquarium, forming a type of carpet, you can take the excess growth and replant it in a new aquarium.
When taking into account the costs of some of these plants, replanting the growth from already existing plants can represent a considerable savings. Especially if you plan on setting up several planted aquariums.
This author recently purchased two Mr. Aqua acrylic aquariums, and took the trimmings of dwarf hairgrass and microsword from my 20 long tank, and replanted them in the Mr. Aqua tanks.
The amount of trimmings that I used would have easily cost me $50 to $60, had I purchased them from an online petstore.
About a year and a half ago I received a few fancy guppies as a gift, and presently have about 40 of them. There was some attrition for a time as the weaker fish died off (there were about 90 offspring at one time), however, the strongest have continued to flourish.
A few impregnated female guppies can have fry every month for up to six months. Consider that each guppy can have an average of 30 - 40 fry each month. Multiply this by say three female guppies, and your aquariums can be overrun in no time.
So in this author's opinion it is best to have at least three tanks in which to house your guppies: a female tank, a male tank, and a breeding tank where the two can breed, and where the fry can be left to grow out safely.
This author decided to take one of the 5.5 gallon aquariums that I had originally used in my 16.5 gallon sectional aquarium, and use it as a breeding tank for my fancy guppies.
Thus far, the tank is being kept under a 50 watt halogen light which I am using to grown microsword.
However, halogen lighting is not very good for promoting plant growth, and this light will likely be replaced by some type of inexpensive T5 fluorescent light fixture in the future.
The tank is heated by a 25 watt Marineland heater. Filtration is by way of an Eheim 2211 canister filter. Its diminutive size, yet excellent filtering ability have made the 2211 a favorite for nanotank keepers.
Aqua Design Amano uses the Eheim 2211 on its nano aquariums, and sells the unit for use with these aquariums. The ADA distributor in the United States also offers the Eheim 2211 for sale on its Website, for use in nano aquariums.
It really is a great little filter. I also have two Eheim 2213's, which I was actually able to purchase for $10 less (each) than the 2211. The 2213 even at its normal price, which is about $20 more than the 2211, gives you about twice the filtering capacity. And in my opinion is easily the better bargain of the two.
Initially, given their simplicity, many fishkeepers would argue that HOB's are easier to maintain than canister filters.
However, HOB filters need to be cleaned at least once every two weeks, since they simply don't have the media surface area to go for long periods of time between cleanings.
On the other hand, canister filters can go for months without being cleaned, and still keep the water in an aquarium crystal clear. The time to change a canister filter is when the water flow slows considerably.
If the fishkeeper can afford to do so, it also makes sense to use redundant filtration by purchasing two canister filters for your aquarium.
One you can stock with nothing but mechanical filtration. The second canister can be setup stock, using biological, chemical and mechanical filtration, or just biological and mechanical filtration, since chemical filtration really isn't necessary in most cases; and chemical filtration can leach nutrients from your water table that your aquatic plants need.
Moreover, unlike mechanical and biological filtration which can be reused indefinetly, chemical filtration (usually active carbon) must be changed at least once a month, which would necessitate opening your filter.
I used to clean my canister filters once a month. Now I clean the smaller canisters every three months and the larger ones ever six months.
That is as close to maintenance free as you can get with an aquarium filter.
If you are concerned about your canisters becoming "phosphate factories" you can check your aquarium's nitrate levels to determine if your filters are producing lots of phosphates. The higher the phospate levels in your aquarium the more nitrate is being produced. If you find that you have a phosphate problem, then just clean your filters more frequently. And do a few extra water changes to lower the levels of phosphate in your aquarium.
Earlier..
UPDATE: Hurricane Sandy - The Storm From Hell & The Destruction That It's Caused In The North Eastern United States
* On 11/18/12 we finally had our phone service, cable TV and Internet access restored to us, nearly three weeks after Hurricane Sandy hit.
After nearly two weeks without electricity, we finally had power restored to our home on - 11/11/12.
On Long Island, the storm was absolutely terrible, destroying a myriad of homes on Long Island's Northern, Eastern and Southern coasts. A number of homes were completely washed away. Manhattan Island fared no better, with thousands of businesses flooded by the tidal surges of Sandy. It may take years to restore Manhattan to its pre Sandy status.
On our own property, we suffered the loss of more than 10 large trees ranging in height from about 50 feet to over 100 feet.
Our once tree lined property looks very different than it did two years ago, since Hurricanes Irene and Sandy knocked down many of our trees; completely uprooting them. We are looking at somewhere in the area of 15 thousand dollars in damages for tree removal, however, are far more fortunate than many people whose homes were washed away by the tidal flooding which Sandy caused.
As for my brood of fish, they survived in temperatures which went as low as 60 degrees. I lost three Rasboras due to the storm, however, most of my other fish have survived. I attribute this to the excellent water quality they are kept in, the plants which surround them, and the excellent diet regimen that I have them on.
These fish have now survived two major hurricanes in 2011 and 2012, as well as a microburst in the Spring of 2010 which resulted in our losing power for about 72 hours, in some fairly cold weather. They survived without filtration, heating or light for a week after Irene hit in 2011, and 13 days after Sandy hit in October of 2012.
These fishes are troupers one and all.
Interestingly enough, the plants also survived fairly well from the light let into my den from my windows (one of which has partial southern exposure). I also managed to run the filters and my lighting systems for at least a few hours a week over the past two weeks. This was useful in filtering some of the fish waste which could have raised ammonia and nitrite to dangerous levels.
Overall, we weathered this monster of a storm fairly well, even if many of our beautiful trees did not.
One of the real joys of this hobby is to constantly try different ways in which to maintain your fishes and plants in order to make the hobby as affordable as possible.
For example, if one takes the manufacturer's advice regarding changing filter media regularly, they are going to spend a considerably greater sum of money each year than if they reuse the media. This is especially true if one is maintaining several aquariums.
This author does not change my filter media every month. Instead, I reuse it until the media wears out. This means that I can use the same media for years before changing it. I also don't use carbon since it can leach minerals which my plants need for growth, from the water table of my aquaria.
Recently, I have decided to do something similar with the T5 light bulbs I use in my Hagen GLO lighting systems.
At first, I changed the bulbs every year. However, it appears that these T5 bulbs may still operate within their proper spectra for up to 18 months. Moreover, I was reading a post on the Internet which said that fluorescent light bulbs only drift about 5 - 10% throughout their lifetime, so it makes sense to use them until they burn out.
They say that a consequence of using bulbs after they drift from their rated spectra can be algae growth. However, I use uv sterilizers in my planted aquaria which keeps algae to a minimum.
This means that instead of changing T5 bulbs every year, one may be able to get at least three years out of them before they burn out and need to be replaced.
Fishkeeping can be a very expensive hobby, especially if one owns several aquariums. So the more ways that we find to reduce costs, the better.
Speaking of reducing costs, for those with planted aquaria who use seachem Flourish plants tabs, this author has found a 40 tab box for sale for about $20 - only $17 more than the 10 tab box many pet stores sell. Check Amazon.com for these bargains.
Earlier
Update: Hey Mr. Eheim? How About Including Baskets Like The One You Have
In Your Eheim 2213, With All Eheim Classic Canister Filters?
I have been using two Eheim 2213 canister filters for the past year and they really are terrific.
They are well designed, simple to use, and thanks to the media basket in the 2213, a breeze to clean.
The only question that I have is why has Eheim ommitted this useful feature in the 2211, 2215, 2217 and 2262 models?
As far as this author is concerned, most people would probably be willing to pay a few dollars more in order to have the benefit of the media basket; especially since it reduces the cleaning time of this filter substantially.
So how about it Mr. Eheim?
Earlier...
Update: Adding Another Fluval 305 To The 37 Aqueon - A Fluval E 300 Digital Heater Burns Out After Only 10 Months Of Service
About a week ago I decided to add a canister filter to my Mr. Aqua 13.3 gallon acrylic tank. It made sense to transfer the Fluval 106 which I had on the Aqueon 37 to the 13.3, so I did.
This left me needing another canister filter for the Aqueon 37. I went to Amazon.com and took a look at some of the canister filters available, and then settled on an API Nexx modular filter.
However, after I ordered it I had some misgivings in regard to what I had read about this filter leaking, and its overall questionable build quality.
So, I decided to cancel my order and search for another canister. Then I remembered seeing Fluval 305's listed on Amazon.com for around $90 each - $30 cheaper than the last 305 I purchased almost two years ago. I decided to order one, and set it up last night.
It's been running fine ever since, in conjuction with my other 305, which was purchased almost two years ago.
The 305 is a terrific filter that does an excellent job of keeping your aquarium's water clean. I use one of the 305's for mechanical filtration, as well as CO2 injection and uv sterilization. The other 305 is used as a two stage filter, however, with more ceramic nodes for the biological filtration than is usually used in this filter.
I don't use carbon in any of my filters, since it leaches many of the nutrients from the water column that my plants need to absorb.
The Fluval 305's have become a real bargain since the 05 series was replaced by the 06 series, even though I have seen some online retailers still asking more than $179 for the 305.
At the $89.95 price that I purchased the 305 for (plus tax) this filter may be the best bargain in new canister filters to be had.
It was the middle of the night and this author had just looked up from my slumber, when I noticed something strange. The normally green LCD display for the Fluval E300 that I use to heat my Aqueon 37 was blank. No color, no temperature being displayed.
As it turns out, the heater burned out. Later in the day, I decided to try to remove the top of the unit, and even with just a slight bit of effort the glass not only cracked, but completely split about midway up the E300, with the bottom of the glass being completely removed from the heater
There was a strong smell of burnt circuitry. Being a complete loss, it did not make any sense to send this heater back to Fluval. And the fact that I purchased it at a discount - $32.40 on Amazon instead of $52.99 - meant that I had no intention of even wasting about $10 to ship this back to Fluval.
However, the unit was not a total loss since I did remove the fish guard from it, which I can use with another E300 that continues to operate after nearly two years.
Being heavy duty plastic, these fish guards can get pretty funky sitting in the water for any length of time. So the extra fish guard will enable me to remove the dirty fish guard and allow it to soak in order to remove all of the algae from its surface, so that it can be used as a stand in for this the other fish guard.
As for digital heaters, as much as I can appreciate their sleek look and complex features, they are too tempermental for my liking. There's also the issue of quality control with today's aquarium heaters in general.
It seems that you either get a reliable one or a lemon. There doesn't seem to be any moderate ground here. And it doesn't seem to matter very much which manufacturer you purchase these heaters from either, since there are as many criticisms in regard to their performance as there are positive comments.
This author still has a 30 something year old Supreme Aquamaster Heetmaster II, 75 watt aquarium heater from my first go around in this hobby, which still works fine. The unit was in service from the late 1970's until the late 1980's when I got out of this hobby. And it went unused for about 22 years until I got the urge to get back into fishkeeping.
After sitting in a box for 22 years this old heater worked perfectly from the getgo, when so many heaters purchased brand new in the modern day, fail right out of the box.
It is a sad commentary on the planned obsolescence of many of the products that are manufacturered in the modern day. We really do live in a disposable society.
Earlier...
Update: The Mr. Clean Majic Eraser Continues To Amaze This Fishkeeper With Its Ability To Easily Clean Acrylic As Well As Glass Aquariums - It Is Easily The Best Algae Removing Tool This Author Has Ever Encountered, And Easily Removes Algae From Your Plants As Well
Yes, my fellow fishkeepers, you did not misread the last part of the above statement.
The Mr. Clean Majic Eraser also cleans the algae off of plants - and quite well.
How many times have you had such algae build up on your plants that you decided to simply cut a leaf off a plant, rather than have it marr your otherwise beautiful aquarium?
If you're like many fishkeepers, you have probably had to do this myriad times.
The Mr. Clean Majic Eraser works as well at removing algae from plant leaves as it does in removing it from the glass panes of an aquarium.
Simply take one of these small scrubbing pads and gently rub it along the surface of the affected plant leaf. You'll be surprised how easily the algae is removed.
Just make sure that before you do so, you have a filtration system that will remove the algae from your aquarium - a diatom filter - or ever better, a uv sterilizer which will kill off the algae before it can be reintroduced to your aquarium.
Earlier..
Update: Siliconing The Fittings On An AquaTop IL10UV Sterilizer
First off, I'd like to say that that I think the AquaTop IL10-UV 10 watt UV sterilizer is a genuine bargain. The bulb AquaTop includes with the unit is inexpensive (it can be purchased for $11.95 at the TruAqua.com Website), however, it does do a credible job of removing algae and bacteria from the water columns of my aquarium.
There are more expensive versions of this same bulb from other manufacturers which may be better in terms of their longevity and germicidal ability.
However this remains to be seen.
Moreover, at nearly six times the price of the uv bulb which AquaTop includes with the IL10UV, given that the bulb will still have to be replaced at least once a year, this huge difference in price must be questioned.
As for the IL10-UV, this author owns two of them, one of which I use as a backup.
For the past seven months the IL10-UV has performed flawlessly in its ability to keep my 37 gallon aquarium from being completely overrun by algae.
The aquarium uses T5 lighting, CO2 injection, and fertilizer tablets planted in the tank's substrate, so there's a lot of nutrients in this aquarium's water table, which in the past, algae have both feasted upon and propagated exponentially from.
The result was always the same: green water so thick, that I could not see my fish or plants.
The AquaTop IL10-UV quickly remedied this situation. In fact, the unit did such a fine job, and at a such an affordable price, that I recently purchased AquaTop's entire lineup of hob filters with uv sterilizers incorporated into their filter bodies: the PF-15UV, PF-25UV and PF-40UV.
Like the IL10-UV, these filter/uv sterilizers do an excellent job of keeping the water tables in my aquariums nice and clean.
And thus far, the units have operated perfectly.
In fact, the only problem that I have had in the past year is with the IL10-UV. And that had nothing to do with its UV performance, but instead, the flimsy washers that AquaTop supplies with the IL10-UV.
The fact is that while the IL10-UV is a genuine bargain in inline uv sterilizers, the unit leaks like a sieve.
And the second one I purchased leaked even worse than the first. Moreover, I am not the first person to complain about an IL5-UV of IL10-UV leaking like this either. Nor am I the first person to state that AquaTop's instruction manuals (if you can even call them that) leave much to be desired).
So what's the remedy?
Purchase a tube of non toxic silicone from Marineland or some other company that manufactures a non toxic version of silicone, and apply it to the areas where the IL10-UV is plumbed into your canister filter's output line.
Give it 48 hours to dry and your IL10-UV should be leak free for several years.
Keep in mind that when you need to change the uv bulb (usually every 7-10 months of so), you don't need to unscrew the top and bottom fasteners on the IL10-UV.
Instead, simply unscrew the area on the IL10-UV where the arrows are located, remove the old uv bulb, and resecure the area after installing the new bulb.
For those of you who are interested in purchasing an AquaTop IL10-UV, Amazon.com is having a sale on these units, which are now selling for under $35, and qualify for free shipping. This is one heck of a bargain for a 10 watt uv sterilizer in spite of its leaking; which as I have stated, can be easily remedied.
And if you choose to go with a more expensive version of the uv bulb (a T5 unit) this will install exactly like the standard bulb which AquaTop includes with the IL10UV. That is, if you want to spend about 65 bucks for it! - nearly double the price of the entire IL10-UV including its uv bulb.
Earlier...
Update: Current Aquarium Setups
37 gallon display tank
Fluval 305 canister filter loaded with mechanical filtration only, and with an AquaTop IL10-UV ultraviolet sterilizer plumbed into its output tube, and also used as a CO2 reactor for my DIY CO2 system
Fluval 305 filter used for biological and chemical filtration
(1) Hagen Glo 24" 24 watt x 2 T5 fluorescent lighting systems with 6700K bulbs
Via Aqua 200 watt heater
Aquatic Fundamentals aquarium stand
(5) Red Eye Tetras
(9) Rasbora Harlequins
(1) Neon Tetra
(3) Orange Fancy Guppies
(1) Platinum Blue Angelfish
(2) Panda Cory Catfish
(1) Potted XXL Rose Sword Plant
Aqueon 20 long
AquaTop PF-40UV HOB filter/UV sterilizer
Fluval 106 canister filter also used as a DIY CO2 diffuser
(1)Hagen Glo 24" 24 watt x 2 T5 fluorescent lighting system with 6700k/18000k bulbs
Fluval E 100 heater
(6) Rasbora Harlequin fish
(3) Neon Tetras
(3) Fancy Orange Guppies
12 Gallon Mr. Aqua aquarium
Hagen GLO 36" 39 watt x 1 T5 lighting system with 18000k bulb
AquaTop PF-15UV hob/sterilizer
Eheim 2213 canister filter also used as a DIY CO2 diffuser
Supreme Aquamaster Heetmaster II 50 watt heater
(18)Female Fancy Orange Guppies
Dwarf Hairgrass & Microsword
Mr. Aqua 13.3 gallon bowfront aquarium
20 Fancy Orange Guppy males
(1)AquaTop PF-25UV hob/sterilizer filter
(1)Eheim 2213 canister filter used for biological and mechanical filtration as well as as a diffuser for my DIY CO2 system
(1)Elite 50 watt heater
(1) Hagen Glo 24" x 2 24 watt T5 fluorescent light with 6700k/18000k bulbs
Dwarf Hairgrass & Microsword
DIY CO2 System
Aqueon 5.5 gallon breeding aquarium
(1) Eheim 2211 canister filter
(1) Marineland 25 watt heater
(4)Four Orange Guppies 1 male, 3 female
Earlier...
Update: The Mr. Clean Majic Eraser Is Easily The Best Algae Removing Tool This Author Has Ever Encountered
Having tried a number of scrub brushes and other cleaning utensils such as the Mag Float algae scraper, this author has found that these items do a decent job removing most types of algae. However, as you get to the lower portion of your aquarium, it is easy to stir up the substrate and rub the sand floating in the water against your tank's glass, which can result in some bad scratches.
Even the Mag Float products can scratch glass, as this author learned from first hand experience. And they do require quite a bit of force when it comes to removing diatom algae.
As such, I was completely taken aback when using a Mr. Clean Majic Eraser for the first time, since it *removed diatom algae from the walls of my acrylic aquarium with such ease, that it really makes the aforesaid products outmoded.
*This product also removes algae from plant leaves, by gently moving it along the affected areas of your plants.
The Mr. Clean Majic Eraser is that good. The thing is that these small white pads are so unimpressive looking, that you simply don't expect that they are going to clean as well as they do. And, the most important point here is that they are chemical free - which is extremely important to a fishkeeper.
They can also be rinsed and reused until they gradually fall apart.
The Mr. Clean Majic Eraser should be part of every fishkeeper's aquarium cleaning kit. They have made the job of cleaning the panes on my aquariums significantly easier than with any other cleaning brush I have ever used. The amount of force needed to remove diatom algae is far less with the Mr. Clean Majic Eraser than with a Mag Float magnet algae scraper.
Quite simply, the Mr. Clean Majic Eraser is tremendous! I only wish that I had found this product a few years ago, so that I could have saved myself quite a bit of elbow grease.
Earlier..
Update: Getting The Most Out Of Aquaclear HOB Filter - Why It Pays To Buy An Entire Filter As A Spare, Instead Of Spending A Lot Of Money On Many New Parts For It
When it comes to the Aquaclear series of power filters, the brand is supported by a substantial number of loyal fishkeepers who enjoy the flexibility of these cleverly designed filters.
In fact, many Aquaclear owners like to customize their filters for the specific needs of their aquaria.
One of the main concerns for the small aquarium owner is to find a filter which offers substantial biological and mechanical filtration, without having so much flow that the filter completely overwhelms the aquarium.
What good is a powerful aquarium filter if your fish are completely exhausted from having to constantly swim in its powerful current?
The Aquaclear filters are ideal in such situations, since all but the largest Aquaclear (the 110 or 500) utilize the same electric motor to power these filters. The only difference between the Aquaclear 20,30,50 and 70 (aside from their larger housing), is that the impeller fan for each of these filters is larger than the subsequent smaller version.
Now imagine that you have a 15 gallon aquarium with a few lovable but very dirty gold fish, and the filter which is rated for this tank simply can't keep the tank clean. This is a common problem with fishes that eat and defecate more than you average species of fish.
In this instance, one can purchase one of the larger Aquaclear filters and then buy the impeller fan from one of the smaller Aquaclears to replace the larger fan with. Spare parts for this brand are common and can be purchased at many online tropical fish retailers.
For example, if you purchased an Aquaclear 70 for your 15 gallon aquarium, even on its lowest setting, it would create too much turbulance for your fish.
However, if you purchase an Aquaclear 20 or 30 impeller and install it in the Aquaclear 70, you will have the benefit of the 70's larger mechanical and biological surface area, yet the same flow as the Aquaclear 20 or 30.
This will enable you to increase the biological load in your aquarium, while offering greater mechanical filtration, both of which will help to keep your aquarium cleaner and healthier for your fishes.
And if you should decide to eventually purchase a larger aquarium, you can simply replace the smaller impeller from either the AQ 20 or 30, with the larger one which came with the AQ 70.
This is just one example of why the Aquaclear line of hob filters is so popular with aquarists.
Given that an increasing number of people are getting into planted aquariums which use a sand substrate, a word of caution is advised here. Nothing can contribute to reliability problems with an hob filter faster than sand being sucked up into the filter's electric motor.
Once the sand gets into the motor, the impeller grinds the sand against the motor's housing, oftentimes marring the smooth surface of both.
The result is that the motor will often make quite a bit of noise, and even freeze up at times infuriating the owner, when in reality, the filter worked perfectly until the sand damaged its electric motor.
This author actually threw the electric motor from my Aquaclear 50 out because of this problem, and replaced it with another electric motor from one of the Aquaclear 20's I have sitting around; while using the impeller fan from the AQ 50 on the replacement motor. This is just one of the advantages of owning several Aquaclear hob filters in various sizes.
Any fishkeeper who has purchased spare parts for their canister or hob filter knows how quickly the costs can add up. For this reason, it is often a good idea to simply purchase an entire filter which can be parted out as the parts from your regular filter wear out.
This is especially true since there are great bargains to be had on aquarium filters. For example, a Fluval 305 which prior to its replacement by the Fluval 06 series of canisters, usually retailed for about $180, can now be purchased on Amazon.com for $90 including shipping.
If you consider the cost of replacing just some of the parts on a Fluval 305 as it ages, you can come close to the $90 purchase price of a brand new 305. Gaskets, impellers, impeller shafts, intake and output hoses and their associated components add up quickly. By purchasing another unit new, you get all of the components you need plus the new filter's motor, housing, trays, and biological and mechanical filtration.
As such, if you like the filter you are using and plan on keeping it, it is simply foolish to purchase replacements separately, when in all probablity you can purchase an entire filter oftentimes at a substantial discount and get all the parts you need plus several important extras. For example, supposing you purchase several replacement parts for your filter, and the motor suddenly gives up the ghost.
You've spent all that money on parts, and now you must spend that much more on a new motor for your filter. To illustrate this point, a replacement motor for a Fluval 305 is about $135, when you can purchase the entire filter on Amazon for only $90.
This author doesn't want to belabor this point, however, the savings is so significant, that it can't be ignored.
I have made it a point to have several spare filters laying around in the event that the ones in service ever have a problem that would take require that the be taken out of service for a time. When it comes to this fantastic hobby, you can never have too many spares.
Earlier...
Update: The Hagen GLO Light Timer - Quirky But Very Useful
Every time this author has purchased a Hagen GLO light fixture, it has come with a GLO timer. The timer is a simple enough looking piece of equipment with two three pronged electrical outlets.
However, the GLO timer's setup can be more than a bit confusing to a first time user. Specifically, the setup instructions for this timer are quite poor. In the past, most light timers have included two pieces of plastic which you merely insert in the desired areas of the timer, where you want to turn the unit on and off.
With the Hagen GLO fixture the setup is completely different.
Instead of having the two pieces which you insert for on and off time, the Hagen has a piece for each 15 minute segment. As such, the user must press down on each segment in order to open it. And you must press down on every 15 minute segment from the time which you choose to turn the unit on, until the time you turn the unit off.
For example, if you decide to have the fixture turn on at 9AM and turn off at 8PM, you would have to push down every 15 minute segment from 9AM until 8PM. If you miss just one segment, the GLO timer will turn your lighting fixture off prematurely.
Moreover, the GLO instructions tell you to push the segments for this timer down, however, you really pull them out.
Aside from these caveats, the GLO timer is very useful, since you can set it to automatically turn on and off several times per day - this feature can come in handy if you have an algae problem in your aquarium, and are seeking to turn the light fixture off for a few hours during the day to disrupt algae growth.
Overall, this is a very good product with lousy instructions. Hagen should include a drawing of how you open each 15 minute segment, since to the naked eye, the segments themselves look like one large solid black ring around the timer housing, which only serves to confuse the user. Initially, this author thought that by pushing down each 15 minute segment, Hagen meant that you should push down on the appropriate number on the top of the timer, which corresponds to the times that you wish to turn the timer on and off, rather than using the black ring which surrounds the timer housing in order to accomplish this.
For those enthusiasts who have also been confused by Hagen's instructions, the aforementioned should be helpful.
Earlier..
Update: Mr. Aqua Frameless Aquariums Are A Bargain!
Recently, this author decided to break the 26.5 sectional guppy aquarium down and to replace it with two Mr. Aqua acrylic frameless aquariums: A Mr. Aqua 12 gallon long, and a Mr. Aqua bowfront 13.3 gallon.
First off, I must say that these are beautiful looking aquariums that rival the Aqua Design Amano frameless aquariums, but at a fraction of the price.
The Mr. Aqua tanks are manufactured in Taiwan, which is known as one of the largest commercial glass manufacturers in the world. And their build quality is quite good. I find the aesthetic of the 12 long to be quite appealing given that it is as long as some 50 gallon tanks, and looks larger than its 12 gallon capacity.
I keep the 12 gallon on a desk, and on a slight angle positioned next to it, the 13.3, which look quite nice sitting adjacent to one another.
Earlier...
Update: Growing Dwarf Hairgrass & Microsword Can Be Tricky - So Can Keeping Your Water Clear When Using T5 Lighting & Lots Of Fertilizer
For the past few years I have been trying different methods to get dwarf hairgrass and microsword to grow well in my Aqueon 20 long aquarium.
However, early on the dh did not carpet, and didn't have the nice lush green color I had seen in the photos I had seen on the Web. The microsword simply melted and had to be thrown away.
Then I decided to add pressurized CO2 and T-5 lighting to the 20 long, in addition to Flourish plant tabs and liquid fertilizer a few times a week.
The dh began to get a nice lush look to it, and slowly carpeting the bottom of this aquarium. However, with the addition of a second T-5 lighting system and a total of about 4.8 watts of light per gallon of water, the dh really began to grow, getting significantly taller, while carpeting.
A brief time later, I began to notice that strands of microsword were growing in the 20 gallon long, which began to take up residence anywhere that the dwarf hairgrass had not managed to grow.
The dh and ms are now propagating nicely throughout this aquarium, giving it a lush green look which contrasts beautifully with my fish: Rasbora Harlequins, Neon Tetras, and Orange Fancy Guppies.
I have tried a number of plants in my 37 gallon, however, the nearly 2 foot height of this aquarium makes it difficult for baby plants to grow, given the distance of the lighting from the substrate.
So I decided to add two large Rose Sword Plants to the tank, and they have filled it out nicely. The plants are growing well giving off new leaves, and the fish enjoy the safety of the many leaves to hide behind.
These Rose Swords are very tall, the longest stems reaching the top of tank. And the size of the plants is nice, because they use many of the nutrients in the water before the algae and bacteria can absorb them.
Using uv sterilizers has greatly reduced the amount of algae and bacteria in the water table on both of my heavily planted aquariums, so the plants are able to avail themselves of nutrients within the water table that were once devoured by algae and bacteria.
The result is that the water stays nice and clear, and the algae doesn't grow all over the plants.
In this author's opinion, if a fishkeeper is going to utilize a hightech lighting system with CO2 and supplemental fertilization, they are also going to experience regular blooms of green or cloudy water, depending on whether algae or bacteria are rapidly multiplying in the water column.
The uv sterilizer makes a lot of sense given its ability to kill off harmful pathogens, while keeping your water crystal clear.
As such, this author highly recommends the addition of a uv sterilizer to any freshwater planted aquarium, since it offers both the ability to keep your tank free of harmful pathogens and algae, as well as keeping your water clear.
What a great hobby!
Earlier...
Update: The AquaTop PF-UV25 HOB Filter - Impressions After A Week Of Use
This author purchased the AquaTop PF-UV25 hob filter after my AA Green Killing Machine Mini (3 watt uv sterilizer) stop functioning properly.
The Mini worked fine for a few weeks, however, recently, would no longer clear the cloudy water from my aquarium after it had been turned off for a few days. What is strange about this situation is that the red led which indicates that the bulb is still operating, remains on, even though the AA Mini will still not clear green or cloudy water from my aquarium.
As for the AquaTop PF-UV25, this is the second product that I have purchased from this company (the first being an IL-10UV 10 watt inline uv sterilizer), and I am very impressed with it. I purchased it because of the good experiences I have had with the IL-10UV.
There's quite a bit of controversy within the aquarist community in regard to the topic of UV sterilization.
For years, tropical fish keepers have complained about myriad forms of algae taking over their aquariums; especially when they employ the use of high-tech lighting systems and CO2 injection.
This has led to many an aquarist adding uv sterilization to their aquariums to combat algae blooms.
This author decided to do the same after the water in my two high-tech planted tanks remained cloudy. Even after diatoming, the water in the tanks would be clear for a day or so and become cloudy again. There were simply so many nutrients in the water, that the bacteria and algae fed on them and multiplied exponentially until I could no longer see into my aquariums.
After I added my first AquaTop UV sterilizer, the water cleared within 24 hours. Now I use the sterilizer a few times a week to keep the water clear, while conserving the life of the uv bulb.
My second uv sterilizer is incorporated into the AquaTop PF-UV25 hob filter. This unit has a well constructed separate power supply for the uv bulb, which can be turned on independently of the filter motor.
This enables this author to run the uv sterilizer intermittently, whenever the water starts to cloud up, so that I can quickly clear the water.
For those who have claimed that these inexpensive uv sterilizers may be able to clear algae blooms, but can't remove bacteria and viruses, I disagree.
The cloudy water that I have experienced is the direct result of extensive bacterial growth due to the nutrient content in the water table on my aquariums.
And when I use the uv sterilizers on this water, the cloudiness disappears within a day or so, which means that these sterilizers are killing off large amounts of bacteria. This means that these uv sterilizers, in spite of their cheap quality bulbs, do work.
However, they may not kill off as many different types of bacteria as a better uv sterilizer bulb would, so I also use a Vortex D1 diatom filter to remove any remaining harmful pathogens which may be lurking in my aquariums' water tables.
If you are an aquarist who's frustrated with the inability to keep your aquarium's water nice and clear because of its high nutrient content, even though you are fastidious about water maintenance, a uv sterilizer will enable you to clear the water in your aquarium, and to maintain it by running the uv sterilizer several times each week.
In this author's opinion, multiple or redundant filtration is best for medium to larger sized aquariums, because if one filter fails, the other will ensure that your fish have plenty of oxygen and filtration.
I also think it's a good idea to use redundant filtration to maintain your biological filter. For instance, when you clean one filter you tend to lose a certain amount of your biological filtration regardless of how careful you are, while the second filter is still running, which ensures that your biofilter remains secure.
In the instance where you are using a filter like the AquaTop PF-UV25, which is only good for mechanical filtration and uv sterilization, you should also have a second filter which uses biological filtration. In my 20 gallon long heavily planted tank, this author uses the AquaTop PF-UV25 for mechanical filtration and uv sterilization, and an Eheim 2213 canister for mechanical and biological filtration. It's an excellent combination which works quite well.
Fishkeeping can be done simply enough, or it can become a very expensive hobby, depending on the aquarist. As such, whether you are running one tank or several, it pays to purchase quality equipment whenever you can. And it is best to look for sales when doing so.
This author has saved hundreds of dollars in my purchase of lighting, heaters and filters for my aquariums, by making sure that they are on sale when I do so.
Moreover, I am always interested in seeing the latest equipment and how it compares to the tried and true gear which this hobby's enthusiasts swear by.
I have been curious about the API Nexx modular filter system which I have included a video of at the top of this Webpage.
I like the concept, however, there have been several complaints in regard to this filter leaking, which may involve some type of design flaw.
Either that, or these people were careless in regard to how they set this filter up.
Given its affordable price - the API Nexx single filter retails for about $100 and can be had for as little as $60 including shipping on Amazon.com, I do think it warrants a look.
Whether it will stand up to use over time is anyone's guess - especially since it's only been on the market for about a year.
After more than two and half years back in this hobby after a 25 year hiatus, it continues to be challenging and tremendous fun!
Earlier...
Update: Reviewing The Fluval O5 - 06 Series Of Filters' Bypass Problem
If you go to virtually any aquarist forum on the Internet, you will inevitably find a post regarding the bypass problem with certain canister filters, including the Fluval 05 series.
In fact, many Eheim owners have described how they gave up using Fluval 05 canister filters because of this bypass problem.
As the owner of both Fluval and Eheim canister filters, this author decided to see if the Fluval 05 series does indeed suffer from a design defect, or if there is some other reason for this bypass issue.
Over the course of the pass year, everytime I removed my Fluval 305 canister in order to clean it, when I replaced it and turned the filter back on, the 305 immediately began shooting a tremendous amount of detritus back into my aquarium, which would then take about a half an hour for the filter to remove.
Undoubtedly, this problem is responsible for the many complaints by former Fluval 05 series owners.
As such, this author decided to attempt to find exactly where the probem was in the Fluval design.
The last time I cleaned my Fluval 305 canister, I also removed the ribbed intake and exhaust hoses, and then flushed them with hot water for several minutes. To my surprise, the amount of gunk that came out of these hoses was tremendous.
Less surprising, was the fact that unlike in the past when I reinstalled the 305 and found all of this gunk being recirculated into my aquarium, this time around there was no detritus being blown back into the aquarium. The 305 is now working as it was designed to.
So, the problem with the 05 series is not a legitmate bypass issue at all, but instead, the ribbed hoses which collect all of this gunk, and then recirculate it into the tank when the filter is turned on again.
My Fluval 106 has the same problem with these ribbed hoses, which is remedied by cleaning the hoses out everytime I clean the 106. Like the 305, the 106 is a nice filter that does an excellent job of keeping the water in my aquarium clean. I have also noticed a similar problem with my Eheim 2213 Classics, when turning the units back on after a cleaning. A lot of detritus gets circulated back into the aquarium.
What's the simple cure? When you clean these filters, remember to remove their hoses and flush them with hot water before returning them to your tank. This way you can avoid blowing all of the gunk that your filter had previously cleared from your aquarium, back into it again.
Yes, it is a bit inconvenient, and does defeat the filters' quick release feature, in that you lose the vaccum in the filter when you do this. However, it is better than recirculating all of the waste that your filter has removed from your aquarium. As for the filters themselves, in this author's experience both Fluval and Eheim make excellent filters, with the nod going to Eheim for its slightly better build quality, and the nod going to Fluval for its more contemporary design and greater surface area.
Earlier...
Update: Review on AquaTop PF-UV25
I just bought an AquaTop PF-UV25 for my 20 gallon planted aquarium and I like it. As for fitting this filter on anything larger than a 20-25 gallon tank, one should consider the PF-UV40.
The PF-UV25 also has very little clearance - it just fits my Aqueon 20 long, so even a fraction of an increase in the width of the lip of an aquarium would preclude the ability to use this filter. Check with AquaTop to see if the PF-UV40 has more clearance.
As for the build quality of the PF-UV25, it is fairly well constructed, and has a heavy duty separate power supply for the UV bulb, which also contains an on and off switch.
I like the flexibility here, since you can run the uv bulb independently of the filter, increasing the life of the bulb.
The 7 watt bulb for the PF-UV25 is also discounted at the TrueAqua Website - $11.95 each. This is a lot better than spending nearly $30 for a replacement bulb for my 3 watt Green Killing Machine Mini.
The management at AquaTop have studied their competitors quite well, and designed a product in their line of UV hob filters that is already attracting lots of positive attention.
In this author's opinion, these uv hob filters are going to force companies such as Aquaclear, Whisper and Fluval to design uv hob filters of their own in the future, if they want to remain competitive. This is especially true given the increased popularity of high tech lighting systems and CO2 injection, which have made it necessary incorporate uv sterilization into aquariums used with these high output lighting systems.
I have several canister filters, as well as a number of Aquaclear hob filters, all of which work well in tanks without CO2 injection.
However, once you add pressurized CO2 with fertilizer supplementation and T5 lighting, it becomes much tougher to keep your water table clear, because of all of the additional nutrients in the water.
The end result is bacterial and algae blooms that make keeping your aquarium's water clear, almost impossible without uv sterilization.
As for the AquaTop PF-UV25, since it's only mechanical and chemical filtration, I use it with an Eheim 2213 canister filter, which has two stage filtration, including biological. I don't use carbon in this filter as I consider it to be unnecessary. I can also just rinse out the filter pad in the PF-UV25 and use it repeatedly for mechanical filtration when the carbon portion loses its effectiveness.
Together, these filters work quite well, since the Eheim keeps the biological filter in this aquarium healthy, and the PF-UV25 kills off any bacteria or algae spores that can lead to the water's becoming cloudy.
I have been using an AquaTop IL10UV 10 watt inline uv sterilizer plumbed into the output on a Fluval 305 for another aquarium, and it has worked flawlessly for the past four months. The water is crystal clear.
In my experience if you are using a high-tech CO2 lighting system with pressurized CO2, you need a uv sterilizer to keep the tank's water column clear. Otherwise, you'll end up with bacterial and algae blooms every week.
Given the high price of many uv sterilizers, the AquaTop line up is quite affordable and does an excellent job of keeping bacterial and algae growth under control.
I also purchased an AA Green Killing Machine 3 watt uv sterilizer, however, this was more cheaply made, and the uv light crapped out after a month, so I can't recommend it. Especially given the high price of replacement bulbs for this unit.
However, the AquaTop IL10UV has been terrific, and thus far it appears that the PF-UV25 is also a winner. So I can recommend AquaTop enthusiastically. I think that this company is going to give better known manufacturers of hob and canister filters such as Fluval, Eheim and Rena, a lot of competition in the future. Especially with those aquarists who are using high tech lighting systems and CO2 injection.
It's always a pleasure to find a quality product at an affordable price, and AquaTop has done so with its new line of uv hob filters.
Earlier..
Update: Review Of The Fluval 88 Gram CO2 System
After using the Fluval 88 CO2 system for the past six months, I must say that my overall impression of this CO2 rig is quite good. The Fluval 88 is elegant in an understated sort of way; cleverly designed and well made.
Its machined regulator may be diminutive in size, however, has a sturdy feel.
The CO2 88 also represents a good value when compared to some similar CO2 rigs sold by companies like GLA and Aqua Design Amano.
For example, the ADA top line CO2 setup sells for about $250, and only comes with a 75 gram cartridge.
The Fluval CO2 88 on the other hand, comes with an 88 gram CO2 cartridge and usually retails for anywhere from $50 to $75. Although this writer has seen the CO2 88 selling for as much as $100 and as little as $36. I purchased my CO2 88 on sale at Doctors Foster & Smith for a paltry $36, and it was worth every penny.
The only real shortcoming to the Fluval CO2 88 and the rest of the downsized CO2 systems is the cost of the CO2 refills, since they are expensive.
For example, the average price of a CO2 88 refill is about $12. In this author's experience a canister lasts about a month at 1 bubble every three seconds and turning the CO2 system off at night. That works out to $12 per month for CO2, or $144 per year.
This doesn't sound too bad until you consider that purchasing a larger canister of CO2 is far less expensive in the long run.
The following is an illustration of how much money can be saved each year by using a larger CO2 canister.
1 lb. is equivalent to 453.59237 grams. There are 2,268 grams in a 5 lb. tank of CO2. To put this into perspective, that is more than 26 times the amount of CO2 contained in a single Fluval 88 gram CO2 canister. Moreover, it costs about $15 to fill up a 5 lb. CO2 canister which can last at least a year. Compared to the $144 for the 12 Fluval CO2 88 canisters you'll need to run you Fluval CO2 rig for a year, this is a genuine bargain; even if you have to spend more initially for a better CO2 rig.
For my 37 gallon display tank, this author spent about $200 in total, which included a 5 lb. CO2 tank, and a CO2 regulator equipped with a solenoid valve and a bubble counter.
Within a year I would have spent more than that on my Fluval CO2 88 system plus 12 CO2 88 gram cartridges.
Still cheaper is the DIY CO2 system created by the fermentation method. This system can run well under $20 per year. You simply buy a 25 lb. bag of sugar, a bag of yeast, make a CO2 generator out of a plastic 64 ounce soda bottle, some clear 1/4" tubing, and you have yourself a dirt cheap CO2 system.
As for a diffuser, you can take the tube from the CO2 reactor, run it into a 1/4" hole that you drill into the intake tube on your canister or hob filter, and you have yourself a CO2 system that will demonstrably improve the growth of your aquatic plants.
This author has chosen to use both DIY CO2 supplementation as well as a pressurized system. However, the pressurized system which I have been using on my 37 gallon aquarium, will now also be used on my 20 gallon long, since I am retiring the Fluval CO2 88 system.
I'll keep the system around in the event that I want to tinker with it on some of my smaller 5.5 gallon tanks, since I many decide to transfer some of the dwarf hairgrass and microsword which are now carpeting the bottom of my 20 gallon long aquarium, to these tanks in the future.
As for determining how effective a CO2 system is, whether it's DIY or pressurized, a CO2 drop checker is invaluable here, since you can see if your aquarium is receiving enough CO2 based on the color the reagent liquid in the drop checker turns. If it is turns green, you have about 30ppm of CO2 in your tank; yellow, and you have more than 30 ppm; blue, and you have less than 30 ppm.
I have read about some aquascapers using much higher levels of CO2 in their heavily planted-fishless tanks. They say that when the ppm for CO2 reaches 60 ppm or higher the plant growth is absolutely spectacular. Some of these enthusiasts have grown their planted tanks very quickly without fish, then added the fish after the plants had grown substantially.
There are so many different ways in which to enjoy this hobby, given the challenges that it presents and the learning experiences it offers. Whether it's the fishkeeping side of it, or the aquascaping side, for this author this hobby remains tremendous fun two and half years into it, after a 25 year hiatus. Except that now, I am a much better fishkeeper than I was the first time around, and I am gradually improving as an aquascaper as well.
Earlier...
Update: AA 3 Watt Green Killing Machine Not Clearing Algae Bloom
When this author first purchased my 3 watt AA Green Killing machine, it worked well at clearing the algae from my aquarium. The 3 watt unit is rated for up to a 20 gallon aquarium, however, using it on a 20 gallon is really maxing out the potential of this unit.
In spite of this, the AA Green Killing Machine 3 watter worked well the first few times I used it, even though it did take a few days to clear my aquarium's water.
However, after having used the unit a handful of times, I noticed that when the water in my 20 gallon would become cloudy, the AA 3 watter was not clearing it up.
I checked the red led light on the control box for the AA 3 watter, and it's still working. The only thing that I can think of is that the bulb itself is no longer operating within the proper wavelength.
If the bulb had burned out, the red led on the control unit should be out. So the situation remains a bit confusing, since the unit was purchased new, and the bulb did work fine at first.
I am now left to decide whether I want to purchase a replacement bulb or just go for a more expensive uv sterilizer.
Earlier...
Update: Status Of My Present Aquariums
My present aquarium setups are as follows:
37 gallon display tank
Fluval 305 canister filter used with an AquaTop IL 10UV ultraviolet sterilizer plumbed into its output tube
Fluval 106 canister filter
Aquaclear 20 HOB filter
Hagen Glo 24" 24 watt x2 T5 fluorescent lighting systems with 6700K bulbs
Fluval E300 300 watt heater
DIY CO2 Injection System
Aquatic Fundamentals aquarium stand
(5) Red Eye Tetras
(9) Rasbora Harlequins
(2) Neon Tetras
(3) Orange Fancy Guppies
(1) Platinum Blue Angelfish
(2) Panda Cory Catfish
(2) Potted XL Rose Sword Plants
Aqueon 20 long
AquaTop PF-UV25 HOB filter
Eheim 2213 canister filter
(2)Hagen Glo 24" 24 watt x 2 T5 Fluorescent lighting systems with 6700/18000k bulbs
Fluval E300 300 watt heater
Aquariumplants.com 5 lb CO2 tank with Milwaukee MA957 regulator
(6) Rasbora Harlequin fish
(3) Neon Tetras
(2) Fancy Orange Guppies
10 Gallon tank
Aquaclear 20 HOB
Eheim 2213 canister filter
Elite 50 watt heater
(18) Orange Fancy Guppies
(1) Amazon Sword Plant
(3) 5.5 gallon tanks
One Amazon Sword each
About 20 Fancy Orange Guppies per tank
(1) Aquaclear 20 per tank
(1)Big Al's 50 watt heater - Tank A
(1)Supreme Aquamaster Heater 75 watt - Tank B
(1) Big Al's 50 watt heater - Tank C
(1) 36" Hagen Glo 39 watt T5 fluorescent light with a 6700k bulb covering tanks: A, B & C
Earlier
Update: An Easy Way To Prime Your Vortex D-1 And XL Diatom Filters
The Vortex Diatom filter design may be forty years old, however, its patented ability to mechanically filter an aquarium remains unsurpassed.
The Vortex filters are built like the proverbial Sherman tank, some of which are still in service after more than three and four decades of use.
The only real short coming of these filters is in setting them up. While the Vortex filters may be the best mechanical filtration systems on the market, they are probably the most ideosyncratic aquarium filters ever manufactured.
The most difficult part in setting these filters up is in getting them primed - in other words, removing the air from the filter and its intake and exhaust tubes, so that the water can flow freely through them.
The Vortex setup for these filters says to turn them on, then upside down for a few minutes to get them to prime, before turning them rightside up again.
However, the filters can't just be turned rightside up without losing the vaccum.
Instead, you have to gently rock the filter back and forth until you gradually remove the air bubbles from it, before placing it upright.
This can take a lot more than a few minutes. Sometimes it has taken this author up to 10 ten minutes to accomplish this.
One day when I was attempting to prime my Vortex D-1, out of exasperation, I turned the unit rightside up and off, just leaving the D-1 sit unprimed.
When I returned about five minutes later, I turned the filter on expecting to have to turn it upside down and go through the priming process again, only to find that the filter had primed itself while being left to sit for a time.
So when I now prime the Vortex D-1, all I do is turn it on, turn it upside down for about 15 seconds, then turn it rightside up again and off.
I then wait for about five minutes, and then the unit back on, and it primes itself.
If you own a Vortex D-1 or XL and have been frustrated in the time it takes to get these filters primed, try it this way. You may be presently surprised. I know that I was!
Editor's Note: Make sure that the seal in the mason jar cap is seated correctly and that the cap is threaded properly, since improper sealing of the cap to the Vortex mason jar often results in the jar leaking air and water - both of which make the Vortex more difficult to prime.
Earlier...
Update: The Perfect Eco-System - My Snail Condo
When this author considers the time and effort that goes into my aquariums, it is nice to be able to maintain my snail condo with virtually no maintenance at all.
Specifically, this snail condo - a small tupperware container sans top that is probably about a half gallon in size - represents the perfect eco-system. All I do is top off some fresh filtered water once a week.
I keep the "condo" near a window which ensures a steady supply of green algae.
As the algae grows it serves as both a source of food and oxygen for the snails. And since it feeds on fish waste, the algae also removes toxins from the water, helping to ensure that the water in this fish condo stays cycled.
And all without an electronic filter, heater, or external lighting. With this simplistic system one can say: "All you need to have for fun is to add water and some snails!"
Earlier...
Update: Dramatically Reducing The Algae In The 37 Gallon Aqueon
This author has regularly used Seachem Flourish in my T5 lit aquariums over the past few years. However, I have found that this liquid fertilizer does contribute to the algae blooms which occur in 37 gallon. The situation became so problematic, that I was cleaning the hair algae off the aquarium glass everyother day.
As such, I decided that I would no longer add liquid fertilizer to the 37 gallon. Combined with using a uv sterilizer, the algae problem is now much better.
The 20 long is loaded with dwarf hairgrass, which has completely carpeted the bottom of the tank. Microsword is also sprouting up in several areas of the tank to provide a nice contrast to the dh. Since there is so much flora in this tank, the weekly dosings of the Flourish liquid fertilizer have not resulted in algae blooms. Instead, the liquid supplement works well in conjunction with the Flourish plant tabs.
Two of my Rose Swords have suffered from broken leaves, and I am floating them at the top of the 20 long in an effort to strengthen their root systems. The one Rose Sword in the 37 continues to do well with pressurized CO2 and T5 lighting (6700K).
The snails also continue to propagate like mad, so I am constantly removing them from these tanks and into a tupperware container. The container is left by the window, which allows for algae growth. The algae filled green water in this container is very nutritious for the snails.
This hobby remains very enjoyable after two and half years into it, having returned after taking a 25 year hiatus.
Earlier ...
Update: Plants In 20 Long & 37 Gallon Aquariums Growing Nicely - The Second Aqua Medic R100 Diffuser Breaks
When this author was removing the last Aqua Medic R100 from a diffuser I had in my Aqueon 37, the glass tube which attaches to the R100's bell cracked. These are very nice looking diffusers, however, they are cheaply made and do not last very long. When one considers the cost of an ADA diffuser (prices range from about $60 to over $100), at $16 the Aqua Medic R100 would appear to be good value.
However, having purchased two of the R100's only a few months ago, with both now broken, I must say that the R100 is not well constructed and should be avoided.
Several fishkeepers have complained about the cheap build quality of the R100, as well as the junky clips which it comes with to attach the R100 to the suction cup it's included with.
And the R100 is far from the only glass diffuser which is poorly constructed. There are many companies offering inexpensive glass diffusers similar in design to the R100, which also suffer from stress related breakage.
As such, if you plan to use this type of a diffuser with your pressurized CO2 system, it would be prudent to spend more money, and purchase a better constructed one.
Otherwise, stick with inexpensive plastic diffusers like Fluval's own ceramic diffuser, which at about $7 retail offers excellent value, and good dispersion of CO2 gas into your aquarium. It may not look as nice as the R100, however, it does just as good a job at half the price, and is a lot sturdier.
Since moving one of the Glo T5 lighting systems to the 20 long, the dwarf hairgrass in this tank is really carpeting nicely, growing lush, green and tall. The two T5 lighting systems produce a total of 96 watts of light, or 4.8 watts of light per each gallon of water.
Combined with pressurized CO2 and supplemental fertilizer, plant growth is significantly improved.
As for the 37 gallon tank, this author was pleasantly surprised to find that the Rose Sword Plants are doing quite well with only one T5 light fixture. Moreover, because of the use of a uv sterilizer, the algae spores have been reduced to a minimum. The combination of the lower lighting and uv sterilization has allowed the plants to grow unencumbered from the algae growth which once plagued this aquarium.
It is also interesting to note that even though this is a tall aquarium (nearly 23" in height), and there is only 1.4 watts of light per gallon of water, that the plants are growing very nicely.
I have read that Takashi Amano uses low levels of lighting in his nature aquariums, yet still manages to obtain spectacular growth from his plants, so a case can be made for using less watts of light per gallon of water, as long as your plants are of the type that can get by with low to medium lighting.
For those of you who have experienced problems in having algae growing on your plants, you will find the earlier post listed below of interest, since following these simple recommendations means the difference between having lush healthy plants, and those which either die off, or experience stunted growth due to their inability to absorb enough light.
Earlier ...
Update: Fluval 106 After A Month & The Challenges Of Growing Plants In A Tall Aquarium
After a month of using a Fluval 106 this author has found it to be a reliable piece of equipment that does a good job of keeping the water clean, while operating quietly. The 106's diminutive size also makes it a pleasure to clean.
On the negative side, the Fluval's ribbed hoses continue to collect gunk which gets blown back into the aquarium after you reinstall an 05 or 06 series canister.
This means that you should remove the intake and exhaust hoses of these filters whenever you remove these canisters for a cleaning.
It's more time consuming, however, a necessity given the ribbed construction of these hoses. This author prefers the smooth hoses included with my Eheim Classic filters, which don't accumulate anywhere as much gunk, even if they also need to be cleaned out every few months.
Any aquarium that is taller than 18 inches or so represents a challenge in growing baby to mid sized plants, since the lighting system is more than a foot and a half above these plants, making it difficult for them to out-compete algae for light.
If you are going to purchase a tall tank and intend to keep plants in it, your best bet is to buy tall plants which can out-compete algae for the light and nutrients in the water column.
This way the plants will use most of the nutrients in the water, depriving algae spores of the food they need to overrun your fish tank.
The algae problem in this author's 37 gallon aquarium became so bad that it was growing all over the walls of my tank as well as my plants.
As such, I decided to invest in an ultraviolet sterilizer, which has worked very well in reducing the number of algae spores in the water column. The water is now crystal clear.
Prior to using the uv sterilizer, the algae would grow all over my plants, further depriving them of the light they require for growth.
Now, the water is largely free of algae spores, so instead of growing on my plants it grows on the walls of my aquarium.
If I were to scrape the algae off the aquarium it would immediately attach to my plants, posing another problem - how to get rid of the algae without having it attack my plants.
The answer is simple enough.
Until these plants grow large enough to completely out-compete the algae for growth, I remove them once every week or two, then scrub the algae off the walls of my aquarium, while using a Vortex D-1 diatom filter to remove the algae from my tank.
Having done so, I trim a few inches off the roots of my plants in order to further stimulate their growth, and then replant them.
This system has made a significant difference in keeping the algae from attacking my plants. They are healthier, their colors vibrant, and throwing off new leaves every few days, while the older leaves are no longer overrun with algae growth.
If you are going to grow baby to mid sized plants in a tall aquarium, this is really the only way to do so without concern for your plants being overrun with algae, since using a T5 HO (or VHO) or metal halide fluorescent high lighting system with pressurized CO2 and lots of fertilizer, is going to produce a tremendous amount of nutrients in your water column, which algae will thrive on.
As such, unless you have large plants which are capable of absorbing these nutrients, your aquarium is going to be overrun with algae.
So either purchase large plants to begin with, or if you are going to add baby or mid sized plants, buy a uv sterilizer to ensure that algae will not over populate your water column. Moreover, remove your plants before you scrub the algae off your aquarium's glass. This will ensure that your plants are not covered with the algae as it floats in the water, so that they can continue to grow successfully. As for the controversy about using uv sterilizers full time, it has been determined that the biological filter in your aquarium originates from within its substrate, so using a uv sterilizer 24/7 will not kill off your biological filter; just the bacteria that is in the water column at any given time, which is constantly being replaced with refilted water and good bacteria.
Moreover, as your plants grow and the algae problem recedes, you can begin to use your uv sterilizer intermittently instead of full of time. Earlier...
Update: Aqua Medic R100 Reactor Breaks & An Update On The AA Green Killing Machine Mini
When I decided to forego the DIY CO2 system that I was using on two of my aquariums, I purchased a pair of Aqua-Medic R 100 diffusers to use as part of a new pressurized CO2 system.
At first the Aqua-Media R 100 appeared to be an ideal component to use as part of this system - a simple and elegant solution to replace the plastic and unsightly inverted cups that I cut from the bottom of a plastic soda bottle.
However, within a short time it became apparent that the Aqua Medic R100 is not very well constructed. The plastic clips that come with the unit are poorly made and break within a short period of time.
Moreover, as is the case with other glass diffusers of this design, the intake portion of the Aqua-Medic R100 is very delicate and breaks easily.
I still have one left that I will continue to use for the time being, however, I will not purchase another Aqua-Medic R100; nor will I recommend them to other fishkeepers.
Note that this author's opinion in regard to the R100 is not in anyway an attempt to impugn the Aqua-Medic name, as I believe that this company offers many fine quality products for the fishkeeper and aquascaper. However, the R 100 is not one of them.
The AA Green Killing Machine Mini is a compact 3 watt ultraviolet sterilizer combined with a small powerhead.
Unlike its 9 and 24 watt uv sterilizers, the 3 watter is a neat little unit that can be easily concealed behind some taller plants at the back of your aquarium. The 9 and 24 watt units look like microphones, with their gangly appearance, however, have been reported to do a good job of killing algae spores and removing green water from aquariums.
The 3 watt Mini is a two plug affair; one goes to the powerhead and the other to the uv sterilizer. This author had the opportunity to take the Mini apart the other night and found that it is a simply designed piece of equipment, that is inexpensively built.
To separate the powerhead from the uv sterilizer, first remove their plugs from the power outlet, then just pull the powerhead away from the body of the uv sterilizer.
To gain access to the impeller in the Mini's powerhead, use the edge of a coin or a small pen knife and insert the edge in between the gap that runs between the impeller cover and the powerhead assembly.
It should not take you more than a few seconds to accomplish.
While the unit is apart, you can also remove the bottom portion of the uv sterilizer cover which contains a triangular sponge used to prevent larger pieces of detritus from entering the uv sterilizer.
Once removed, you can then run tap water through the uv sterilizer to clean it, before reassembling the unit.
Many people have remarked that the replacement bulb for the Mini is very expensive ranging in price from about $22 to around $30, depending on where you purchase it.
The reason that the bulb is so expensive, is that you don't just replace the uv bulb when you purchase a new bulb for the Mini, you purchase the entire uv sterilizer portion of the unit, which then attaches to the powerhead.
This would seem to be a foolish expenditure of money. However, the Mini is not designed to be operated 24/7, but instead, only when the water begins to get a bit murky. The objective here is to ensure that you use the Mini before your aquarium is overrun by algae spores, thus preventing green water.
If you are able to run the Mini for a few days each month instead of 24/7, the uv sterilizer bulb may last for several years, making the cost of owning the unit much cheaper in the long run. It is also nice to have the powerhead isolated from the uv sterilizer by incorporating a second plug, which enables you to use the powerhead all the time, while only using the uv sterilizer when you need it.
As such, the AA Green Killing Machine Mini is a very cleverly designed piece of equipment which works quite well in removing green water from aquariums up to 20 gallons in size, and once having done so, is useful in greatly diminishing the propagation of algae spores in order to keep them from overwhelming your aquarium's water column.
The AA Mini retails for about $48, however can be had for less. In fact, the AA is a bargain at the $36.99 price this author purchased mine for.
And when combined with a Vortex diatom filter, the two work quite well in keeping your aquarium's water crystal clear.
So if you can get by with just 3 watts, before you spend a lot more money on a uv sterilizer that also requires an additional powerhead, consider the AA Mini, since it does its job well, and for a minimum of expense.
Earlier..
Update: Which Is Better For Keeping Your Aquarium's Water Clean? A UV Sterilizer Or Diatom Filter?
Both UV sterilizers and diatom filters can be used to play important role in keeping the water in your aquarium healthy. In fact, in many instances they serve the same function, by removing harmful microscopic pathogens that can harm your fish, and unsightly algae which can cause your tank's water to turn green.
As a fishkeeper who uses both, I have found that while their functions tend to overlap, both uv sterilization and diatomaceous earth can also be useful on their own.
For example, suppose you decided to re-aquascape your fish tank. You will start by stirring up your substrate and making a complete mess of your aquarium's water.
A uv sterilizer is useless in this case, since its purpose is to kill free floating parasites and algae - not to clean lots of debris from your aquarium's water.
And if you use sand as a substrate the particles may just hang in the water for days before your filter can remove them; some sand particles may even be too small for your filter to remove, and just get recirculated into you aquarium.
This is where a diatom earth filter like the Vortex D-1 or XL shine, because they simply are the best high speed mechanical filters on the market; capable of removing the tinyest of particles down to a micron in size. A micron is one millionth of a meter. Particles so small, that they are invisible to the naked eye, yet your Vortex will find them and eradicate them from your aquarium.
In fact, running your Vortex D-1 in a tank whose water table is loaded with sand will result in this tank being cleaned up within a few hours.
The D-1 can also be used to take water that is relatively clear on first inspection and polish it to a significantly higher degree of clarity.
Many aquarists who thought their filters were doing a great job of keeping their water clean, were amazed to find that once they had used a diatom filter on their tanks for the first time, how much clearer their water was. In fact, several of these people had stated that the water was so clean that their fish looked like they were literally hanging in space.
However, as good as a diatom filter is, it cannot stop the causes of green water - too many phosphates and other nutrients which allow for the propagation of single cell algae, that can multiply into the billions within a matter of days.
You can use a diatom filter to clear your aquarium of green water, however, once you stop using the diatom your tank water will quickly return to being green.
This is where an ultraviolet sterilizer shines, since not only does it remove harmful pathogens from your water table, it also removes the algae spores which can gradually overrun your aquarium.
Many aquarists who use T5 lighting and pressurized CO2 in combination with fertilizer tabs and regular dosing of liquid fertilizer, find that green water can become a chronic problem with their aquariums. They try using chemicals, doing massive water changes, and even purchasing better quality filtration systems, yet nothing clears their tanks of the green water.
These are the fishkeepers who need a uv sterilizer, since this component will become indispensible in ridding their aquariums of green water, while ensuring that it does not come back. UV sterilizers are also the best way to keep your aquarium's water crystal clear, since they kill off the microscopic organisms that are too small for your filters to remove, and which thus get recirculated into your aquarium.
So there you have it. The best reasons for owning both a diatom filter and a uv sterilizer.
Diatom filters are no more expensive than many canister filters - The Vortex D-1 ranges in price from about $90 to $130 depending on where your purchase it, and the XL ranges in price from about $130 to $160.
UV sterilizers get more expensive as their wattage increases. However, there is also a noticeable difference in the quality of the uv bulbs used in these components.
UV sterilizers range in price for a small inline or hanging unit of about 3 to 10 watts, selling for anywhere from $20 to $60, to much higher wattage sterilizers selling for thousands of dollars. And as the price goes up, the quality of the construction - as well as the quality of the sterilzer bulb - improves.
This author is thus far pleased with how the Aquatop IL 10 UV has been functioning on my Aqueon 37 gallon aquarium. And I will likely purchase another inexpensive inline uv sterlizer for my 20 gallon long aquarium in the near future.
Keep in mind that when purchasing an inexpensive uv sterilizer, that some companies charge almost as much for a replacement bulb as they do for the entire unit, while other companies charge about 25% of the cost of a uv sterilizer for a replacement bulb. These are the companies you want to focus on when researching a uv sterilizer.
As for convenience, the Aquatop has not completely stopped the algae from growing in my aquarium, however, it has gotten it under control, and my plants are growing nicely again, without becoming completely covered in algae.
The water is also crystal clear, and my fish seem more active.
I consider this to be money well spent; especially when the AquaTop only cost me $40.